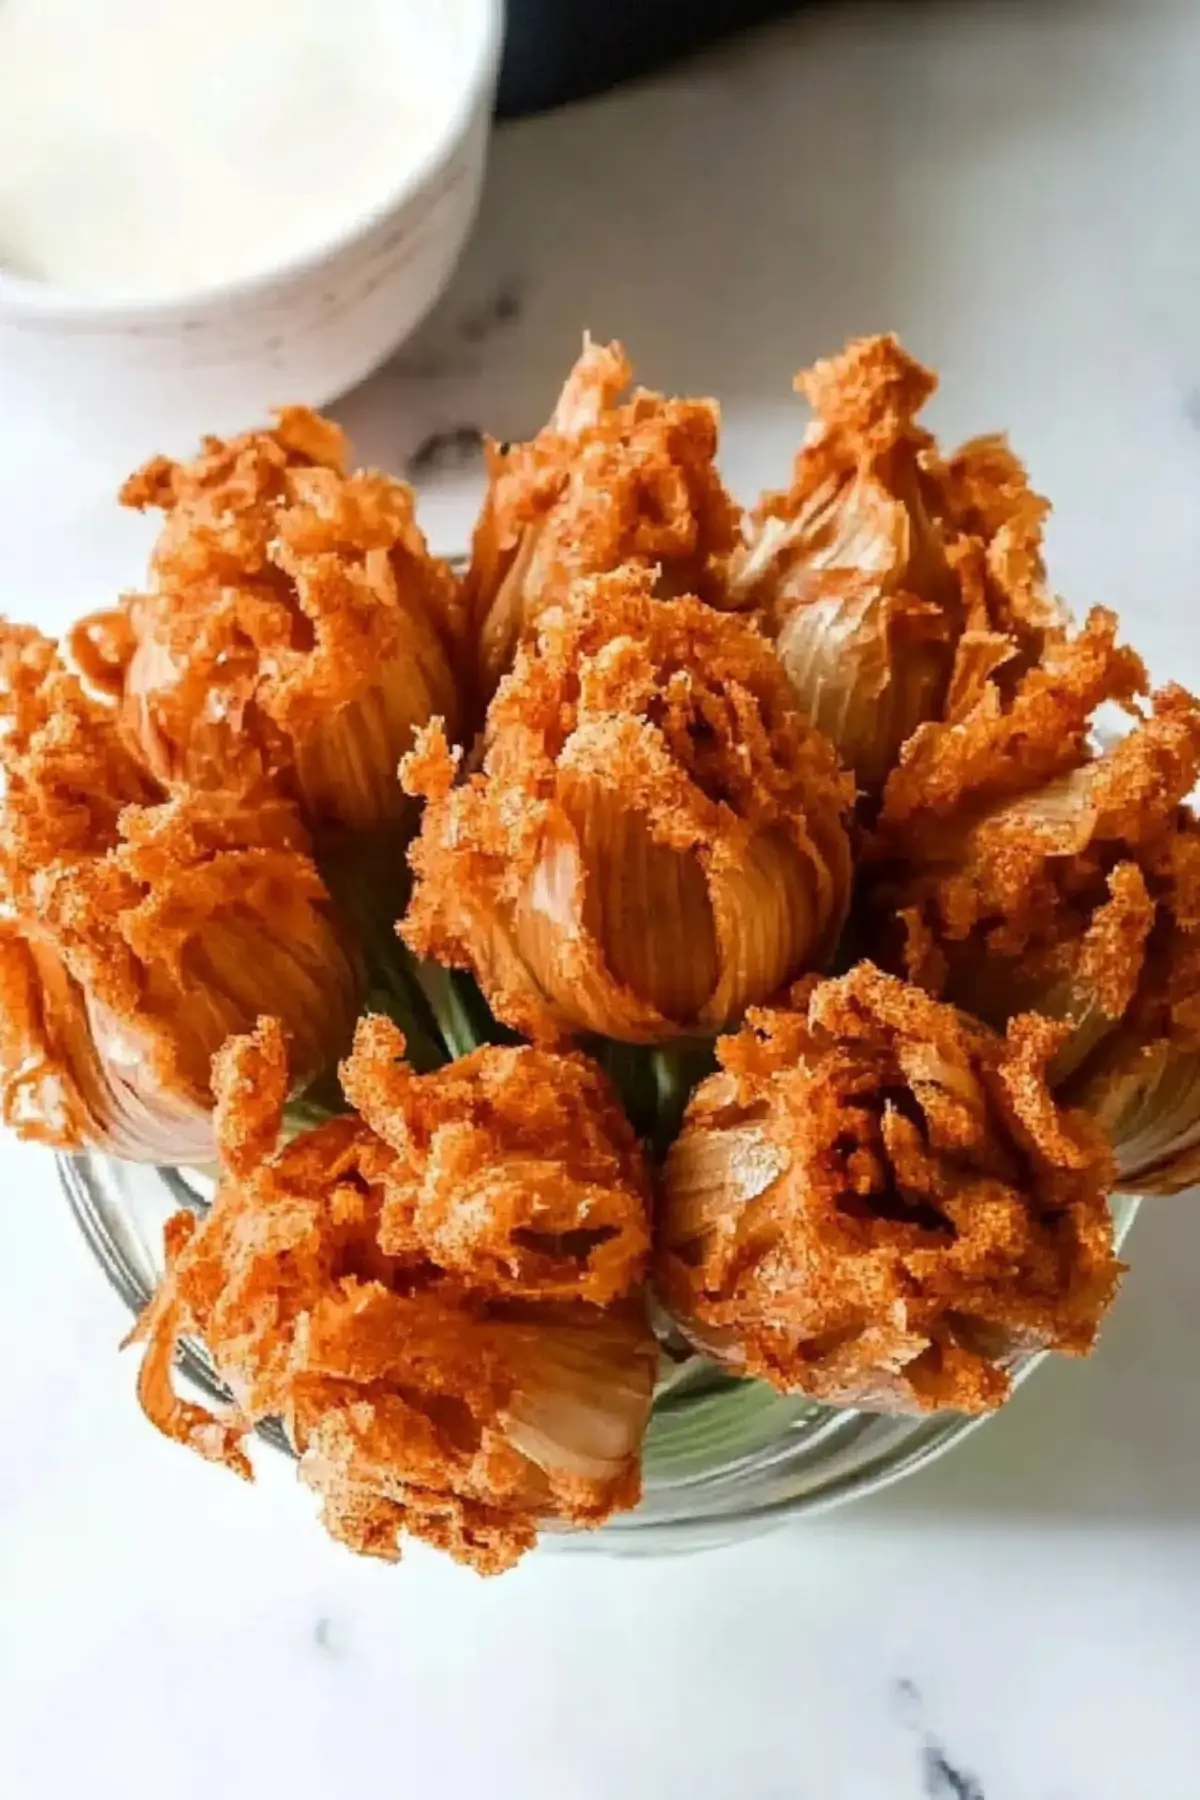
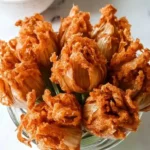
The first time I made baby blooming onions, it was a rainy Saturday afternoon and I was craving something fun, crispy, and restaurant-worthy—but without the hassle of leaving home. I had just watched a cooking show featuring a towering blooming onion and thought, “Why not try a smaller, easier version?” To my surprise, it was a total win—golden, flavorful, and paired beautifully with a quick dipping sauce I threw together. What’s even better? This recipe is perfect for beginners.
Baby blooming onions are an ideal starter dish for novice home cooks. They require only basic chopping, simple pantry ingredients, and a quick fry—or even an air fry or bake if you prefer. It’s a “wow” dish that looks impressive but is easy to master. Plus, onions are rich in antioxidants and vitamins, and when paired with a creamy, zesty dip, they hit all the comfort food notes while still being portion-controlled.
Why This Recipe is Special
What sets baby blooming onions apart is their combination of visual appeal and simplicity. They mimic the classic restaurant-style blooming onion but in a manageable, single-serve format that’s perfect for family dinners or casual get-togethers. You don’t need special tools, deep-frying experience, or fancy ingredients. Just a few onions, some seasoned flour, and a quick dip in hot oil—or a crisp-up in the air fryer—and you’re good to go.
They’re also versatile. Whether you serve them as appetizers, snacks, or even a fun veggie side dish, baby blooming onions can be adapted to suit your taste. Want it spicy? Add more cayenne. Prefer baked over fried? We’ve got you covered.
Ingredients and Preparation
Here’s what you’ll need to make baby blooming onions. Remember, you don’t need to measure yet—just gather these essentials.
Onions
Use sweet yellow or Vidalia onions. Their natural sweetness balances the savory coating and holds up well when cooked. Smaller onions work best for the “baby” version.
Flour
This creates the crispy breading. All-purpose flour is standard, but you can swap with gluten-free flour if needed.
Eggs and Milk
These help the flour stick and create that golden, crunchy coating. Whole milk or 2% works well, and plant-based alternatives can be used too.
Seasonings
Paprika (for color and mild heat), garlic powder (for aroma), cumin and cayenne pepper (for a spicy kick), oregano and thyme (herbal depth), salt, and pepper. These layers of seasoning ensure the breading is flavorful, not bland.
Oil for Frying
Vegetable, canola, or sunflower oil are ideal. They have high smoke points and neutral flavors.
Dipping Sauce (Optional but Highly Recommended)
Made with mayo, sour cream, ketchup, creamy horseradish, and seasonings, this sauce adds a cool, tangy contrast to the hot onions. You can also use pre-made boom boom sauce or spicy ranch for convenience.
Alternative Suggestions
- Use panko crumbs for extra crunch.
- Swap regular paprika with smoked for deeper flavor.
- Use Greek yogurt instead of sour cream in the sauce for a lighter option.
Step-by-Step Instructions
Step 1
Start by cutting a small flat slice off the non-root end of the onion. Peel away the outer layers but keep the root intact. Place the onion root-side up on your cutting board.
Step 2
Using a sharp knife, cut the onion into quarters from the top down, stopping about half an inch before the root to keep it connected. Then slice each quarter into three or four thinner segments to create the “petals.” Gently flip the onion over and spread the layers apart slightly to bloom it.
Step 3
Prepare two wide bowls—one with a seasoned flour mixture (flour, paprika, cumin, oregano, thyme, salt, pepper, garlic powder, cayenne) and one with beaten eggs and milk.
Step 4
Coat the onion in the flour mixture by hand, making sure to get flour between the petals. Then dip it in the egg mixture, turning it over to coat evenly. Return it to the flour for a second coating, ensuring every petal is well-covered.
Step 5
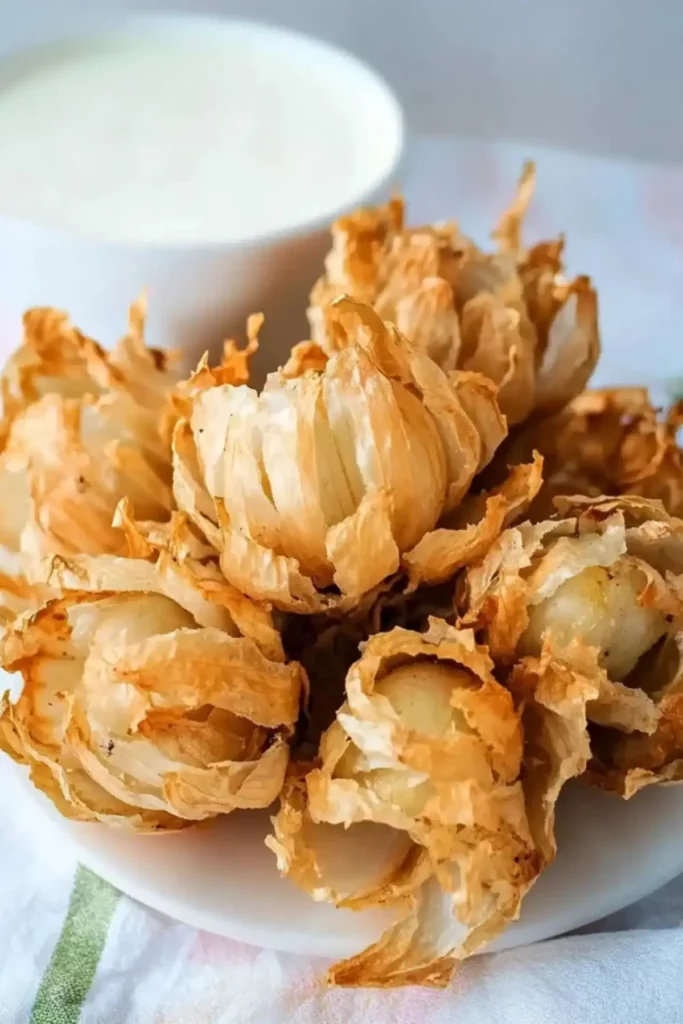
Heat oil in a deep, heavy pan or Dutch oven to about 375°F. Carefully lower the onion into the oil, root side up, and fry for 7–10 minutes until golden brown. Flip halfway through if needed.
Step 6
Remove the onion with tongs or a slotted spoon and place on a paper towel-lined plate to drain. Serve hot with your preferred dipping sauce.
Air Fryer Option
Preheat to 350°F and cook the breaded onion root-side down for 20 minutes or until crisp and golden.
Oven-Baked Option
Preheat to 400°F. Cover the onion with foil and bake for 10 minutes, then uncover and bake for an additional 20 minutes until crisp.
Beginner Tips and Notes
- Over-browning? Reduce heat or cook in shorter intervals to avoid burning.
- Petals falling off? Don’t cut too close to the root—leave that half-inch buffer.
- Flour not sticking? Make sure the onion is dry before flouring and don’t skip the egg wash step.
- Too spicy? Cut back on cayenne and cumin.
- No thermometer? Test oil with a small bit of bread—it should sizzle and float.
Tool Substitutes
- No deep fryer? Use a Dutch oven or heavy-bottom pot.
- No tongs? Use a slotted spoon to carefully move the onion.
Prep Tip
Cut the onions and mix your flour blend a few hours ahead. Store both in the fridge until you’re ready to fry.
Serving Suggestions
Pair your baby blooming onions with grilled chicken, a hearty salad, or sliders for a complete meal. Want to make it a full-on appetizer platter? Add fried pickles, mozzarella sticks, or mini meatballs.
For a healthier twist, serve with Greek yogurt-based dips or spicy hummus.
Leftovers? Store in an airtight container in the fridge for up to two days. Reheat in the air fryer or oven at 350°F for 5–7 minutes to revive crispiness.
Conclusion
There’s something magical about making a restaurant favorite in your own kitchen—and even more so when it’s this easy. Baby blooming onions are beginner-friendly, crave-worthy, and sure to impress. Whether you’re frying for game day or just treating yourself to a quick and healthy meal, this lemon herb chicken-inspired spin on crispy onions has you covered. Try it out and let us know in the comments how it went—share your own twist or dipping sauce idea too. We’d love to hear from you!
FAQ About Baby Blooming Onions
1. Can I make baby blooming onions without deep frying?
Yes! You can air-fry them at 350°F for about 20 minutes or bake them at 400°F, covered for 10 minutes and uncovered for 20 more, until golden and crispy.
2. What kind of onions work best for this recipe?
Sweet onions like Vidalia or yellow onions are ideal. Their mild, natural sweetness balances the savory breading and holds up well when cooked.
3. How do I keep the onion from falling apart when slicing it?
Be sure to leave about ½ inch at the root intact when cutting. This keeps the layers connected and helps the onion bloom without breaking.
More Relevant Recipes
- Pepper Steak with Bell Peppers and Onion
- Simple Cucumber and Onion Salad
- Tomato Cucumber Onion Salad
Blooming Onions
- Total Time: 25 mins
- Yield: 3 servings 1x
- Diet: Vegetarian
Description
Crispy, golden baby blooming onions coated in a flavorful seasoned breading and served with a zesty dipping sauce. Perfect for beginners and snack lovers.
Ingredients
- 3 medium sweet onions
- 2 eggs
- 1 cup milk
- 2 cups all-purpose flour
- 1 tablespoon paprika
- 2 teaspoons ground cumin
- 1 teaspoon dried oregano
- 1 teaspoon dried thyme
- 1 teaspoon salt
- 1 teaspoon ground cayenne pepper
- 1/2 teaspoon ground black pepper
- 1/2 teaspoon garlic powder
- Vegetable oil for frying
- 1/4 cup mayonnaise (for dipping sauce)
- 1/4 cup sour cream (for dipping sauce)
- 1 1/2 tablespoons creamy horseradish (for dipping sauce)
- 1 1/2 tablespoons ketchup (for dipping sauce)
- 1/2 teaspoon paprika (for dipping sauce)
- 1/2 teaspoon garlic powder (for dipping sauce)
- 1/4 teaspoon ground cayenne pepper (for dipping sauce)
Instructions
- Cut a small flat spot on the non-root end of the onion. Peel off the outer skin while keeping the root intact.
- Place the onion root-side up on a cutting board. Cut it into quarters, stopping about 1/2 inch from the root. Then slice each quarter into three or four sections to create petals.
- Flip the onion over and gently spread the layers apart to bloom it.
- Prepare a flour mixture with paprika, cumin, oregano, thyme, salt, cayenne, black pepper, and garlic powder in a wide bowl.
- In a separate bowl, whisk together eggs and milk.
- Coat the onion in the flour mixture, making sure to get flour between the petals. Then dip it into the egg mixture, followed by another coating of the flour mixture.
- Heat vegetable oil in a deep pot to 375°F. Carefully place the onion root-side up in the oil and fry for 7–10 minutes until golden brown. Drain on paper towels.
- For the dipping sauce, combine mayonnaise, sour cream, horseradish, ketchup, paprika, garlic powder, and cayenne pepper. Chill until ready to serve.
Notes
- Use sweet Vidalia onions for best results.
- Maintain a consistent oil temperature of 375°F to avoid soggy or overcooked onions.
- You can air-fry the onions at 350°F for 20 minutes if you prefer a lighter option.
- The dipping sauce can be made up to two days in advance and stored in the fridge.
- Serve the onions immediately for the best crispiness and texture.
- Prep Time: 15 mins
- Cook Time: 10 mins
- Category: Appetizer
- Method: Frying
- Cuisine: American
Nutrition
- Serving Size: 1 blooming onion
- Calories: 638
- Sugar: 12g
- Sodium: 1084mg
- Fat: 25g
- Saturated Fat: 7g
- Unsaturated Fat: 16g
- Trans Fat: 0.04g
- Carbohydrates: 86g
- Fiber: 6g
- Protein: 18g
- Cholesterol: 138mg