There was a time when hibachi night at my favorite Japanese steakhouse felt like an unbeatable treat—flaming onion volcanoes, sizzling meat on the grill, and that irresistible smell of garlic butter in the air. But after one too many pricey takeout orders, I decided to recreate that magic in my own kitchen. The result? This easy Hibachi Chicken with Yum Yum Sauce that tastes just as good—if not better—than dining out.
Perfect for beginner cooks, this dish comes together quickly on a sheet pan or stovetop and checks all the boxes: it’s flavorful, healthy, budget-friendly, and fun to make. Whether you’re looking for quick and healthy meals during the week or planning a cozy date night in, this Hibachi Chicken with Yum Yum Sauce (with a Japanese twist!) will become a go-to favorite.
Why This Recipe is Special
What makes hibachi chicken stand out isn’t just its savory-sweet flavor profile—it’s the experience. This dish brings the energy of a hibachi grill into your home without the need for special equipment or culinary training.
The recipe is built around accessible ingredients, straightforward techniques, and flexible components. You’ll love how the easy sheet pan dinner approach simplifies cooking and cleanup, and the homemade yum yum sauce brings restaurant-quality flavor without any artificial shortcuts.
Ingredients and Preparation
Chicken Breast
The lean protein star of this dish. Cut into bite-sized pieces, it cooks quickly and absorbs all the delicious flavors. Want extra juiciness? Swap in boneless chicken thighs.
Butter
Creates a golden sear and adds richness. If dairy-free, use a vegan butter alternative or olive oil.
Sesame Oil
Brings a nutty, toasted aroma that defines many Asian-inspired dishes. A little goes a long way.
Garlic
Provides the savory backbone. Use fresh garlic for the best flavor, or garlic paste in a pinch.
Soy Sauce
Adds that essential umami. For a low-sodium version, use tamari or coconut aminos.
Brown Sugar
Balances the salty soy with just a touch of sweetness. You can also try honey or maple syrup.
Lemon Juice
Brightens the entire dish and cuts through the butter’s richness.
Salt and Pepper
Basic, yes, but crucial for enhancing all the other flavors.
Vegetables (Zucchini, Onion, Mushrooms, Carrots)
These add crunch, color, and nutrition. Use whatever’s in your fridge—broccoli, bell peppers, or snap peas all work.
Fried Rice (Cooked Rice, Eggs, Peas & Carrots, Green Onion)
Serves as a hearty, comforting base. Day-old rice is best to avoid sogginess. Leftover quinoa can also be used.
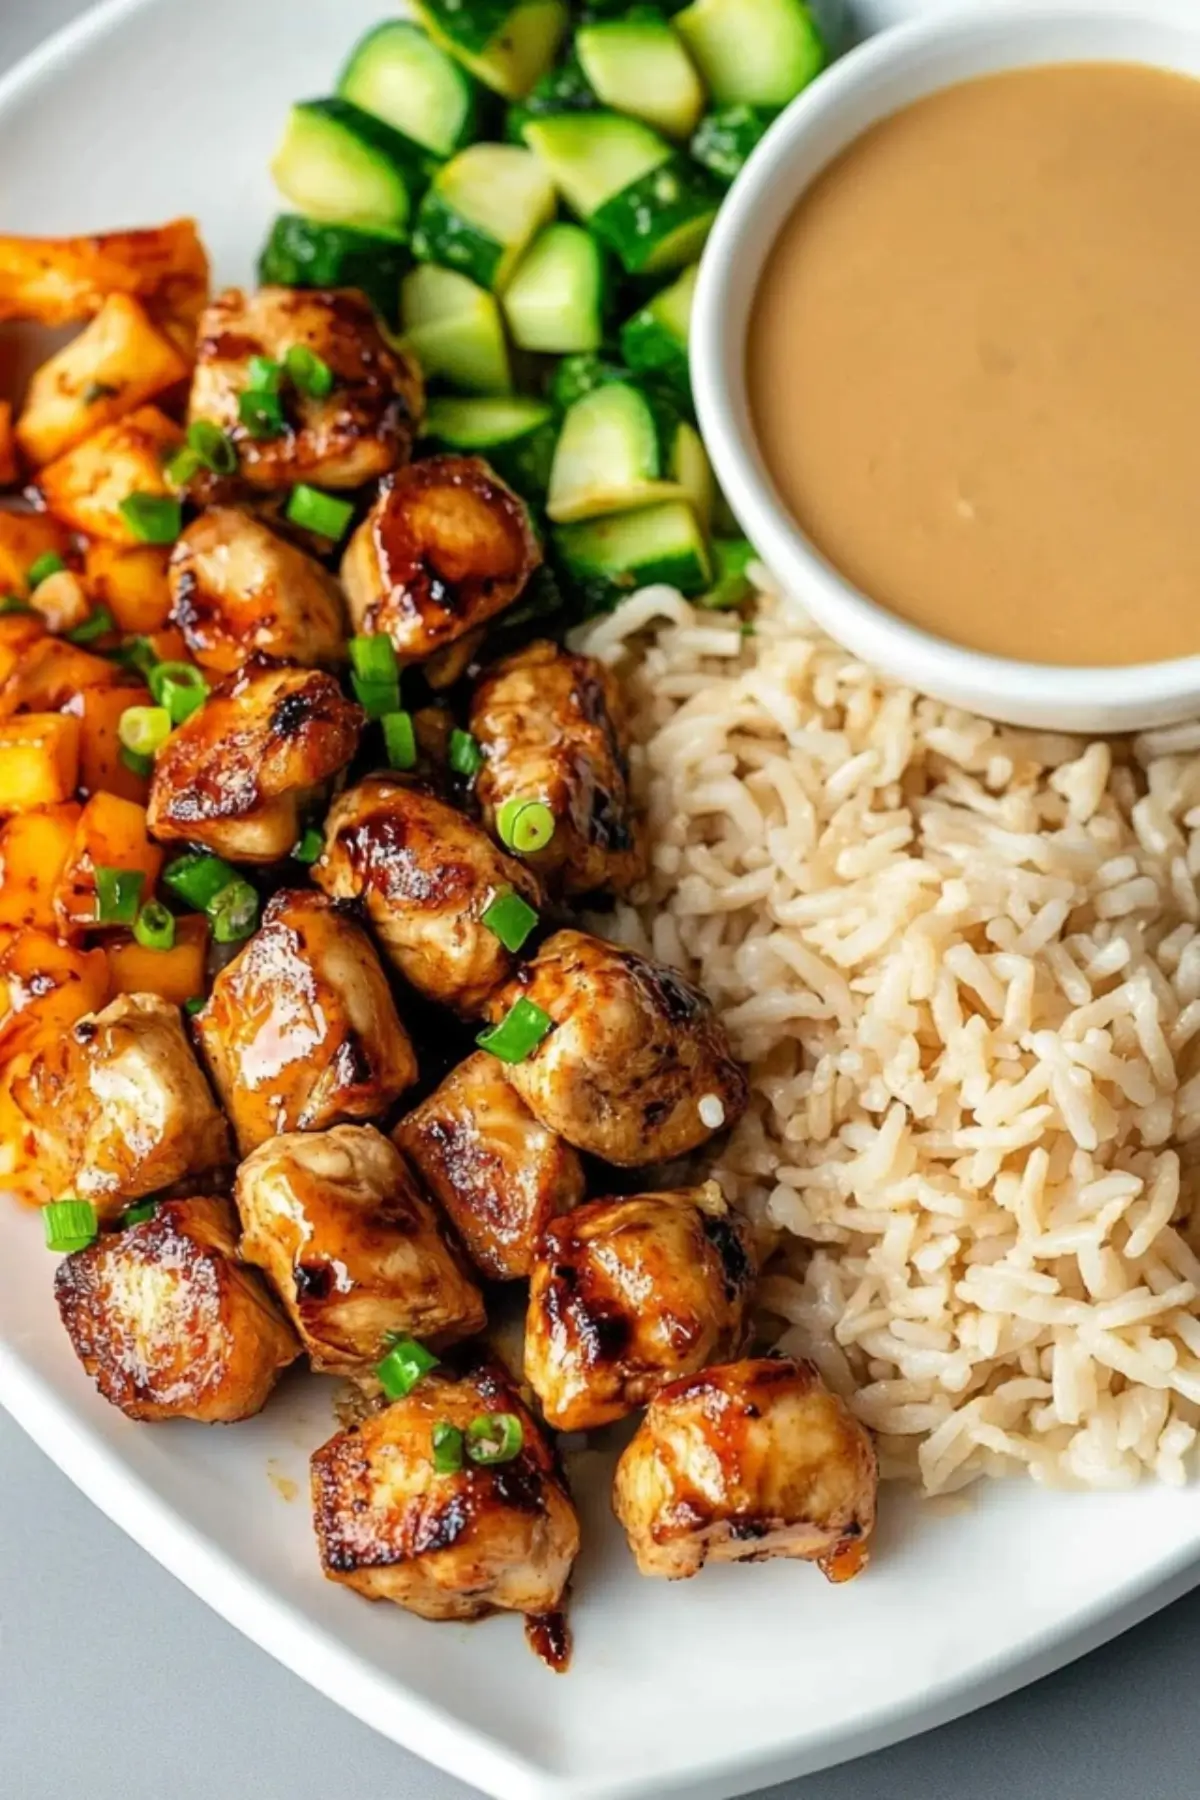
Yum Yum Sauce
This creamy, slightly spicy sauce pulls everything together. Made with mayonnaise, garlic powder, and a touch of paprika, it’s easy to prepare ahead of time.
Step-by-Step Instructions
Step 1
Prepare the yum yum sauce first by mixing mayonnaise, melted butter, Sriracha (or ketchup), paprika, garlic and onion powders, cayenne, sugar, and mirin if available. Stir until smooth and chill in the fridge for at least 1 hour to deepen the flavor.
Step 2
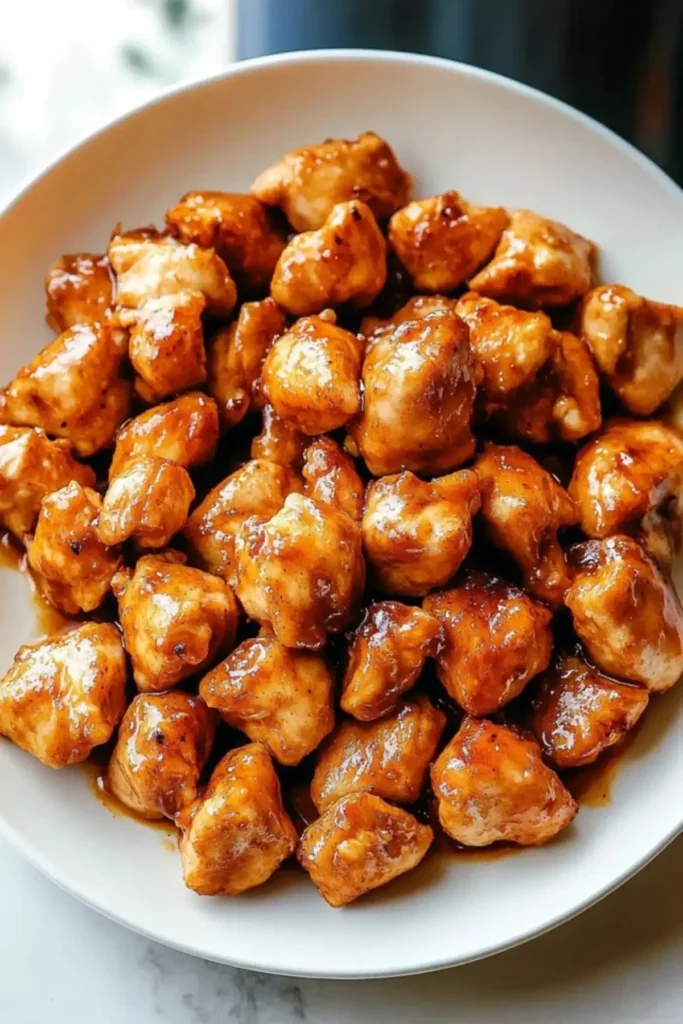
Heat a large skillet or wok over medium-high heat and add butter and sesame oil. Once hot, add the diced chicken, season lightly with salt and pepper, and cook until browned and no longer pink in the center, about 6-8 minutes.
Step 3
Add minced garlic, soy sauce, brown sugar, and the rest of the butter. Stir well, then squeeze lemon juice over the chicken. Let the mixture simmer for 2-3 minutes until the sauce thickens and glazes the chicken beautifully.
Step 4
In a separate pan (or the same one once the chicken is done), stir-fry your vegetables in sesame oil. Cook for 5-7 minutes until they are tender but still have a crisp bite. Season with soy sauce, salt, and pepper for balance.
Step 5
Push the veggies to one side of the skillet and pour in beaten eggs. Scramble until fully cooked, then stir into the veggies. Add in the cooked rice, thawed peas and carrots, more soy sauce, garlic, butter, sesame oil, and chopped green onion. Stir and cook until everything is hot and well mixed.
Step 6
Assemble your plate with a generous portion of hibachi chicken, a scoop of veggie fried rice, and a drizzle of yum yum sauce. Serve hot and enjoy!
Beginner Tips and Notes
- Use day-old rice for fried rice—freshly cooked rice tends to be too moist and sticky.
- Cut all ingredients before turning on the stove. Hibachi cooking moves quickly, and being prepared avoids stress.
- Don’t crowd the skillet—if needed, cook the chicken or vegetables in batches to maintain that seared texture.
- Check doneness by cutting a piece of chicken: if the juices run clear and it’s no longer pink, it’s ready.
- If your veggies get too soft, finish them earlier and remove from heat quickly.
- No wok? A large cast-iron skillet or even a sheet pan works just fine.
Serving Suggestions
This hibachi chicken pairs well with:
- Miso soup or a simple cucumber salad with rice vinegar for a refreshing starter.
- Extra Yum Yum Sauce or a drizzle of spicy Sriracha mayo for those who love heat.
- A light ginger dressing salad just like at your favorite hibachi restaurant.
For leftovers:
- Store chicken, veggies, and rice in separate containers in the fridge for up to 4 days.
- To reheat, use a skillet over medium heat with a splash of sesame oil for best results.
- This recipe also freezes well—just portion and label clearly.
Conclusion
There’s something incredibly satisfying about pulling off a restaurant-style meal at home—especially when it’s as easy and rewarding as this hibachi chicken sheet pan dinner. From the rich garlic butter chicken to the colorful veggies and creamy yum yum sauce, this dish is a celebration of flavor and simplicity.
If you try this lemon herb chicken recipe, I’d love to hear how it turned out! Share your tweaks, tips, or dinner table wins in the comments. Cooking is a journey, and every great dish starts with one try. You’ve got this.
FAQ About Hibachi Chicken with Yum Yum Sauce
Q1: Can I make hibachi chicken without a wok or grill?
Absolutely. A large non-stick or cast-iron skillet works perfectly. You can even use a sheet pan in the oven for a hands-off version.
Q2: What’s the best chicken to use for hibachi-style cooking?
Boneless, skinless chicken breasts are lean and cook quickly, but boneless thighs offer a juicier, richer result. Both are great choices depending on your preference.
Q3: Can I prepare hibachi chicken ahead of time?
Yes! You can prep the yum yum sauce and chop all vegetables a day in advance. Cooked hibachi chicken stores well in the fridge for up to 4 days.
More Relevant Recipes
- Sweet and Savory Pineapple Chicken and Rice
- Honey Pepper Chicken Mac and Cheese
- Kung Pao Chicken Noodles

Hibachi Chicken with Yum Yum Sauce
- Total Time: 45 minutes
- Yield: 4 servings 1x
- Diet: Halal
Description
Easy hibachi chicken with fried rice and vegetables, topped with homemade yum yum sauce. A flavorful, beginner-friendly Japanese-inspired dinner.
Ingredients
- 1.5 lbs boneless, skinless chicken breasts, cut into bite-sized pieces
- 2 tablespoons butter, divided
- 2 tablespoons sesame oil, divided
- 3 cloves garlic, minced
- 1/4 cup soy sauce
- 1 tablespoon brown sugar
- Juice of 1/2 lemon
- Salt and pepper to taste
- 1 cup zucchini, sliced into half-moons
- 1 cup mushrooms, sliced
- 1 cup onion, sliced
- 1 cup carrots, julienned
- 3 cups cooked white rice (preferably day-old)
- 2 eggs, beaten
- 1 cup frozen peas and carrots, thawed
- 3 tablespoons soy sauce
- 2 tablespoons sesame oil
- 2 tablespoons butter
- 3 cloves garlic, minced
- 1/4 cup green onions, chopped
- 1 cup mayonnaise
- 1 tablespoon melted butter
- 1/2 tablespoon Sriracha sauce or ketchup
- 1/4 teaspoon paprika
- 1 teaspoon garlic powder
- 1 teaspoon onion powder
- 1/8 teaspoon cayenne pepper
- 1 tablespoon sugar
- 1 tablespoon mirin (optional)
- 1–2 tablespoons water
Instructions
- In a small bowl, mix all ingredients for the yum yum sauce until smooth and refrigerate for at least 1 hour before serving.
- Heat a large skillet or wok over medium-high heat and add 1 tablespoon butter and 1 tablespoon sesame oil. Add chicken pieces, season with salt and pepper, and cook until browned and fully cooked, about 6–8 minutes.
- Add garlic, soy sauce, brown sugar, and the remaining butter. Squeeze in lemon juice and stir well. Simmer for 2–3 minutes until sauce thickens and coats the chicken.
- In a separate skillet or the same one, heat 1 tablespoon sesame oil and stir-fry zucchini, mushrooms, onion, and carrots for 5–7 minutes until tender-crisp. Season with soy sauce, salt, and pepper.
- Push vegetables to one side, add beaten eggs, and scramble until cooked through. Mix eggs with vegetables.
- Add cooked rice, peas and carrots, remaining soy sauce, sesame oil, butter, garlic, and green onions. Stir well and cook for 5–7 minutes until heated through.
- Serve the hibachi chicken with fried rice and veggies. Drizzle with remaining sesame oil and serve with yum yum sauce.
Notes
- Use day-old rice for best fried rice texture.
- Have all ingredients prepped before cooking—things move quickly.
- Boneless chicken thighs can be used instead of breasts for extra juiciness.
- You can substitute proteins with shrimp, steak, or tofu.
- Add extra veggies like bell peppers, broccoli, or snap peas.
- Prep Time: 20 minutes
- Cook Time: 25 minutes
- Category: Main Course
- Method: Stir-Fry
- Cuisine: Japanese
Nutrition
- Serving Size: 1 plate (chicken, rice, veggies, sauce)
- Calories: 620
- Sugar: 8g
- Sodium: 1140mg
- Fat: 32g
- Saturated Fat: 8g
- Unsaturated Fat: 21g
- Trans Fat: 0g
- Carbohydrates: 50g
- Fiber: 4g
- Protein: 38g
- Cholesterol: 185mg


