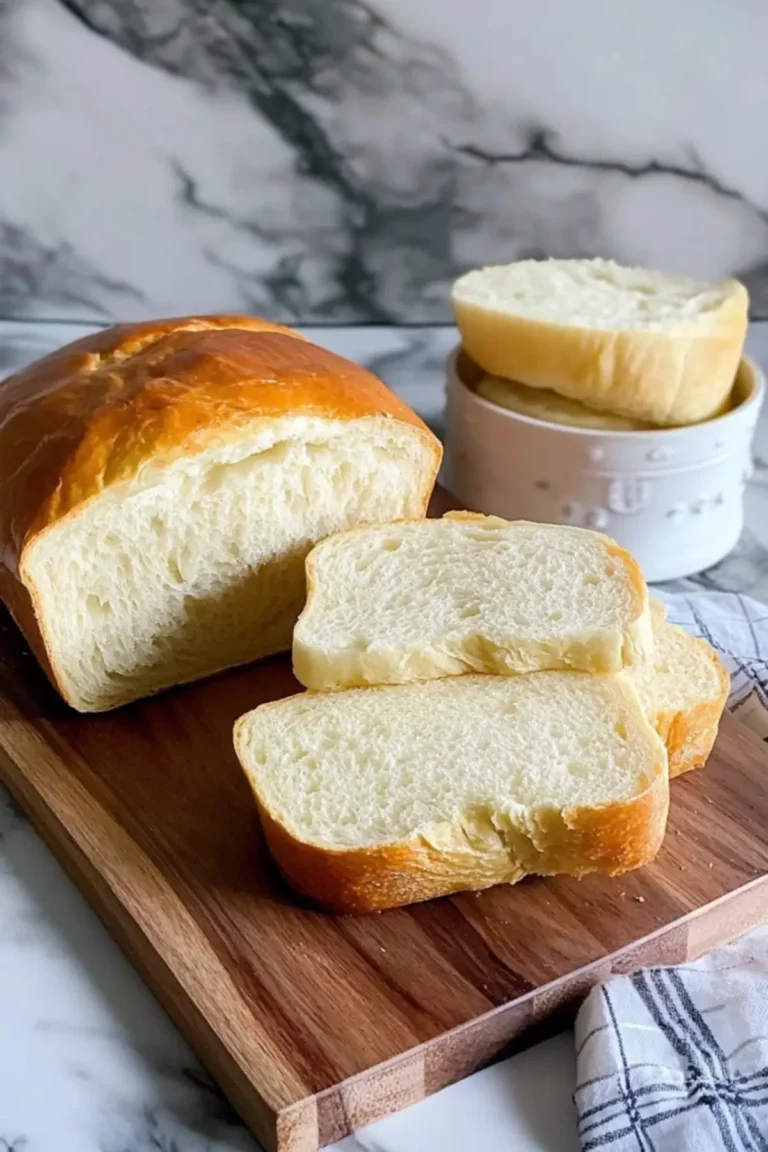
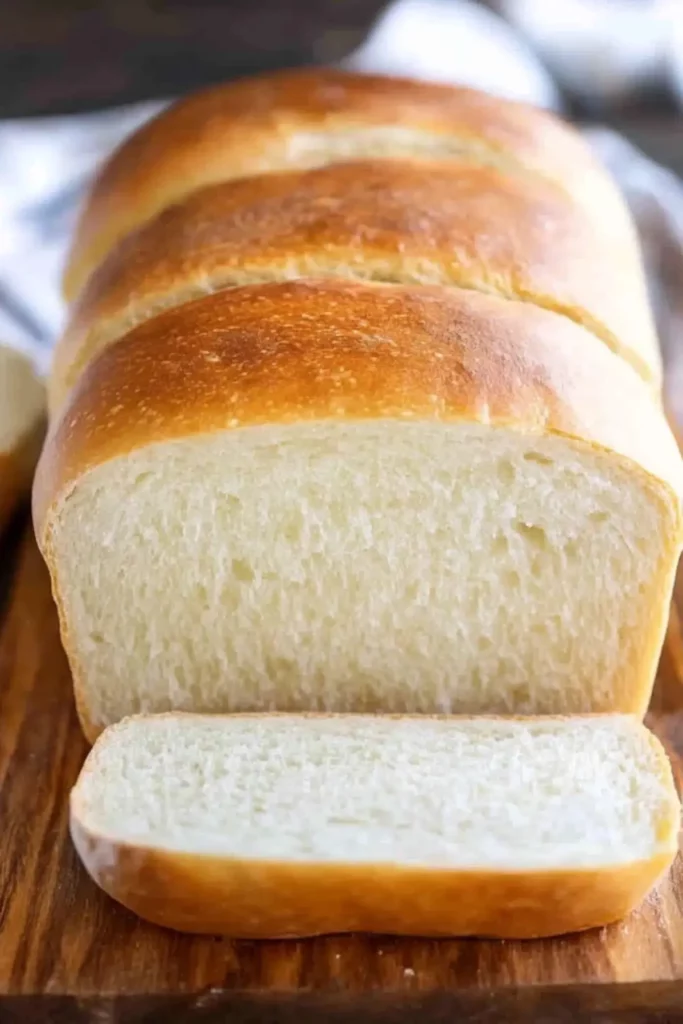
When I was growing up, the smell of fresh-baked bread would float from the kitchen and signal one thing: comfort. My grandmother made a loaf every Sunday, kneading by hand with a calm focus I always admired. Years later, I found myself craving that same simplicity—something warm, satisfying, and made from ingredients already sitting in my pantry. That’s when I stumbled on a basic bread recipe that changed everything.
This easy sheet pan dinner-style bread (yes, no fancy machines needed) is the ultimate beginner’s project. It uses common pantry staples, doesn’t require a bread machine or stand mixer (unless you want to), and is forgiving even if you’re still learning your way around yeast. Plus, with no milk or eggs, it’s surprisingly light and versatile. Whether you want a healthier sandwich option or just want your kitchen to smell amazing, thisHomemade Bread Recipe bread will become a staple in your home.
Why This Recipe is Special
What makes this bread stand out isn’t just how good it tastes—it’s how approachable it is. You don’t need expensive tools, niche ingredients, or even much time. It’s perfect for first-timers and busy folks alike because:
- It’s made with only six shelf-stable ingredients
- It’s highly customizable: You can turn it into cinnamon swirl, raisin bread, rolls, or even pizza dough
- It freezes well, making it ideal for meal prep or gifting
- It teaches the fundamentals of dough handling and yeast proofing in a foolproof format
Let’s take a closer look at what you’ll need and why.
Ingredients and Preparation
Warm Water
This activates the yeast and sets the foundation for your dough. The warmth (around 105–115°F) is key—too cold, and the yeast won’t wake up; too hot, and it dies.
Active Dry Yeast
The engine of your bread. Yeast eats the sugar and releases gases that make your loaf rise and fluff up. Instant yeast can be swapped in for faster rising.
Sugar or Honey
Beyond just sweetness, this ingredient “feeds” the yeast to help it grow. Honey adds a subtle floral note; sugar keeps things neutral.
Salt
A flavor enhancer that balances the sweetness and controls yeast fermentation so your bread doesn’t rise too quickly.
Vegetable or Canola Oil
Adds tenderness and moisture. You can swap in melted butter for a richer flavor.
All-Purpose or Bread Flour
The structure-builder. Bread flour gives a chewier texture due to its higher protein content, but all-purpose flour works just fine. Don’t overdo it—too much flour makes the bread dense.
Flexible Alternatives
- Use maple syrup instead of honey for a hint of caramel.
- Try olive oil instead of canola for a Mediterranean flair.
- Add herbs or seeds (like rosemary, sesame, or flax) for extra flavor and texture.
Step-by-Step Instructions
Step 1: In a large bowl or mixer, combine warm water, yeast, and a pinch of sugar or honey. Let it sit for 5–10 minutes until bubbly and foamy—this shows your yeast is alive and ready to work.
Step 2: Stir in the remaining sugar or honey, salt, oil, and about 3 cups of flour. Mix until smooth. Add more flour gradually, ½ cup at a time, until the dough pulls away from the sides of the bowl and feels soft but slightly sticky.
Step 3: Knead the dough for 5 minutes using a mixer on medium speed, or 5–8 minutes by hand on a lightly floured surface. It should be smooth and elastic. If it sticks too much, add a bit more flour.
Step 4: Place the dough in a greased bowl, cover it with a towel or plastic wrap, and let it rise in a warm place for about 1½ hours, or until doubled in size.
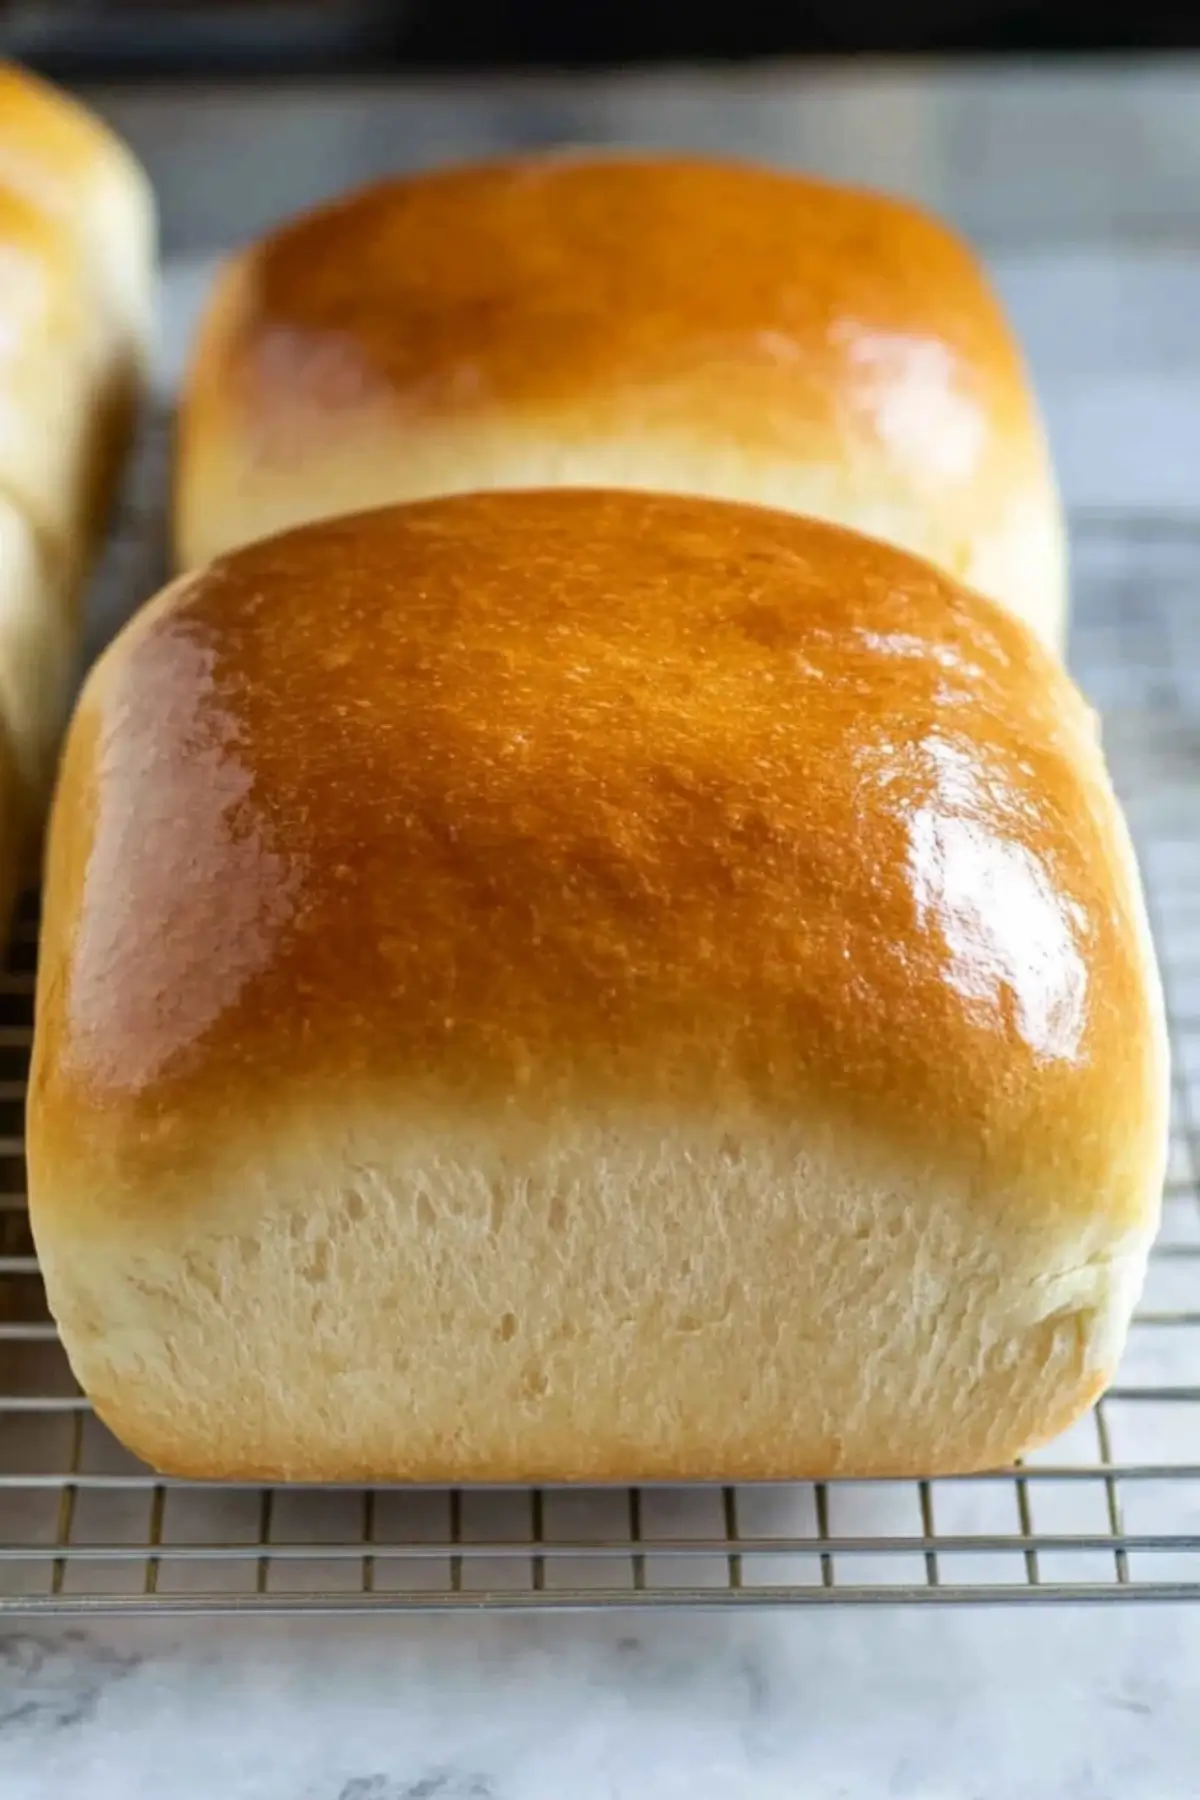
Step 5: Punch the dough down to release air bubbles. Divide it into two equal parts. Shape each into a loaf and place into greased 9×5-inch pans.
Step 6: Cover and let the loaves rise again for 45 minutes to an hour. They should puff up to about 1 inch above the pan rim.
Step 7: Bake in a preheated 350°F oven for 30–33 minutes. Tap the top—if it sounds hollow, it’s done.
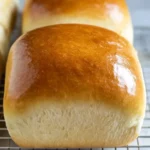
Step 8: Carefully remove from pans and cool on a wire rack. Brush the tops with butter while still warm for a soft, golden finish.
Beginner Tips and Notes
- Yeast not foaming? It may be expired or the water was too hot. Always proof yeast first.
- Bread rising too slowly? Use the “warm oven trick”—heat your oven to 180°F, turn it off, and let the dough rise inside with the door cracked open.
- Sticky dough? Don’t panic. Lightly flour your hands or surface and resist the urge to dump in too much flour—it should be a little tacky.
- No loaf pans? Use any oven-safe dish or shape rustic rounds on a baking sheet.
Serving Suggestions
- For a full meal: Serve warm slices with soup, pasta, or roasted veggies for an easy sheet pan dinner companion.
- Make it sweet: Toast with jam or cinnamon butter for a comforting breakfast.
- Go savory: Pair with garlic-infused olive oil or slice for sandwiches with grilled lemon herb chicken.
Storage Tips:
Keep bread in an airtight bag or container at room temperature for 2–3 days, or refrigerate for up to 5. To freeze, wrap tightly and store up to 3 months. Thaw at room temp or toast directly from frozen.
Conclusion
There’s something magical about pulling a fresh loaf of bread from your oven—especially when it’s something you made entirely by hand. This quick and healthy meal builder is more than just bread; it’s a confidence booster for anyone learning to cook. Whether you’re prepping weekday lunches or simply craving something homemade, this recipe offers you comfort, control, and an unbeatable aroma.
Give it a try and let me know how it goes! Did your bread rise beautifully? Did you put your own spin on it? Drop a comment below—I’d love to hear your story and help with any questions.
FAQ About Easy Homemade White Bread
1. Can I make this bread without a stand mixer?
Absolutely. This recipe is designed for beginners and can be made entirely by hand using a large mixing bowl and a wooden spoon. Just knead the dough on a lightly floured surface for 5–8 minutes until smooth and elastic.
2. What if I only have instant yeast instead of active dry yeast?
You can substitute instant yeast, but you’ll skip the proofing step. Just mix the yeast in with the dry ingredients and continue with the recipe as written. Keep in mind that rise times may be a bit shorter with instant yeast.
3. How can I tell when my bread is done baking?
Your bread is ready when it has a golden brown crust and sounds hollow when tapped on top. This typically takes 30–33 minutes in a 350°F oven.
More Relevant Recipes
- Chocolate Banana Bread (Gluten Free, Vegan, Refined Sugar Free).
- Fluffy Garlic Butter Breadsticks
- My Irish grandma taught me this recipe, and I swear I make it all year long!
Homemade Bread Recipe
- Total Time: 3 hours 45 minutes
- Yield: 2 loaves 1x
- Diet: Vegetarian
Description
A soft, fluffy, beginner-friendly homemade white bread recipe made with six pantry ingredients. Perfect for sandwiches, toast, or as a comforting side to any meal. No special equipment or advanced baking skills needed.
Ingredients
- 2 cups warm water (105–115°F)
- 1 tablespoon active dry yeast
- 1/4 cup honey or sugar
- 2 teaspoons salt
- 2 tablespoons vegetable or canola oil
- 4–5 1/2 cups all-purpose or bread flour
Instructions
- In a large bowl or stand mixer, add warm water, yeast, and a pinch of the sugar or honey. Let sit for 5–10 minutes until foamy.
- Add the remaining sugar or honey, salt, oil, and 3 cups of flour. Mix to combine. Add more flour 1/2 cup at a time until dough pulls away from the sides of the bowl and feels soft and slightly sticky.
- Knead for 5 minutes in a mixer or 5–8 minutes by hand on a lightly floured surface until the dough is smooth and elastic.
- Place the dough in a greased bowl, cover, and let it rise in a warm place for about 1 1/2 hours or until doubled in size.
- Punch down the dough, divide into two equal parts, shape into loaves, and place into greased 9×5-inch pans.
- Cover the pans and let the dough rise again for 45 minutes to 1 hour, until risen about 1 inch above the rim.
- Preheat oven to 350°F. Bake for 30–33 minutes or until golden brown and hollow sounding when tapped.
- Remove from pans, cool on a wire rack, brush tops with butter if desired, and allow to cool before slicing.
Notes
- If using instant yeast, skip proofing and add yeast directly with dry ingredients.
- Use bread flour for a chewier texture.
- Don’t add too much flour—dough should be slightly sticky.
- Use the oven’s warmth to help dough rise faster (preheat to 180°F, turn off, and place dough inside with door cracked open).
- Freezes well before or after baking. Wrap tightly in foil and store for up to 3 months.
- Prep Time: 15 minutes
- Cook Time: 30 minutes
- Category: Bread
- Method: Baking
- Cuisine: American
Nutrition
- Serving Size: 1 slice (approx.)
- Calories: 202
- Sugar: 3g
- Sodium: 196mg
- Fat: 2g
- Saturated Fat: 1g
- Unsaturated Fat: 1g
- Trans Fat: 0g
- Carbohydrates: 41g
- Fiber: 1g
- Protein: 5g
- Cholesterol: 0mg