If you’re craving a dessert that’s both comforting and indulgent, look no further than a homemade cherry pie. This recipe features a buttery, flaky crust paired with a sweet and tart cherry filling, creating the perfect balance of flavors. Whether you’re making it for a holiday gathering, a family dinner, or just a treat for yourself, this homemade cherry pie is sure to satisfy your sweet tooth. With a simple set of ingredients and an easy-to-follow process, you’ll be enjoying a warm slice of cherry pie in no time.
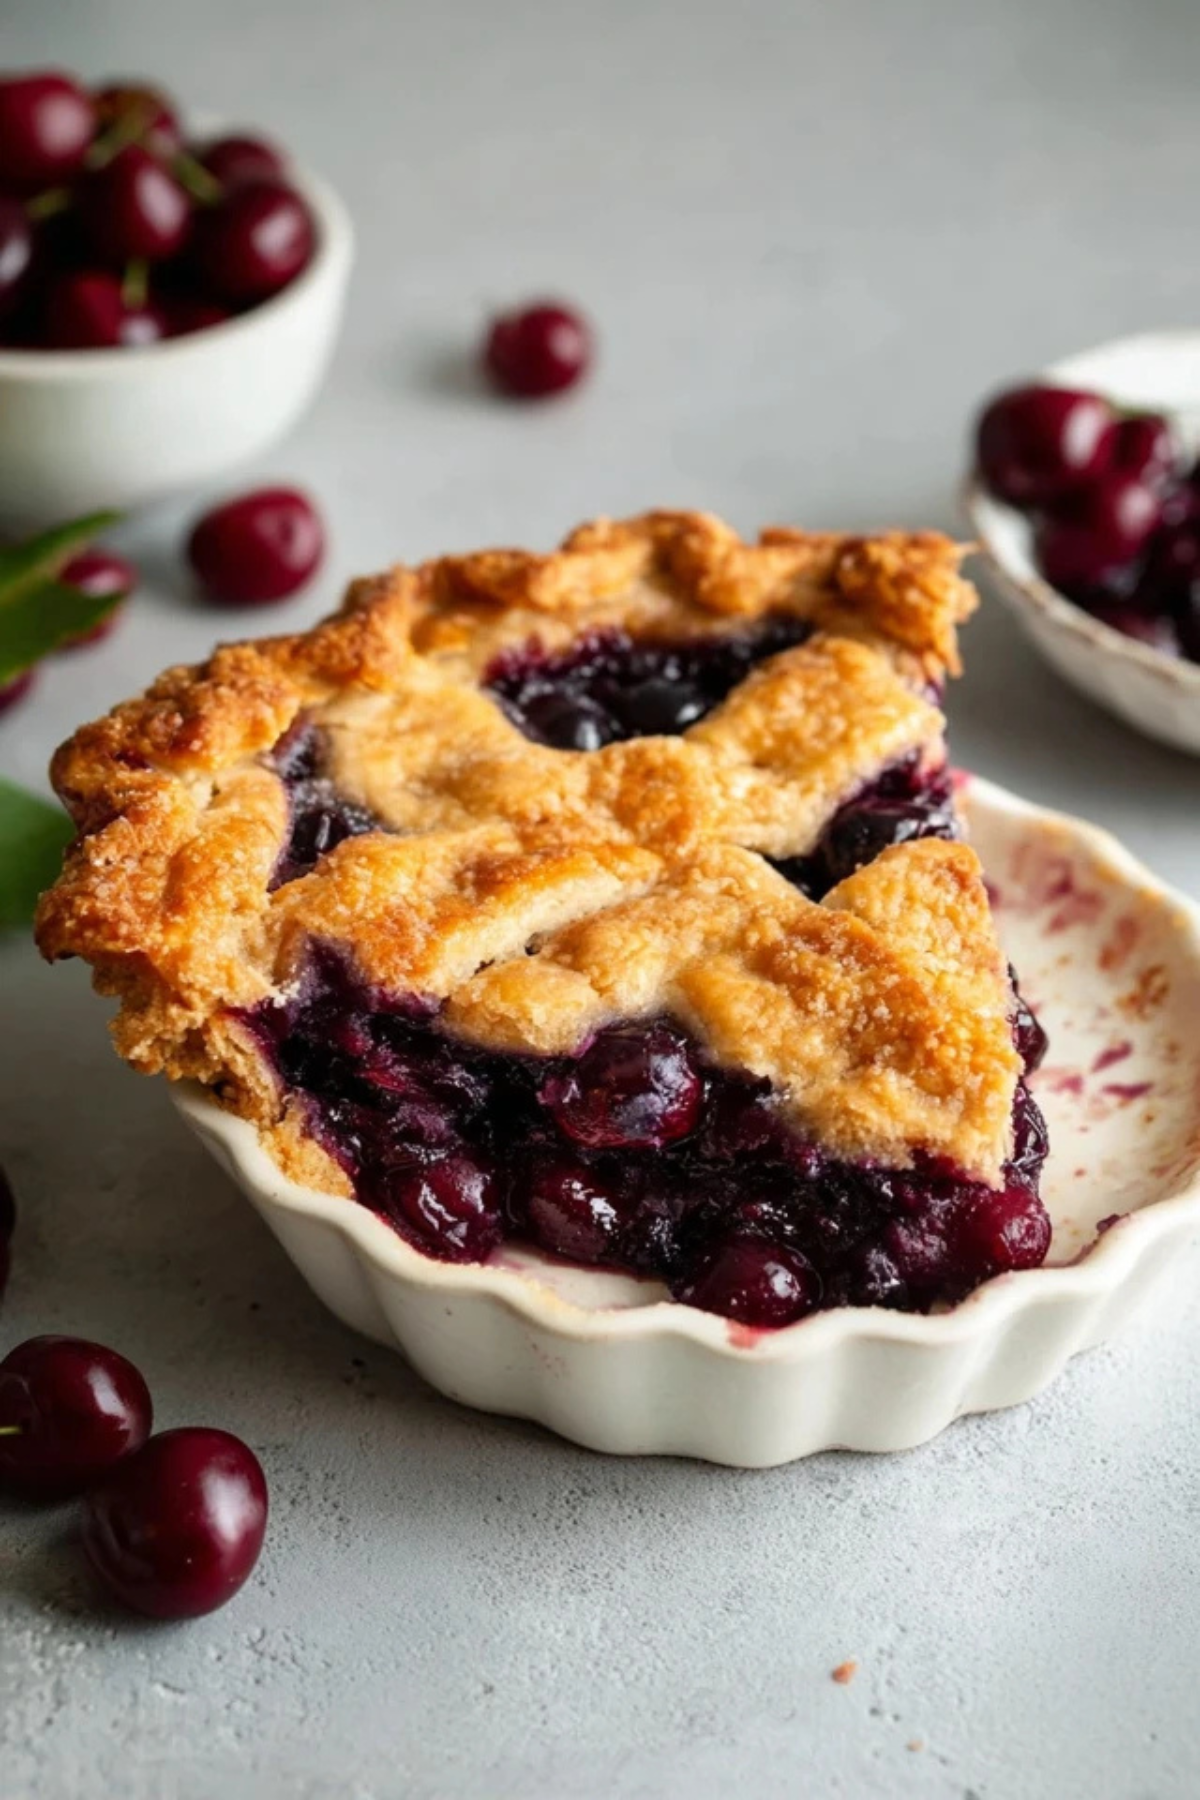
Table of Contents
Why This Homemade Cherry Pie is a Must-Try
What makes this homemade cherry pie so irresistible? It’s quick, easy, and absolutely delicious. This recipe combines the natural sweetness of fresh cherries with a buttery, flaky pie crust that crisps perfectly in the oven. The addition of lemon juice and zest enhances the cherry filling’s flavor, making each bite burst with refreshing zestiness and sweetness. Plus, with just a few simple ingredients, this homemade cherry pie is perfect for any occasion.
Ingredients
For this homemade cherry pie, you’ll need the following ingredients:
For the crust:
• Flour: Provides the structure for a tender and flaky crust.
• Salt: Balances the sweetness of the pie filling.
• Butter: Cold butter creates the flaky texture we love in pies.
• Sugar: Adds a slight sweetness to the crust.
• Ice water: Helps bring the dough together without melting the butter.
For the filling:
• Cherries: Fresh sweet cherries are ideal for a perfectly balanced filling, though frozen cherries can also be used.
• Sugar: Sweetens the tartness of the cherries, making for a perfect balance of flavors.
• Lemon juice: Adds a zesty kick to the filling that brings out the flavor of the cherries.
• Lemon zest: Enhances the cherry flavor with a bright, citrusy note.
• Cornstarch: Thickens the filling, preventing it from becoming too runny.
• Vanilla extract: Adds a warm, aromatic flavor to the filling.
Alternative Ingredient Suggestions
If you’re missing some of these ingredients or need a variation, here are some ideas:
• Gluten-free: Replace the regular flour with a gluten-free flour blend for a gluten-free crust.
• Dairy-free: Use vegan butter instead of regular butter to make this pie dairy-free.
• Frozen cherries: If fresh cherries are out of season, frozen cherries work just as well. Be sure to thaw and drain them before use.
Step-by-Step Instructions
- Prepare the pie crust: In a food processor, combine flour, sugar, and salt. Add cold, cubed butter and pulse until the mixture resembles coarse crumbs. Gradually add ice water, pulsing until the dough begins to come together. Turn the dough onto a floured surface, shape it into a ball, cover with plastic wrap, and refrigerate for at least one hour.
- Make the cherry filling: In a bowl, combine pitted cherries, sugar, cornstarch, lemon juice, lemon zest, and vanilla extract. Stir well until everything is evenly mixed.
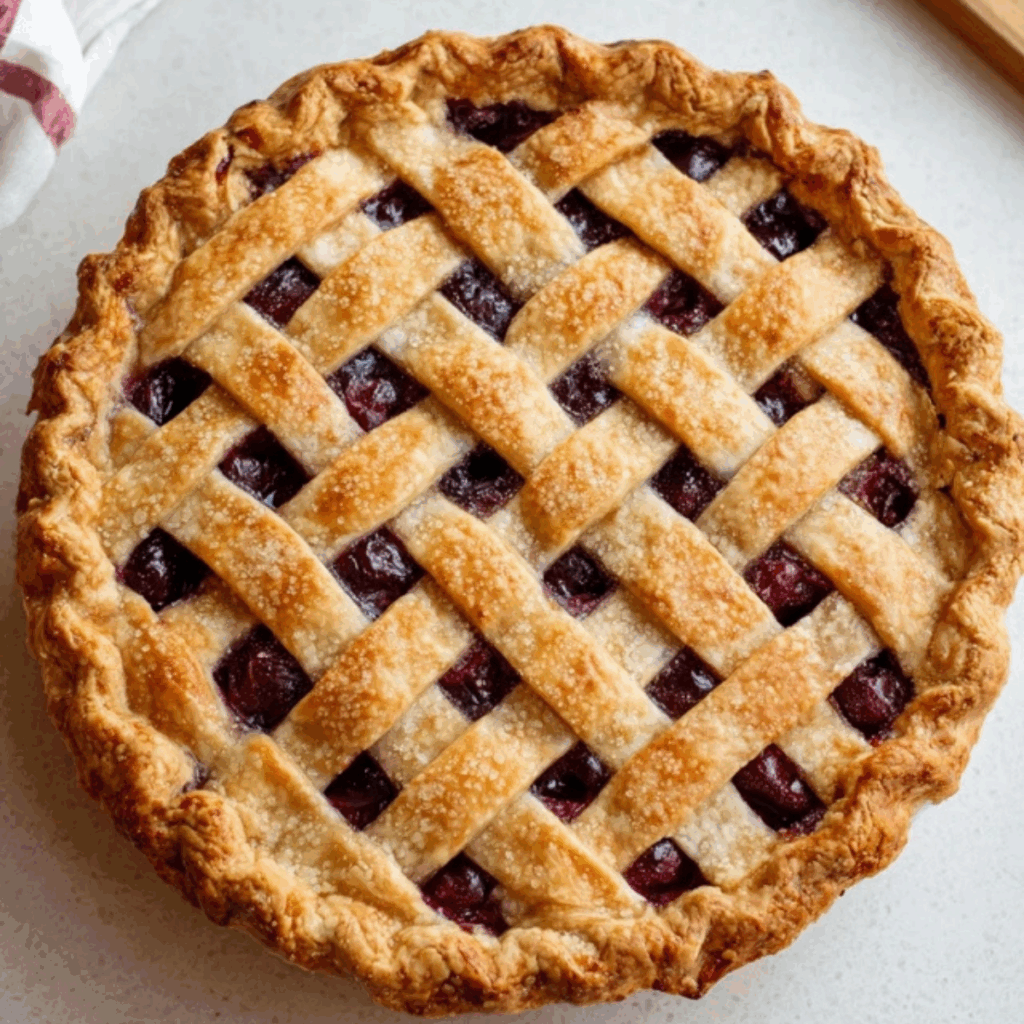
- Assemble the pie: Roll out half of the dough and line a pie pan with it. Poke holes in the bottom with a fork to prevent bubbles. Fill with the prepared cherry mixture. Roll out the second dough disk and cut it into ½-inch strips. Arrange the strips in a lattice pattern over the pie, folding them back to weave through each other.
- Chill the pie: Place the pie in the freezer for 20 minutes before baking to ensure the crust bakes evenly and doesn’t shrink.
- Bake the pie: Preheat the oven to 425°F (220°C). Brush the lattice top with an egg wash (one egg beaten with a tablespoon of milk or cream) and sprinkle with brown sugar. Bake the pie for 20 minutes, then reduce the temperature to 350°F (180°C) and bake for another 30 minutes, or until the crust is golden brown and the filling is bubbly.
Tips & Tricks
- Use cold butter: For the flakiest crust, make sure your butter is cold. Cube it before chilling it in the fridge.
- Don’t skip the egg wash: Brushing the top crust with an egg wash gives it that beautiful golden-brown finish.
- Frozen pie dough: If you want to save time, you can prepare the pie dough ahead of time and freeze it for later use.
Pairing Ideas and Variations
Pair your homemade cherry pie with a scoop of vanilla ice cream or a dollop of freshly whipped cream for an extra indulgent treat. If you want to get creative, you can add different fruit combinations to the cherry filling, such as blueberries or raspberries, for a mixed berry pie. For a fun twist, consider topping the pie with a crunchy crumble topping instead of a lattice crust.
How to Store and Freeze Homemade Cherry Pie
This homemade cherry pie can be stored at room temperature for up to two days. If you have leftovers, place the pie in an airtight container and refrigerate for up to a week. You can also freeze the pie for up to three months. To freeze, wrap the unbaked pie tightly in plastic wrap and place it in the freezer. When you’re ready to bake, just pop it in the oven and follow the instructions as usual.
Health Benefits of Cherry Pie
While cherry pie may not be considered a health food, cherries themselves are packed with antioxidants, vitamins, and fiber. Eating a slice of homemade cherry pie not only satisfies your sweet tooth but also provides a dose of these nutrients. Just remember, everything in moderation!
Homemade cherry pie is a timeless dessert that brings people together. Whether you serve it warm with ice cream or chilled as a snack, this pie is sure to be a crowd-pleaser. Try making it yourself for a sweet treat that’s both simple and delicious.
Conclusion
In conclusion, this homemade cherry pie recipe is a perfect blend of simplicity and indulgence. Whether you’re an experienced baker or a beginner, this pie is easy to prepare and delivers incredible results every time. The combination of fresh cherries, a buttery flaky crust, and a touch of lemon zest makes for a mouthwatering dessert that will impress anyone who tries it. Serve it warm with a scoop of vanilla ice cream for the ultimate treat, or enjoy it on its own – either way, this homemade cherry pie is sure to become a family favorite.
Frequently Asked Questions (FAQs)
1. Can I use frozen cherries for homemade cherry pie?
Yes, you can use frozen cherries for this homemade cherry pie recipe. Just make sure to thaw them and drain any excess liquid before adding them to the filling. Fresh cherries are always the best option, but frozen cherries can be a great alternative when fresh cherries are out of season.
2. How do I make a gluten-free homemade cherry pie?
To make a gluten-free version of this homemade cherry pie, simply replace the regular flour in the pie crust with a gluten-free flour blend. You can also substitute cornstarch in the filling if necessary. Be sure to use a gluten-free pie crust for the best results.
3. How long does homemade cherry pie last?
Homemade cherry pie lasts up to two days at room temperature. If you want to keep it longer, store it in the refrigerator in an airtight container for up to a week. To reheat, simply warm individual slices in the microwave or oven.
More Relevant Recipes
- Christmas Sugar Cookies Recipe
- Christmas Dessert Lasagna: A Sweet Holiday Tradition
- Delicious Lemon Cake Recipe: A Zesty Delight for Every Occasion
Homemade Cherry Pie
- Total Time: 2 hours 25 minutes
- Yield: 12 slices 1x
- Diet: Vegetarian
Description
This homemade cherry pie recipe features a buttery, flaky crust with a sweet and tart cherry filling, perfect for any occasion. It’s an easy and delicious dessert that will satisfy your sweet tooth.
Ingredients
- 2 ½ cups all-purpose flour
- ½ teaspoon kosher salt
- 1 cup cold butter, cubed
- 2 tablespoons granulated sugar
- 7 tablespoons ice water
- 5 cups fresh cherries, pitted
- ⅔ cup granulated sugar
- 1 tablespoon fresh lemon juice
- ¼ cup cornstarch
- 1 teaspoon vanilla extract
- 1 teaspoon lemon zest
Instructions
- Prepare the pie crust by combining flour, sugar, and salt in a food processor. Add cold cubed butter and pulse until crumbly. Add ice water and mix until the dough comes together. Shape into a ball and refrigerate for at least 1 hour.
- In a bowl, combine pitted cherries, sugar, cornstarch, lemon juice, vanilla extract, and lemon zest. Mix well.
- Roll out the first dough disk and line a pie pan. Poke small holes in the bottom with a fork. Fill with cherry mixture.
- Roll out the second dough disk and cut into ½-inch strips. Weave the strips over the filling in a lattice pattern.
- Freeze the pie for 20 minutes. Preheat the oven to 425°F (220°C).
- Brush the lattice with egg wash (1 egg mixed with 1 tablespoon milk). Sprinkle with brown sugar.
- Bake for 20 minutes, then reduce the temperature to 350°F (180°C) and bake for another 30 minutes, or until the crust is golden and filling is bubbly.
Notes
- Use cold butter for the best flakiness in the crust.
- If using frozen cherries, thaw and drain them before using.
- Freezing the pie before baking prevents the crust from browning too quickly.
- For a golden-brown crust, don’t skip the egg wash before baking.
- Prep Time: 1 hour
- Cook Time: 55 minutes
- Category: Dessert
- Method: Baking
- Cuisine: American
Nutrition
- Serving Size: 1 slice
- Calories: 329 kcal
- Sugar: 21g
- Sodium: 220mg
- Fat: 16g
- Saturated Fat: 10g
- Unsaturated Fat: 5g
- Trans Fat: 1g
- Carbohydrates: 45g
- Fiber: 2g
- Protein: 3g
- Cholesterol: 41mg


