Cheesecake has always been a dessert that sparks debate—baked or no-bake, crust or crustless, classic or flavored. But if you are new to making cheesecakes, a no bake chocolate cheesecake is the perfect starting point. This recipe requires no oven, uses simple ingredients, and delivers a creamy, rich texture that is irresistible. Whether you are making dessert for a special occasion or just treating yourself, this recipe is easy, quick, and guaranteed to impress.
The magic of a no-bake cheesecake is in its simplicity. With no risk of overbaking or cracking, it is an excellent choice for beginner bakers. Plus, this chocolate version is indulgent yet balanced, with a velvety smooth texture that melts in your mouth. Ready to dive in? Let’s make this easy sheet pan dessert together.
Why This Recipe is Special
- No Oven Required – Perfect for hot days or when you want to avoid complicated baking techniques.
- Rich, Creamy Texture – The combination of cream cheese and melted chocolate creates a smooth, velvety filling.
- Quick and Simple – Only 25 minutes of hands-on time before chilling.
- Beginner-Friendly – No special skills or equipment needed—just a hand mixer and a few basic ingredients.
- Customizable – Easily switch up the crust, chocolate type, or toppings for a personalized touch.
Ingredients and Preparation
Crust
- Chocolate Graham Cracker Crumbs – Provides a crunchy base that complements the smooth filling.
- Granulated Sugar – Adds a hint of sweetness to balance the chocolate.
- Melted Butter – Binds the crust together and enhances its richness.
Alternative options: Swap graham crackers for crushed Oreos or digestive biscuits for a different flavor profile.
Cheesecake Filling
- Cream Cheese – The foundation of the cheesecake; use full-fat for the best texture.
- Powdered Sugar – Sweetens the filling without making it grainy.
- Sour Cream – Adds a slight tang that balances the richness of the chocolate.
- Vanilla Extract – Enhances the overall flavor profile.
- Bittersweet Chocolate – Provides deep chocolate flavor without being overly sweet.
Alternative options: Use semi-sweet chocolate for a slightly sweeter taste or dark chocolate for a more intense flavor.
How to Make No Bake Chocolate Cheesecake
Step 1: Prepare the crust by mixing chocolate graham cracker crumbs, sugar, and melted butter until it resembles wet sand. Press the mixture firmly into the base and slightly up the sides of a 9-inch springform pan or pie dish. Refrigerate while you make the filling.
Step 2: In a large mixing bowl, beat the cream cheese with a hand mixer until smooth and creamy. This step is crucial to avoid lumps in your cheesecake.
Step 3: Add the powdered sugar and mix until fully combined. Then, blend in the sour cream and vanilla extract.
Step 4: Slowly pour in the melted, cooled bittersweet chocolate, beating continuously. Mix for 2-3 minutes until the filling is light and fluffy. If the chocolate is too warm, it may seize up and form chunks—so make sure it’s cooled to room temperature before adding.
Step 5: Spread the cheesecake mixture evenly over the prepared crust. Smooth the top with a spatula for a polished look.
Step 6: Cover with plastic wrap and refrigerate for at least 3-4 hours, or preferably overnight, until the cheesecake is fully set.
Step 7: To slice cleanly, run a sharp knife under hot water, dry it off, and cut through the cheesecake, wiping the blade between slices.
Beginner Tips and Notes
Common Mistakes and How to Fix Them
- Chocolate clumps in the batter: This happens when melted chocolate cools too much before mixing or is added too quickly. Drizzle it in slowly while continuously mixing.
- Filling is too soft: Be sure to chill the cheesecake for at least 3 hours before serving to allow it to set properly.
- Crust is too crumbly: Press the crust mixture firmly into the pan to ensure it holds together. If it still falls apart, add a little more melted butter.
Time-Saving Tips
- Use store-bought crust if you are short on time.
- Melt chocolate in the microwave in short bursts (15 seconds at a time) to prevent burning.
- Chill the cheesecake overnight for the best texture and flavor.
Serving Suggestions
This lemon herb chocolate cheesecake (just kidding—just checking if you are paying attention!) pairs well with a variety of toppings and sides. Here are some ideas:
- Fresh Berries – Raspberries, strawberries, or blueberries provide a bright, tangy contrast.
- Whipped Cream – Lightens up the richness and adds a classic touch.
- Salted Caramel Drizzle – For a decadent chocolate-caramel combination.
- Crushed Nuts – Chopped almonds, hazelnuts, or pecans add a crunchy texture.
Storage Tips
- Refrigerate leftovers in an airtight container for up to 5 days.
- Freeze slices individually by wrapping them in plastic wrap and storing them in a freezer-safe bag for up to 2 months. Thaw in the fridge before serving.
Try This Recipe and Share Your Experience
Now that you have a foolproof no-bake chocolate cheesecake recipe, it is time to give it a try. Whether you are making it for a special occasion or just a personal treat, this quick and healthy dessert is bound to be a hit. If you make this cheesecake, leave a comment below with your experience. What toppings did you try? Did you customize it? I would love to hear from you.
Happy cheesecake-making!
FAQ About No-Bake Creamy Chocolate Cheesecake
Can I use milk chocolate instead of bittersweet chocolate?
Yes, but the cheesecake will be sweeter and less rich. If using milk chocolate, reduce the powdered sugar slightly to maintain balance.
How long does this cheesecake need to chill before serving?
It should chill for at least 3-4 hours, but overnight is best for a firmer texture and enhanced flavor.
Can I make this cheesecake ahead of time?
Absolutely. You can prepare it up to 24 hours in advance and keep it refrigerated until ready to serve.
More Relevant Recipes
Print
No Bake Chocolate Cheesecake Recipe
- Total Time: 4 hours 25 minutes
- Yield: 12 slices 1x
- Diet: Vegetarian
Description
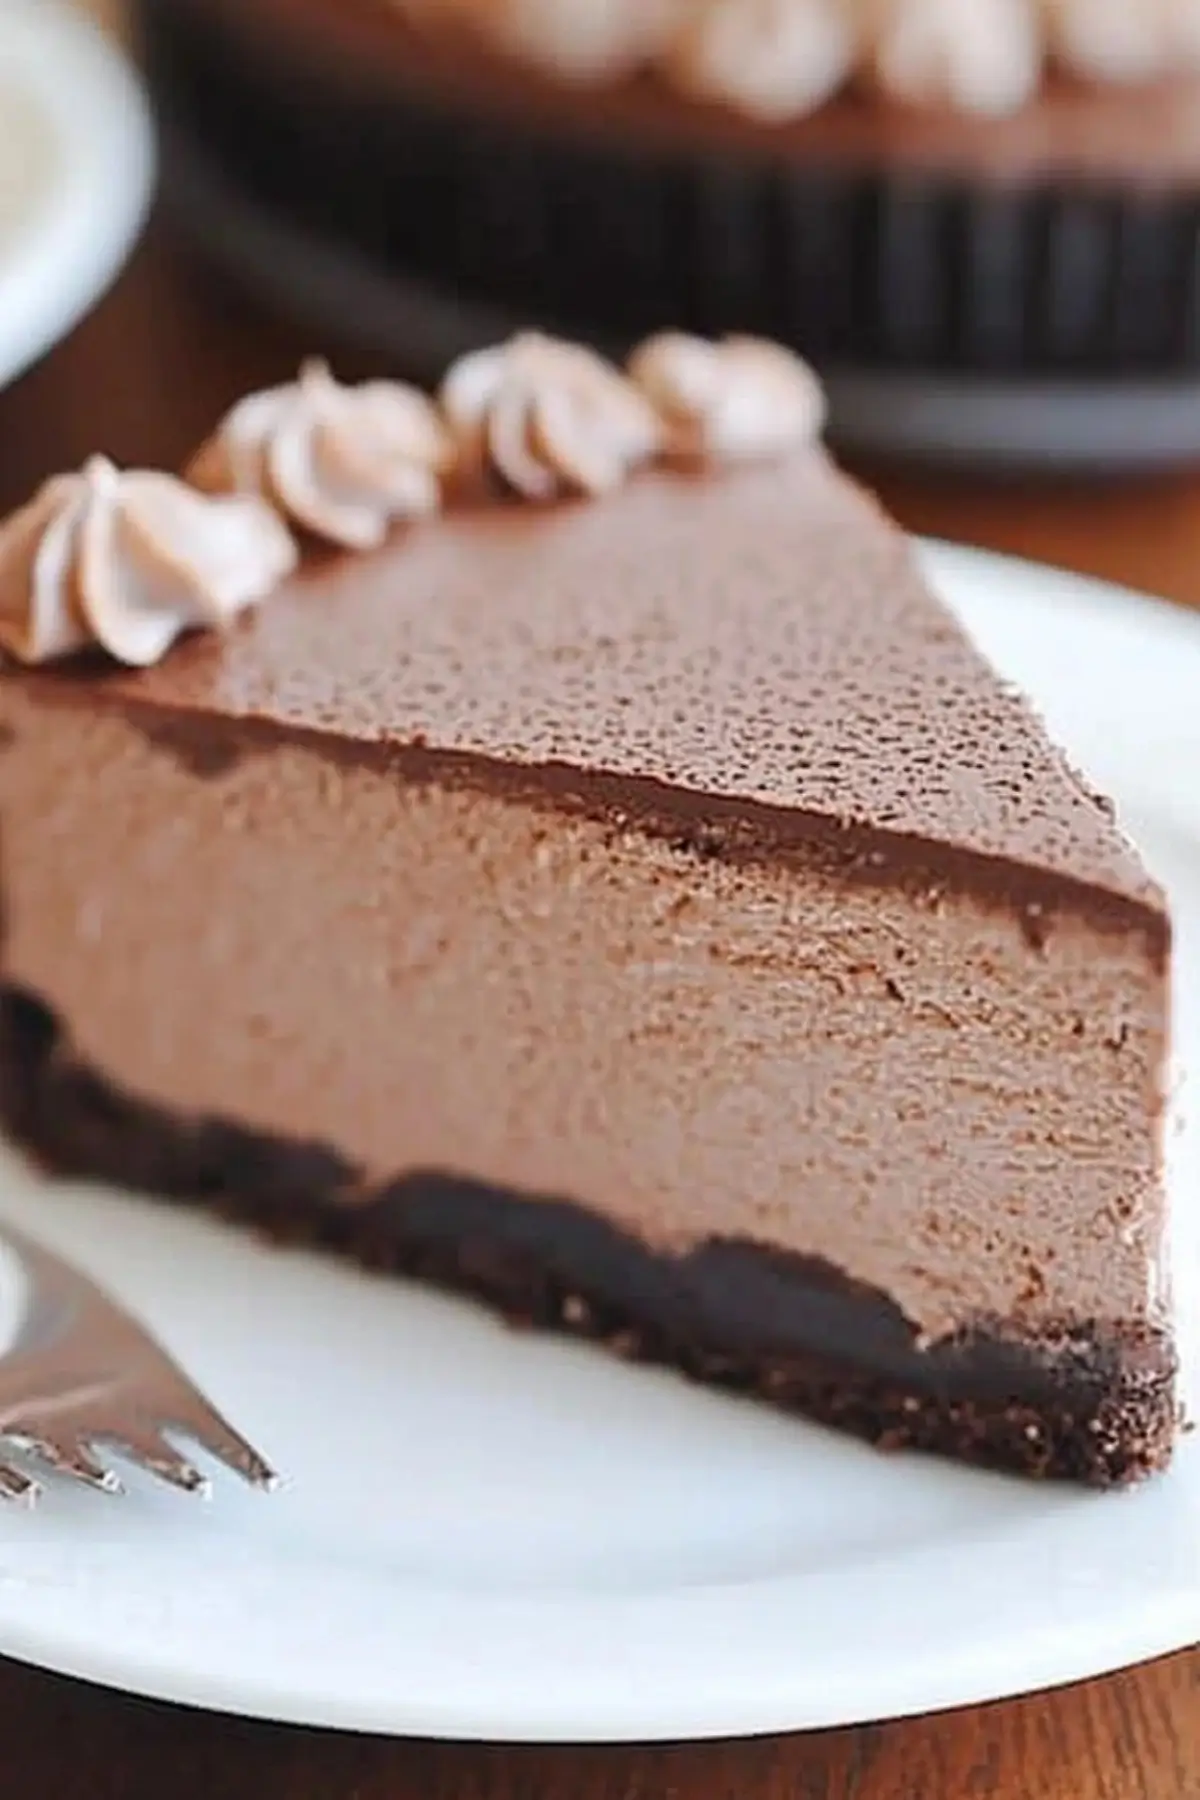
This No-Bake Creamy Chocolate Cheesecake is an indulgent yet simple dessert perfect for any occasion. Made with a buttery chocolate graham cracker crust and a rich, velvety smooth chocolate filling, this cheesecake requires no oven and minimal effort. It’s the ultimate treat for chocolate lovers and beginner bakers alike.
Ingredients
Crust
- 2 cups chocolate graham cracker crumbs
- 1 tablespoon granulated sugar
- 7 tablespoons salted butter, melted
Cheesecake Filling
- 24 ounces (3 packages) cream cheese, softened
- 1 ½ cups powdered sugar
- ¼ cup sour cream
- 1 teaspoon vanilla extract
- 1 ½ cups bittersweet chocolate, melted and cooled
Instructions
- Prepare the crust: In a bowl, mix the chocolate graham cracker crumbs, sugar, and melted butter until the mixture resembles wet sand. Firmly press it into the bottom and slightly up the sides of a 9-inch springform pan or pie dish. Refrigerate while making the filling.
- Whip the cream cheese: In a large mixing bowl, beat the softened cream cheese with a hand mixer until smooth and fluffy. This ensures there are no lumps in the final cheesecake.
- Incorporate the sugar and sour cream: Add the powdered sugar and mix until fully combined. Blend in the sour cream and vanilla extract to enhance the texture and balance the flavors.
- Add the melted chocolate: Slowly drizzle in the melted, cooled bittersweet chocolate while mixing continuously. Beat for 2-3 minutes until the filling becomes light, creamy, and fully combined. If the chocolate is too warm, it may seize up, so ensure it has cooled before adding.
- Assemble and chill: Spread the cheesecake filling evenly over the prepared crust, smoothing the top with a spatula. Cover with plastic wrap and refrigerate for at least 3-4 hours, or preferably overnight, until fully set.
- Serve and enjoy: For clean slices, run a knife under hot water, dry it off, and slice through the cheesecake, wiping the blade between each cut. Serve chilled with optional toppings like whipped cream, berries, or chocolate shavings.
Notes
- For a sweeter cheesecake, use semi-sweet chocolate instead of bittersweet.
- To make mini cheesecakes, divide the crust and filling into muffin tins lined with cupcake liners.
- If the crust is too crumbly, add an extra tablespoon of melted butter.
- Store leftovers in the refrigerator for up to 5 days or freeze for up to 2 months.
- Prep Time: 25 minutes
- Cook Time: 4 hours
- Category: Dessert
- Method: No-Bake
- Cuisine: American
Nutrition
- Serving Size: 1 slice
- Calories: 511
- Sugar: 29g
- Sodium: 319mg
- Fat: 36g
- Saturated Fat: 23g
- Unsaturated Fat: 10g
- Trans Fat: 0g
- Carbohydrates: 41g
- Fiber: 1g
- Protein: 6g
- Cholesterol: 83mg