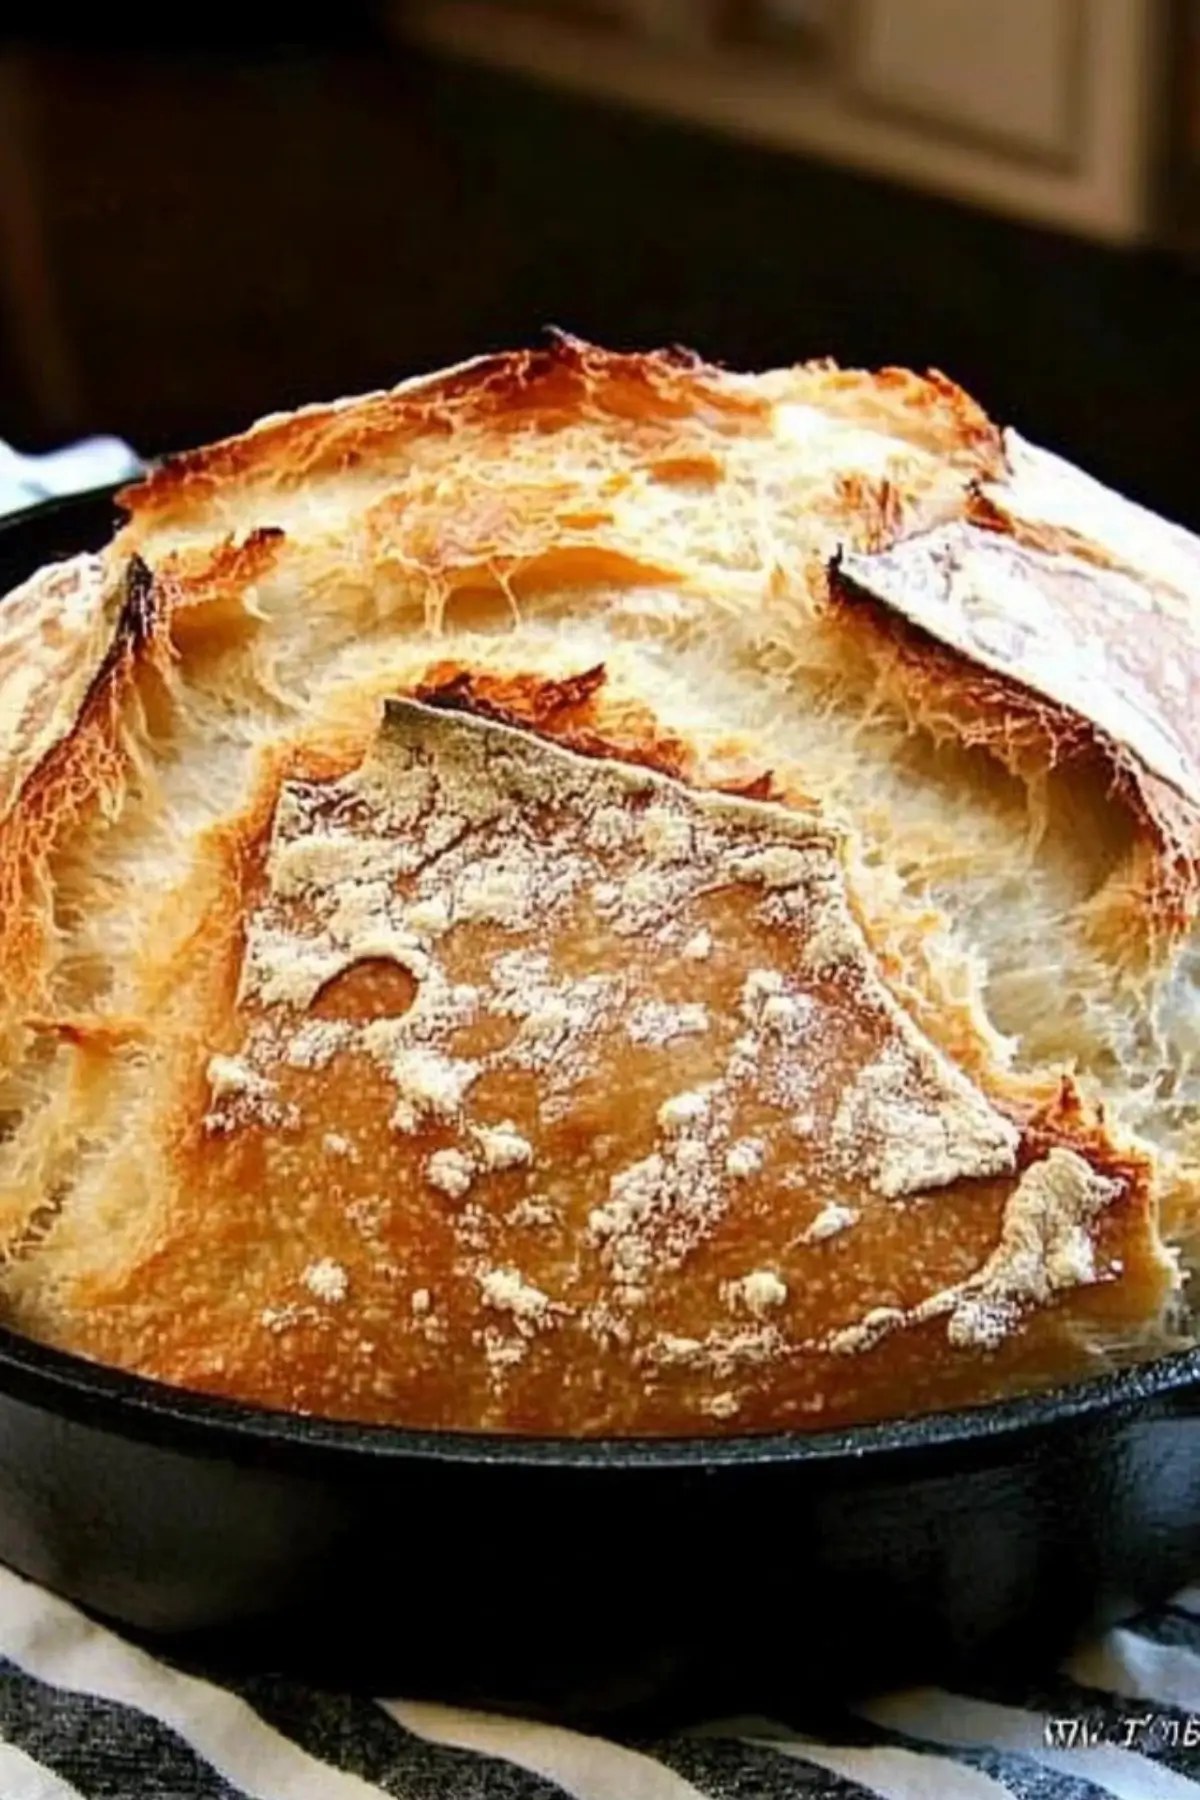
The first time I baked bread, I remember nervously watching a sticky blob of dough rise overnight on my bedroom dresser, simply because it was the warmest place in the house. I had always admired home-baked loaves—golden, crusty, and aromatic—but the process seemed intimidating, especially for someone with minimal baking experience. That changed the moment I discovered this no-knead Dutch oven bread recipe. It was a revelation: four simple ingredients, no fancy tools required, and absolutely no kneading. Just patience and a warm spot. For beginner cooks, this Easy, No Knead Dutch Oven Crusty Bread is the ideal introduction to bread baking. It’s forgiving, extremely simple, and the payoff is huge—a rustic loaf that looks straight from a bakery, with a crisp crust and pillowy interior.
Why This Recipe is Special
- Requires just four pantry staples—flour, yeast, salt, and water.
- No need for kneading, mixers, or bread machines.
- Perfect for beginners: low risk, high reward.
- Bakes into a gorgeous, crusty artisan-style loaf.
- Flexible preparation time: let it rise overnight or for just 8 hours.
- A fun entry point into the world of bread-making without stress.
Ingredients and Preparation
All ingredients are listed without measurements for better understanding; full recipe amounts should be referenced before cooking.
- All-Purpose Flour: Forms the foundation of the dough, giving the bread its structure and body.
Substitute: Bread flour for more chew or whole wheat flour for a heartier texture. - Dry Yeast: The leavening agent that helps the dough rise and develop those airy pockets inside.
Substitute: Instant yeast or highly active yeast will also work. - Salt: Enhances flavor and strengthens the dough structure during baking.
Substitute: Sea salt or table salt in smaller amounts. - Lukewarm Water: Activates the yeast and brings the dough together into a sticky mixture.
Tip: Avoid hot water, which can kill the yeast. - Dutch Oven: Crucial for creating steam, which gives the bread its crusty finish.
Substitute: A heavy oven-safe pot with a lid or even a cast-iron skillet covered with foil in a pinch.
Step-by-Step Instructions
Step 1
In a large mixing bowl, combine the flour, yeast, and salt using a wooden spoon. Slowly pour in the lukewarm water while stirring until a shaggy, sticky dough forms. There’s no need to knead—it should look rough and a bit wet.
Step 2
Cover the bowl tightly with plastic wrap and let it rest at room temperature for 8 to 24 hours. Choose a warm spot in your home—the dough needs warmth to rise properly. Don’t be alarmed if the dough seems very bubbly and soft the next day; that’s a good sign.
Step 3
About 90 minutes before you plan to bake, preheat your oven to 450°F (230°C). Place your Dutch oven, uncovered, into the oven to preheat for 30 minutes. This step is key to forming the bread’s signature crust.
Step 4
While the pot preheats, turn the dough out onto a floured surface. Flour your hands and gently shape it into a round loaf. It will be sticky—resist the urge to over-handle or knead. Cover loosely with plastic wrap while the Dutch oven finishes heating.
Step 5
Once the pot is ready, carefully remove it from the oven. Use floured hands to place the dough onto a piece of parchment paper and gently lower it into the Dutch oven. Be careful—the pot will be extremely hot.
Step 6
Cover with the lid and bake for 30 minutes. Then remove the lid and bake for an additional 7 to 15 minutes until the crust is deep golden brown. Keep an eye on it—every oven behaves differently.
Step 7
Remove the bread and cool on a cutting board or wire rack for at least 15 minutes before slicing. The crust will be crisp, and the interior soft and airy. Enjoy it warm or let it cool completely.
Beginner Tips and Notes
- Sticky Dough: It’s supposed to be sticky. Use floured hands and tools, but avoid adding extra flour to the dough.
- If Bread Overbrowns: Your oven might run hot. Bake covered slightly longer and reduce time uncovered.
- No Dutch Oven? Use an oven-safe dish with a tight lid, or place a pan of hot water on the lower rack to mimic steam.
- Efficient Prep: Mix the dough at night and bake the next evening. It fits easily into any schedule.
- Cutting Tips: Use a serrated knife and let the bread rest first to avoid squashing the interior.
Serving Suggestions
- With Butter and Sea Salt: Classic and simple.
- Alongside Soup or Stew: The crusty texture is perfect for dipping.
- Topped with Avocado or Tomato Slices: For a quick, healthy snack.
- Leftover Storage: Wrap in a kitchen towel or paper bag to maintain crustiness. For longer storage, slice and freeze in zip-top bags.
Engagement Features
Whether this is your first foray into baking or you’re looking for a no-fuss, crowd-pleasing bread, this No Knead Dutch Oven Crusty Bread recipe is a fantastic place to start. It’s almost magical how flour, water, yeast, and salt can transform into something so comforting. Give it a try and let me know how it turns out—drop a comment with your experience or any creative variations you tried. Happy baking!
FAQ About No Knead Dutch Oven Crusty Bread
Can I use whole wheat flour instead of all-purpose flour?
Yes, you can substitute whole wheat flour for up to half of the all-purpose flour to add a nutty flavor and boost the fiber content. Keep in mind the texture will be denser and may require slightly more water.
What if I don’t have a Dutch oven?
While a Dutch oven is ideal for this recipe due to its ability to trap steam, you can use any oven-safe pot with a tight-fitting lid. Alternatively, place a tray of hot water on the lower rack of your oven to simulate a steamy environment.
How do I know if the dough has risen enough?
The dough should double in size and be bubbly on the surface. It will look loose and jiggly—this is completely normal. The longer the rise (up to 24 hours), the more flavor develops.
More Relevant Recipes
- 1-Hour Hot Dog Buns, Homemade Hot Dog Buns | Jenny Can Cook
- Spinach-Artichoke Dip Wonton Cups – Just a Taste
- Copycat Texas Roadhouse Rolls [Video] | Recipes, Bread recipes homemade, Copykat recipes
Easy, No Knead Dutch Oven Crusty Bread
- Total Time: Approx. 9 to 25 hours
- Yield: 1 loaf (serves 8) 1x
- Diet: Vegetarian
Description
This No Knead Dutch Oven Crusty Bread is a foolproof artisan loaf with a golden crust and soft, airy interior. With only four ingredients and zero kneading, it’s the perfect recipe for beginner bakers looking for quick, satisfying, and homemade bread.
Ingredients
- 3 cups all-purpose flour
- 2–3 teaspoons kosher salt
- ½ teaspoon dry yeast (active or highly active dry yeast recommended)
- 1½ cups lukewarm water
Instructions
- Mix the Dough: In a large bowl, stir together the flour, salt, and yeast using a wooden spoon. Pour in the lukewarm water and continue stirring until the mixture forms a shaggy, sticky dough. The dough will look rough and somewhat wet—this is exactly what you want.
- Let it Rise: Cover the bowl tightly with plastic wrap and set it in a warm area of your home. Let the dough rest undisturbed for 8 to 24 hours. During this time, it will double in size and become bubbly and soft.
- Preheat the Oven: About 90 minutes before baking, preheat your oven to 450°F (230°C). Place your Dutch oven, without the lid, into the hot oven for 30 minutes to preheat fully.
- Shape the Dough: While the Dutch oven is heating, turn the dough out onto a well-floured surface. With floured hands, gently shape the dough into a round loaf. It will be sticky—use flour sparingly but enough to manage the shaping process. Loosely cover the dough with plastic wrap and let it rest.
- Bake the Bread: When the Dutch oven is hot, remove it carefully and place the shaped dough onto a sheet of parchment paper. Lower the parchment and dough into the pot. Cover with the lid and bake for 30 minutes, then remove the lid and bake for another 7 to 15 minutes until the crust is deep golden brown.
- Cool and Serve: Take the bread out of the Dutch oven and place it on a wire rack or cutting board to cool for at least 15 minutes before slicing. This resting time helps the interior finish setting.
Notes
- For a more rustic flavor, allow the dough to ferment closer to 24 hours.
- Add-ins like rosemary, shredded cheddar, or roasted garlic can be stirred in at the beginning of the process.
- If your oven tends to run hot, keep a close eye on the bread after removing the lid to prevent over-browning.
- Use a sharp serrated knife when slicing to preserve the structure of the airy interior.
- Prep Time: 5 minutes (plus 8–24 hour rise)
- Cook Time: 45 minutes
- Category: Bread
- Method: Baking
- Cuisine: American, Rustic
Nutrition
- Serving Size: 1 slice (1/8 loaf)
- Calories: 160
- Sugar: 0g
- Sodium: 290mg
- Fat: 0.5g
- Saturated Fat: 0g
- Unsaturated Fat: 0.5g
- Trans Fat: 0g
- Carbohydrates: 33g
- Fiber: 1g
- Protein: 5g
- Cholesterol: 0mg