Every spring, the sight of rhubarb peeking through the garden soil brings me back to my grandmother’s kitchen. She would gently tug the ruby-red stalks from the earth, rinse them under cold water, and slice them into tart little crescents, all while humming an old tune I never quite learned. Her Rhubarb Dream Bars were the first dessert I ever helped bake—and the first recipe I felt confident making on my own.
This Rhubarb Dream Bars easy sheet pan dessert is a timeless classic, and it’s perfect for beginners. With only a few pantry staples and a bit of chopped rhubarb, you can whip up a tray of these bars in under 90 minutes. They’re flaky, creamy, tangy, and sweet—all at once. Even better, they’re a relatively quick and healthy meal-end for anyone craving something homemade without the fuss.
Why This Recipe is Special
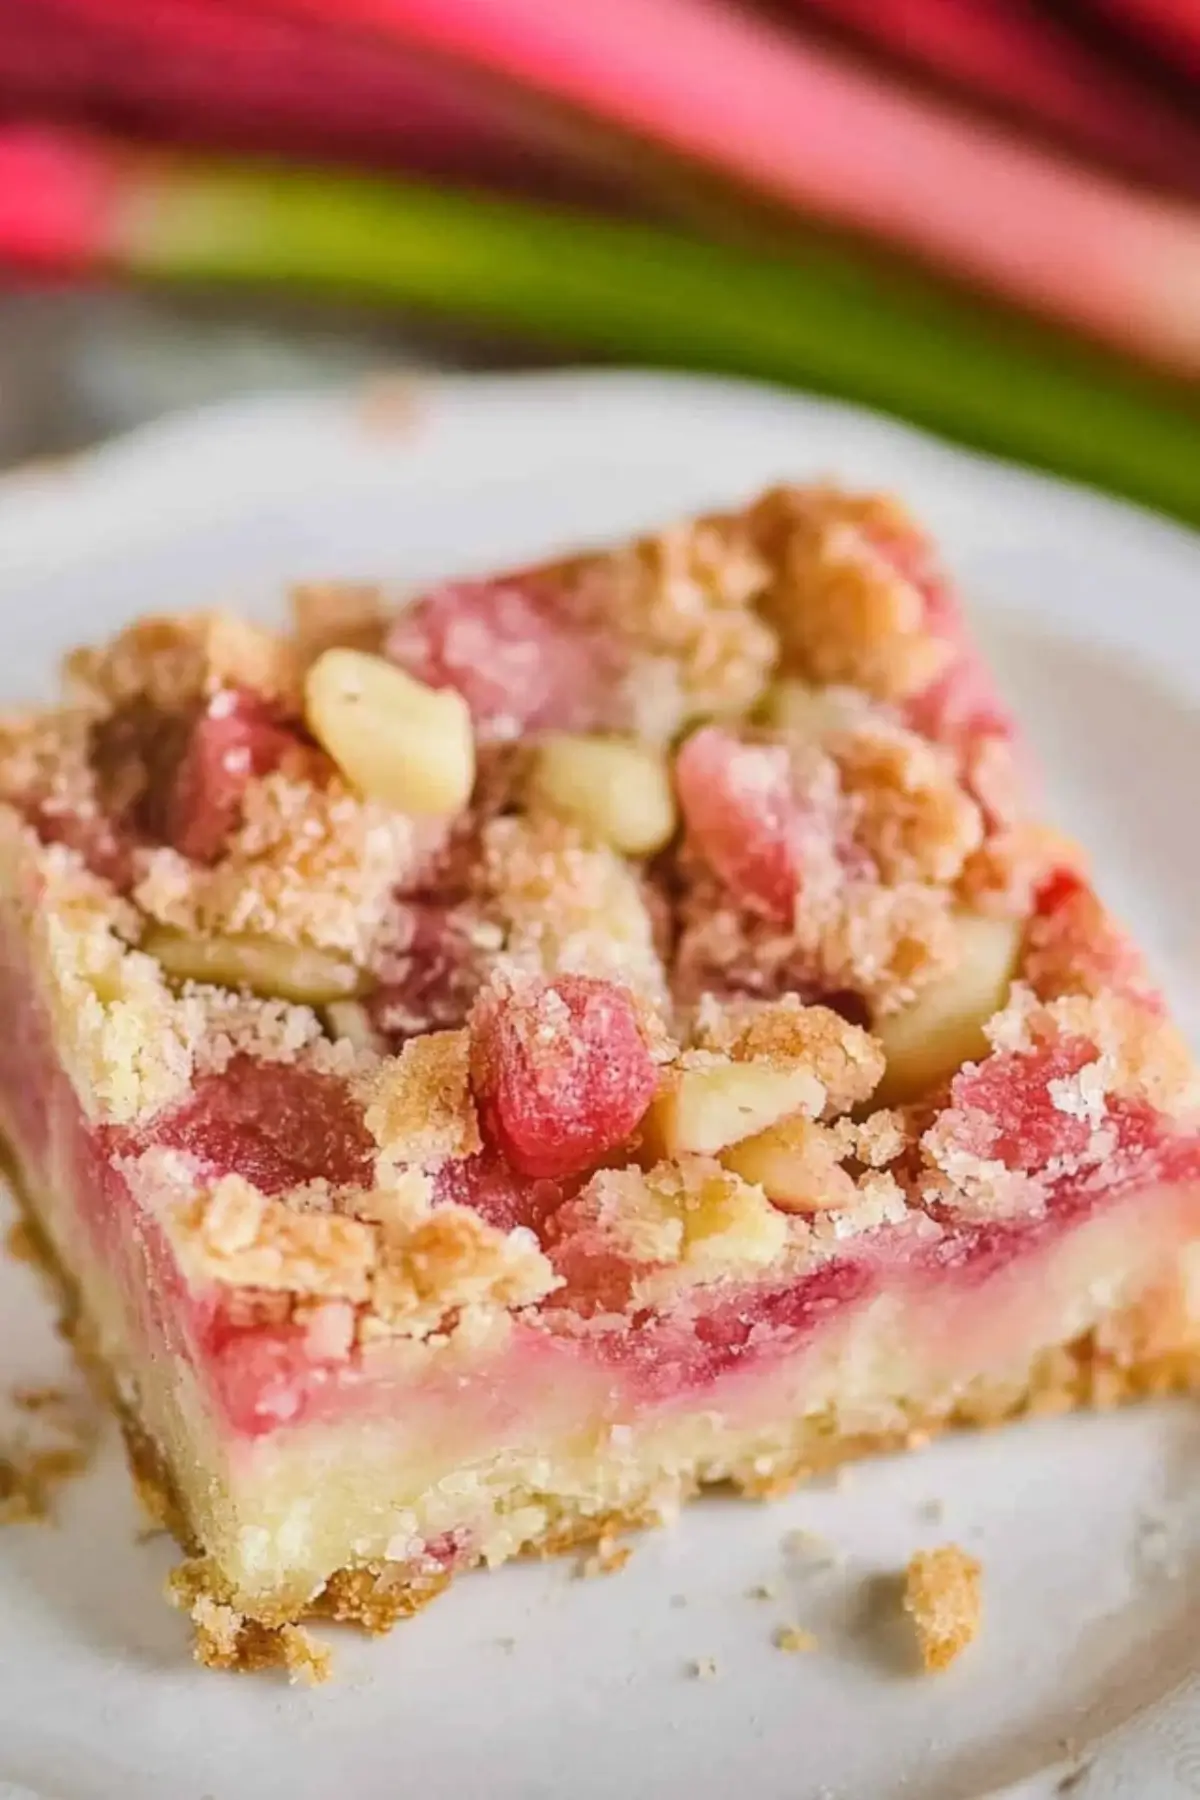
The magic of rhubarb dream bars lies in their simplicity. At first glance, the ingredients seem almost too basic to be interesting—but that’s the beauty of it. This is the kind of recipe passed down through handwritten cards and community cookbooks. It offers comfort and reliability, with a buttery shortbread crust and a sweet-tart custard that comes together effortlessly. The contrast between the crisp base and the soft rhubarb filling gives these bars their signature charm.
They’re also incredibly forgiving. You don’t need a mixer (though it helps), you don’t need to worry about tricky timing, and best of all, it’s hard to mess them up—even if it’s your very first time baking.
Ingredients and Preparation
Butter
This forms the rich base of the crust, offering flavor and structure. Room temperature butter blends easily with flour and sugar to create a tender, flaky shortbread.
All-Purpose Flour
Used in both the crust and the filling, flour gives body to the bars and helps set the custard. You can substitute a 1:1 gluten-free blend if needed.
Powdered Sugar
This sugar dissolves easily into the crust mixture, adding sweetness and that slight melt-in-your-mouth feel.
Granulated Sugar
Used in the filling, it balances rhubarb’s natural tartness and helps the custard set. For a lighter option, consider coconut sugar or a sugar alternative like erythritol.
Salt
A small but mighty player—salt enhances all the other flavors and keeps the sweetness in check.
Eggs
They’re the backbone of the creamy filling, binding everything together and providing a silky texture.
Fresh Rhubarb
The star of the show. Its sharp tang cuts through the sweetness and offers a unique flavor that no other fruit quite matches. If you can’t find fresh rhubarb, frozen works too—just thaw, pat dry, and toss with a bit of flour before using.
Optional: Cinnamon
A pinch of warm spice can add a comforting depth to the filling, but it’s entirely optional depending on your flavor preferences.
Step-by-Step Instructions
Step 1
Preheat your oven to 325°F and grease a 9×13 inch pan. This size ensures even baking and makes cutting into squares easy later on.
Step 2
In a large bowl, mix together the flour, powdered sugar, and butter until the mixture is crumbly but not fully combined into a dough. Use a food processor or your fingers—just don’t overmix. You want the crust to remain light and crumbly.
Step 3
Gently press the crust mixture into your prepared pan to form an even base. Don’t pack it too tightly or it may turn hard after baking. Bake the crust for 15 minutes. It should look pale, not golden—this is just a par-bake to give it a head start.
Step 4
While the crust is baking, prepare your filling. In a clean bowl, beat the eggs lightly. Add in the granulated sugar, flour, salt, and cinnamon (if using), and stir until smooth. Fold in the chopped rhubarb.
Step 5
Pour the filling over the hot crust and return the pan to the oven. Bake for 60 minutes, or until the center is no longer jiggly and a light crust has formed on top. The edges may brown slightly—that’s perfectly fine.
Step 6
Allow the bars to cool completely before slicing. This helps the custard set and makes for cleaner cuts.

Beginner Tips and Notes
- Rhubarb too watery? If using frozen rhubarb, always thaw and pat dry first. Toss it with a tablespoon of flour to prevent the filling from becoming soggy.
- Crust too tough? You may have overmixed or pressed it too firmly. Use a gentle touch for a tender texture.
- Filling not setting? Make sure your oven is at the right temperature and bake until the center no longer wobbles when shaken.
- No food processor? A pastry cutter, fork, or even your hands will work fine for making the crust.
Serving Suggestions
Rhubarb dream bars are lovely on their own, but here are a few ideas to make them even more special:
- Serve warm with a scoop of vanilla ice cream for a dreamy contrast of hot and cold.
- Add a dollop of whipped cream or a drizzle of lemon glaze to brighten the tartness.
- Pair with herbal tea or a light dessert wine for a relaxing finish to your meal.
Storage Tips:
Keep leftovers in an airtight container in the refrigerator for up to 5 days. These bars also freeze well—just wrap tightly and freeze for up to 2 months. Thaw in the fridge overnight before serving.
Conclusion
If you’re looking for a nostalgic treat that’s easy, satisfying, and perfect for spring or summer, these rhubarb dream bars are a must-try. They check all the boxes for a quick and healthy dessert, and the simplicity makes them ideal for new bakers. So pull out your favorite baking dish, grab some rhubarb, and bring a little old-fashioned comfort into your kitchen today.
Have you made these bars or added your own twist? Let me know in the comments—I’d love to hear your take!
FAQ About Rhubarb Dream Bars
Q1: Can I use frozen rhubarb instead of fresh?
Yes, frozen rhubarb works well. Thaw it completely, drain any excess liquid, and pat it dry. Tossing it with a bit of flour can help absorb moisture during baking.
Q2: How do I know when the bars are fully baked?
The bars are done when the center is set and no longer jiggles when gently shaken. This usually takes about 60 minutes at 325°F. A light golden color around the edges is normal.
Q3: Can I make these bars gluten-free?
Absolutely. Substitute the all-purpose flour with a 1:1 gluten-free flour blend for both the crust and the filling. Check the blend includes a binder like xanthan gum for best results.
More Relevant Recipes
Print
Rhubarb Dream Bars
- Total Time: 1 hr 25 mins
- Yield: 16 servings 1x
- Diet: Vegetarian
Description
These rhubarb dream bars feature a buttery shortbread crust topped with a sweet and tangy rhubarb custard filling—easy to make and perfect for beginners.
Ingredients
- 2 cups all-purpose flour
- 1/2 cup powdered sugar
- 1 cup butter
- 4 large eggs
- 2 cups granulated sugar
- 1/2 cup all-purpose flour
- 1 teaspoon salt
- 4 cups diced rhubarb
- Optional: 1/2 teaspoon ground cinnamon
Instructions
- Preheat your oven to 325°F and grease a 9×13 inch baking pan.
- In a bowl, combine 2 cups flour, 1/2 cup powdered sugar, and 1 cup room temperature butter. Mix until crumbly using a hand mixer or food processor.
- Press the crust mixture evenly into the prepared pan and bake for 15 minutes. The crust should be pale, not browned.
- While the crust bakes, lightly beat 4 eggs in a large bowl. Stir in 2 cups sugar, 1/2 cup flour, 1 teaspoon salt, and optional cinnamon until smooth.
- Fold in 4 cups diced rhubarb, then pour the filling over the hot crust.
- Bake for 60 minutes, or until the filling is set and does not jiggle in the center.
- Let cool completely before slicing and serving. Store leftovers in the refrigerator.
Notes
- If using frozen rhubarb, thaw, drain, and pat dry before use. Toss with a tablespoon of flour to absorb extra moisture.
- Do not overmix the crust or it may become too dense.
- Allow the bars to cool fully to ensure clean cuts.
- These bars freeze well—wrap tightly and freeze for up to 2 months.
- Prep Time: 10 mins
- Cook Time: 1 hr 15 mins
- Category: Desserts
- Method: Baking
- Cuisine: American
Nutrition
- Serving Size: 1 bar
- Calories: 307
- Sugar: 29g
- Sodium: 243mg
- Fat: 13g
- Saturated Fat: 8g
- Unsaturated Fat: 4g
- Trans Fat: 0g
- Carbohydrates: 45g
- Fiber: 1g
- Protein: 4g
- Cholesterol: 77mg