When I first moved into my own place, I had big dreams of hosting friends for casual sandwich nights. I imagined hearty Italian subs overflowing with meats, cheeses, and crisp veggies. But every time, I would hit a wall—store-bought rolls just weren’t cutting it. They were either too flimsy to hold the fillings or so tough they overwhelmed the sandwich. Determined to fix it, I ventured into baking my own. What I discovered is that making soft, sturdy Italian sub rolls at home is easier than you think, even for absolute beginners.
This Soft Italian Sub Rolls Anyone Can Make is a game-changer. It’s soft enough to bite into without a fight but firm enough to hold all your favorite fillings. Plus, these rolls come together with just a few pantry staples, offer great nutritional balance, and skip the additives often found in store-bought versions. If you’re new to bread baking, this is the perfect recipe to start with—simple, time-efficient, and immensely rewarding.
Why This Recipe is Special
There’s something magical about pulling freshly baked bread from your oven, especially when it fills your kitchen with a warm, comforting aroma. What sets these Italian sub rolls apart is their simplicity. The dough is forgiving and easy to handle, making it perfect for beginners. Even better, a clever technique—adding steam during baking—gives these rolls a professional-quality crust and rise. Whether you’re crafting a quick weeknight meal or prepping for a party, these rolls will elevate your sandwiches to the next level.
Ingredients and Preparation
Bread Flour
Bread flour is essential for creating a chewy, sturdy roll that can hold up to heavy fillings. Its higher protein content compared to all-purpose flour builds better gluten, resulting in superior texture.
Water
Water activates the yeast and hydrates the flour, allowing the dough to develop structure. Warm (not hot) water ensures the yeast works efficiently.
Sugar
A little sugar feeds the yeast, helping the dough rise faster while also adding a subtle sweetness that enhances flavor.
Instant Yeast
Instant yeast is your best friend for no-fuss baking. It mixes right into the dry ingredients and doesn’t require proofing, saving you time and hassle.
Salt
Salt balances the flavor and strengthens the dough’s gluten network, helping the rolls rise higher.
Vegetable Oil
Oil tenderizes the dough, keeping the interior soft and giving the crust a slight sheen.
Alternative Ingredients
- Use all-purpose flour in a pinch, but expect a slightly less chewy texture.
- Olive oil can replace vegetable oil for a deeper, richer flavor.
- Add sesame seeds, poppy seeds, or dried herbs like oregano to the tops for extra flair.
Step-by-Step Instructions
Step 1 Add bread flour, water, sugar, instant yeast, salt, and vegetable oil to a stand mixer fitted with a dough hook, a bread machine, or a large bowl if kneading by hand. Knead until the dough is smooth and stretchy, about 8-10 minutes. If you can stretch a small piece of dough thin enough to see light through it (windowpane test), it’s ready.
Step 2 Transfer the dough to a lightly oiled large bowl and cover it with a damp cloth or plastic wrap. Let it rise in a warm place for about 1 hour until it doubles in size and looks very puffy.
Step 3 Gently punch down the dough and divide it into 8 equal pieces. Shape each piece loosely into a log shape, cover them with plastic wrap, and let them rest for 10 minutes to relax the gluten.
Step 4 Prepare a baking sheet lined with parchment paper and lightly dusted with cornmeal. Shape each rested dough log into an oval roll, tucking the seams underneath for a smooth top. Place the rolls on the prepared sheet with enough space for them to rise.
Step 5 Brush the tops of the rolls with melted butter. Cover them lightly with greased plastic wrap and allow them to rise for about 45 minutes until very puffy.
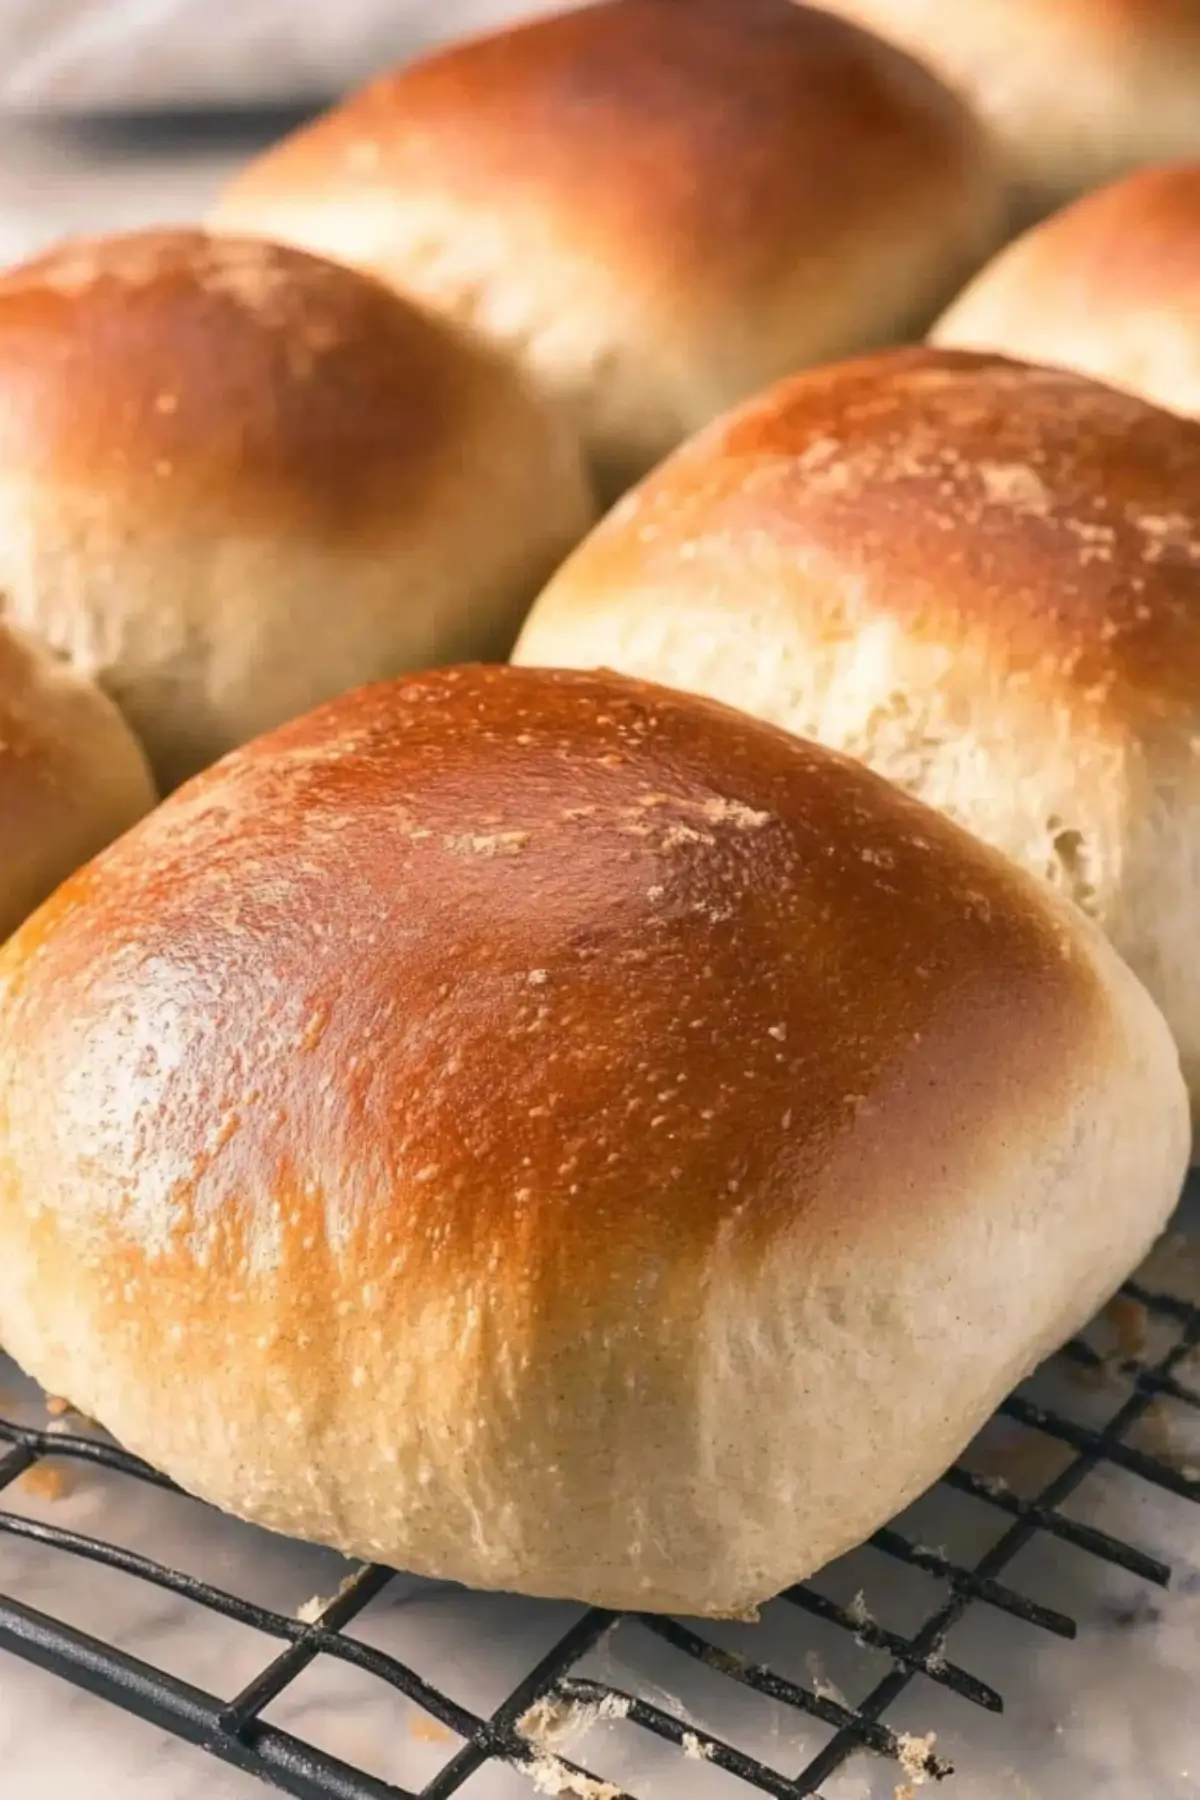
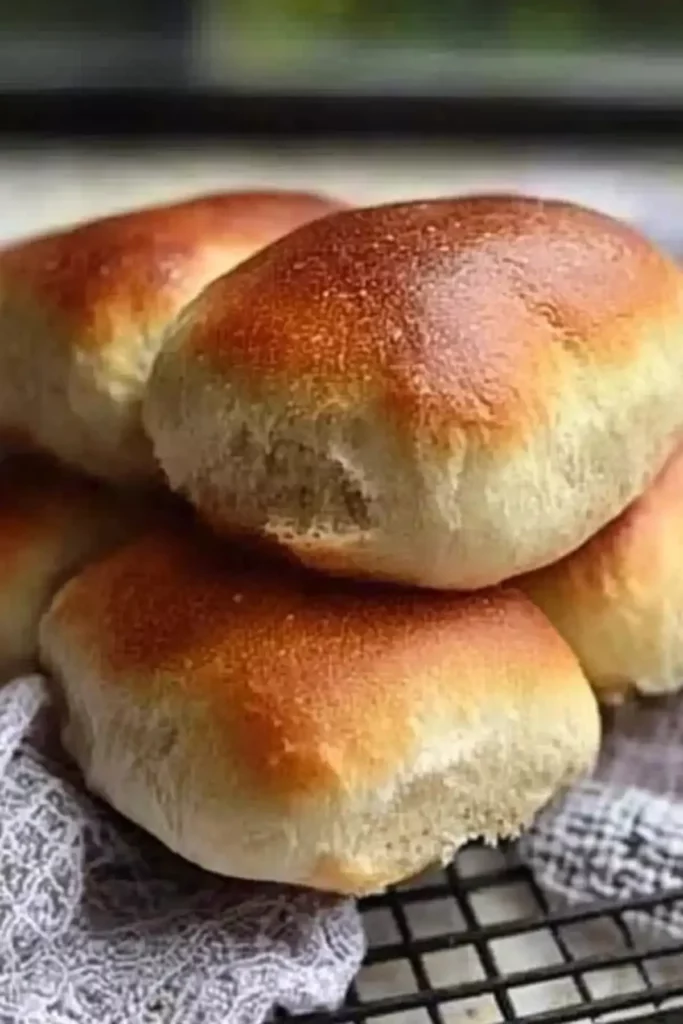
Step 6 Preheat your oven to 425°F. Place a rimmed metal baking sheet on the bottom rack to heat. Once the oven is ready, pour 1 cup of water into the hot pan to create steam. Quickly place the rolls on the middle rack and bake for 15-19 minutes, until golden brown and sounding hollow when tapped.
Step 7 Transfer the baked rolls to a wire rack to cool completely before slicing. This ensures the texture stays perfect and the crumb finishes setting.
Beginner Tips and Notes
- Yeast Troubleshooting: If your dough isn’t rising, your yeast may be old. Always check it by mixing it with warm water and a pinch of sugar to see if it foams.
- Sticky Dough: If the dough is too sticky to handle, lightly flour your hands but avoid adding too much extra flour, which can make the rolls heavy.
- Shaping Advice: Don’t stress about perfect shapes. Focus on smooth tops and sealed bottoms; it will all come together with practice.
- Steam Safety: When adding water to the hot pan, pour carefully and step back to avoid the burst of steam.
- Tool Substitutes: No stand mixer? No problem—you can knead by hand, but expect it to take about 15 minutes of steady work.
Serving Suggestions
These soft Italian sub rolls are versatile and perfect for hearty sandwiches like Philly cheesesteaks, Italian cold-cut subs, turkey clubs, or even veggie-packed delights. They pair wonderfully with simple sides like coleslaw, potato salad, or a cup of hot soup.
For storage, let the rolls cool completely, then place them in an airtight container or zip-top bag at room temperature for up to two days. They also freeze beautifully: wrap individually and store in freezer bags for up to three months. To thaw, leave them out at room temperature for a few hours or gently warm them in the oven.
Conclusion
Making homemade bread can feel intimidating, but these Soft Italian Sub Rolls are a perfect starting point for beginners. With simple ingredients, straightforward steps, and a few helpful tips, you’ll soon be baking rolls that rival your favorite sandwich shop’s. Give this recipe a try, and don’t forget to share your baking adventures in the comments. I can’t wait to hear how your sandwiches turn out!
FAQ About Soft Italian Sub Rolls
1. Can I use all-purpose flour instead of bread flour?
Yes, you can use all-purpose flour if needed. However, the rolls will be slightly less chewy and sturdy compared to using bread flour.
2. How do I know when the dough is kneaded enough?
The dough is ready when it’s smooth, elastic, and can pass the windowpane test—stretch a small piece until light shines through without tearing.
3. What if I don’t have a stand mixer?
You can knead the dough by hand. It will take about 15 minutes of steady kneading until the dough is smooth and stretchy.
More Relevant Recipes
Print
Soft Italian Sub Rolls Anyone Can Make
- Total Time: 2 hours
- Yield: 8 rolls 1x
- Diet: Vegetarian
Description
Soft, chewy Italian sub rolls perfect for beginners, ideal for making hearty sandwiches at home with simple ingredients and easy techniques.
Ingredients
- 3 ½ cups bread flour
- 1 ¼ cups water
- 3 tablespoons sugar
- 2 ½ teaspoons instant yeast
- 1½ teaspoons salt
- ¼ cup vegetable oil
- Melted butter for brushing
- Cornmeal for dusting (optional)
Instructions
- Add bread flour, water, sugar, instant yeast, salt, and vegetable oil to a stand mixer, bread machine, or large bowl. Knead until smooth and stretchy, about 8-10 minutes.
- Transfer the dough to a lightly oiled bowl, cover, and let rise in a warm place for about 1 hour until doubled in size.
- Punch down the dough and divide into 8 equal pieces. Shape each piece loosely into a log, cover, and let rest for 10 minutes.
- Shape the logs into smooth oval rolls, tucking seams underneath, and place them on a prepared baking sheet lined with parchment and dusted with cornmeal.
- Brush the rolls with melted butter, cover loosely, and let rise again for 45 minutes until very puffy.
- Preheat oven to 425°F and place a rimmed metal baking sheet on the bottom rack to preheat.
- Pour 1 cup of water into the hot baking sheet to create steam and immediately place the rolls on the middle rack. Bake for 15-19 minutes until golden brown.
- Cool the rolls completely on a wire rack before slicing and serving.
Notes
- If the dough is too sticky, lightly flour your hands but avoid adding too much extra flour.
- Use fresh yeast and warm (not hot) water to ensure a good rise.
- Brush the rolls with butter before baking for a soft, golden crust.
- Let the rolls cool completely to finish baking internally and prevent sogginess.
- For added flavor, top with sesame or poppy seeds before baking.
- Prep Time: 20 minutes
- Cook Time: 15-19 minutes
- Category: Bread
- Method: Baking
- Cuisine: Italian-American
Nutrition
- Serving Size: 1 roll
- Calories: 227
- Sugar: 5g
- Sodium: 441mg
- Fat: 1g
- Saturated Fat: 0.2g
- Unsaturated Fat: 0.6g
- Trans Fat: 0g
- Carbohydrates: 46g
- Fiber: 2g
- Protein: 8g
- Cholesterol: 0mg