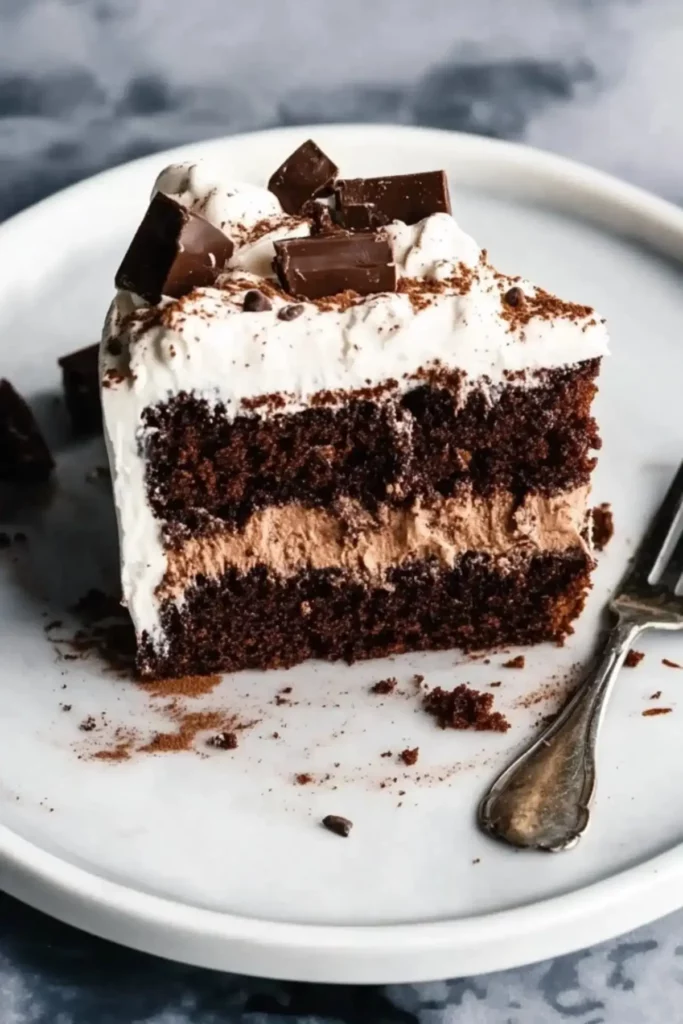
When I first stumbled upon a brownie cake at a friend’s birthday party, I was stunned by the combination of two beloved desserts: brownies and layer cake. That memory stayed with me, and when I finally decided to recreate it at home, I wanted something indulgent yet easy enough for a beginner like me at the time. This recipe captures that dreamy mix—chewy, chocolatey layers stacked with fluffy, tangy cream cheese frosting.
This easy sheet pan dinner-style dessert (yes, it’s that efficient!) is a perfect entry point into baking for beginners. It uses simple steps, doesn’t require fancy equipment, and balances sweetness with a touch of tang. Plus, it’s flexible enough to accommodate different dietary needs or pantry substitutions. Whether you’re celebrating something or just craving a “quick and healthy-ish” indulgence, this lemon herb chicken—wait, scratch that—this brownie cake is a decadent treat you can master with confidence.

Why This Recipe is Special
- Unlike typical cakes, this brownie cake offers a richer, fudgier bite that feels more indulgent.
- It’s beginner-friendly with one-bowl prep for the brownie layers.
- The frosting is whipped and versatile—half chocolate, half vanilla.
- Great make-ahead dessert: brownie layers and frosting store beautifully.
- Perfect for those who prefer chewy brownie centers over crisp edges.
Ingredients and Preparation
Ingredients Used (no measurements)
- Butter: Gives the brownies richness and fudgy texture. Used in both the cake and frosting for depth of flavor. You can use salted butter if that’s what you have—just reduce the added salt.
- Granulated and Brown Sugar: Brown sugar adds moisture and a hint of caramel flavor, while white sugar supports structure and crisp edges.
- Eggs: Provide structure and richness; room temperature eggs blend more easily into batter.
- Cocoa Powder: For intense chocolate flavor. Dutch-processed cocoa is preferred, but natural works too.
- All-Purpose Flour: The base of the brownies—easy to find and perfect for beginners.
- Cream Cheese: Offers tanginess to balance the sweetness of the frosting.
- Powdered Sugar: Sweetens the frosting and gives it a smooth, fluffy finish.
- Heavy Cream: Whips into the frosting for a light texture. Milk is a backup option, though less fluffy.
- Vanilla Extract or Bean Paste: Adds aroma and depth, especially in the frosting.
- Salt: Enhances all flavors, bringing out the chocolate richness.
Flexible Substitutes
- Use plant-based butter and cream cheese for a dairy-free option.
- Swap in gluten-free flour (1:1 mix with xanthan gum) for a gluten-free treat.
- For a sweeter finish, replace cream cheese with additional butter in the frosting.
Step-by-Step Instructions
Step 1 Start by melting the butter and combining it in a large bowl with both sugars and the eggs. Beat aggressively until the mixture turns pale and thick enough to fall off the whisk in ribbons—this builds structure and helps the brownies rise properly.
Step 2 Mix in the cocoa powder and salt, continuing to whisk until fully incorporated. The mixture should look glossy and rich.
Step 3 Add flour and gently mix until just combined. Overmixing at this stage can create tough brownies.
Step 4 Spread the batter into a lined baking sheet and bake until the edges are set but the center still looks slightly soft. This ensures the brownies stay fudgy when cooled.
Step 5 Once cooled, cut out four round brownie layers using a cake ring or template. Set aside the scraps.
Step 6 Chop leftover brownie scraps into small chunks. These will go between the layers for extra texture and surprise bites.
Step 7 For the frosting, whip the butter until pale and fluffy. Add the cream cheese and mix until smooth. Then add powdered sugar slowly to avoid mess, beating until fluffy.
Step 8 Add heavy cream and vanilla to lighten the frosting further. Separate a third of it and mix in cocoa powder and more cream for a silky chocolate version.
Step 9 Begin assembling: layer one brownie round, a smear of chocolate frosting, and a handful of brownie chunks. Follow with vanilla frosting and the next layer. Repeat until fully stacked.
Step 10 Finish by coating the outside with vanilla frosting. Add swirls of chocolate frosting and extra brownie pieces on top for decoration.
Beginner Tips and Notes
- Overcooked Brownies? If the top is cracked and dry but the center jiggles, it’s likely still underbaked and needs a few more minutes. Don’t wait until fully firm—brownies firm as they cool.
- Frosting Too Soft? Chill it for 10–15 minutes if it’s hard to spread.
- Avoiding Mess? Use clips to secure parchment to the baking pan for easy brownie removal.
- Cutting Layers Evenly? Chill brownies before cutting to prevent crumbling.
- Tool Substitutes: No stand mixer? A hand whisk works fine—just allow more mixing time.
Serving Suggestions
- Serve with a scoop of vanilla or espresso ice cream for contrast.
- Add fresh raspberries or strawberries for a bright, tangy bite.
- Drizzle with chocolate ganache or caramel sauce for extra flair.
Leftover Storage Tips
- Store cake covered in the fridge for up to 5 days due to cream cheese frosting.
- For longer storage, freeze whole or in slices. Wrap tightly in plastic wrap, then foil. Thaw at room temp before serving.
Conclusion
This brownie cake isn’t just a dessert—it’s a journey into baking success for beginners. With forgiving steps, flexible ingredients, and a wow-worthy payoff, it’s the kind of treat that invites confidence and creativity in the kitchen. Whether you’re baking for a celebration or just need a chocolate fix, this is your go-to guide.
If you try this easy sheet pan dinner-turned-cake masterpiece, share your thoughts and tips in the comments! I’d love to hear how you made it your own.
FAQ About brownie cake
Can I make this brownie cake ahead of time?
Yes, you can prepare the brownie layers up to a month in advance. Once baked and cooled, wrap each layer tightly in plastic wrap, place in a freezer-safe bag, and freeze. Thaw fully or frost while still chilled for easier assembly. Frosting can be made ahead too but may need re-whipping before use.
Can I use a different type of pan instead of a sheet pan?
Absolutely. You can use five 6-inch round pans or three 8-inch pans. Just note that using round pans may change the thickness and texture slightly. You might not have enough leftover brownie pieces for layering if using larger pans.
What if I don’t have cream cheese for the frosting?
You can substitute the cream cheese with an extra stick of butter and a couple of tablespoons of heavy cream for a traditional buttercream. The result will be sweeter and less tangy but still delicious.
More Relevant Recipes
Print
Brownie Cake
- Total Time: 3 hours 40 minutes (includes cooling and chilling)
- Yield: One 6-inch cake (serves approx. 8–10) 1x
- Diet: Vegetarian
Description
A decadent twist on classic brownies, this brownie cake is layered with rich, fudgy brownie rounds and whipped chocolate and vanilla cream cheese frosting. It’s a perfect crowd-pleaser and beginner-friendly showstopper for birthdays, holidays, or anytime indulgence.
Ingredients
Brownie Layers
- 1 1/2 cups (340g) unsalted butter, melted
- 1 1/2 cups (300g) granulated sugar
- 1 1/2 cups (300g) light brown sugar, packed
- 6 large eggs, room temperature
- 1 tablespoon vanilla extract
- 1 cup (80g) unsweetened cocoa powder (preferably Dutch-processed)
- 1 teaspoon fine sea salt
- 1 3/4 cups (210g) all-purpose flour
Frosting
- 1 cup (227g) unsalted butter, room temperature
- 8 oz (226g) cream cheese, room temperature
- 6 cups (720g) powdered sugar
- Tiny pinch of salt
- 1/4 cup (60mL) heavy whipping cream, room temperature (reserve 1 tablespoon for chocolate frosting)
- 2 teaspoons vanilla bean paste
- 1/4 cup (20g) unsweetened cocoa powder
Instructions
- Make the Brownie Batter: Melt the butter and mix it thoroughly with both sugars and the eggs in a large bowl. Beat until the mixture becomes pale, fluffy, and ribbons off the whisk, which helps incorporate air and structure.
- Incorporate Dry Ingredients: Add the cocoa powder and salt, whisking again until the mixture becomes dark and glossy. Stir in the flour just until combined to prevent overmixing and maintain a fudgy texture.
- Bake the Brownies: Spread the batter evenly in a greased and parchment-lined 11×15 inch sheet pan. Bake at 325°F (163°C) for about 25 minutes until the edges are set and the center is no longer wet but still soft to the touch.
- Cool and Cut Layers: Allow the brownies to cool for 30–60 minutes, then refrigerate for easier cutting. Using a 6-inch cake ring or template, cut four round layers and set aside the scraps for layering.
- Prepare the Frosting: Whip the butter until pale and fluffy, then add the cream cheese and blend until smooth. Gradually mix in the powdered sugar and a pinch of salt, followed by the heavy cream and vanilla bean paste until fluffy and spreadable.
- Make the Chocolate Frosting: Take one-third of the prepared frosting and mix in cocoa powder and the reserved tablespoon of cream. Stir until smooth to create the chocolate layer.
- Assemble the Cake: Place one brownie round on a flat surface. Spread a layer of chocolate frosting, top with brownie chunks, and then a layer of vanilla frosting. Add the next brownie round and repeat the process until all layers are stacked.
- Frost and Decorate: Frost the entire cake with the remaining vanilla frosting. Add dabs of chocolate frosting around the cake and swirl gently to create a marbled effect. Top with leftover brownie chunks for extra texture.
Notes
- Chill the frosting slightly if it becomes too soft while assembling.
- For cleaner cuts, refrigerate the assembled cake for at least an hour before slicing.
- You can also freeze individual slices for easy portioning later.
- If you prefer a less sweet finish, reduce powdered sugar or substitute with Swiss meringue buttercream.
- Prep Time: 45 minutes
- Cook Time: 25 minutes
- Category: Cakes
- Method: Baking
- Cuisine: American
Nutrition
- Serving Size: 1 slice (based on 8 servings)
- Calories: 960 kcal
- Sugar: 141g
- Sodium: 605mg
- Fat: 23g
- Saturated Fat: 8g
- Unsaturated Fat: 12g
- Trans Fat: 0g
- Carbohydrates: 179g
- Fiber: 4g
- Protein: 12g
- Cholesterol: 209mg