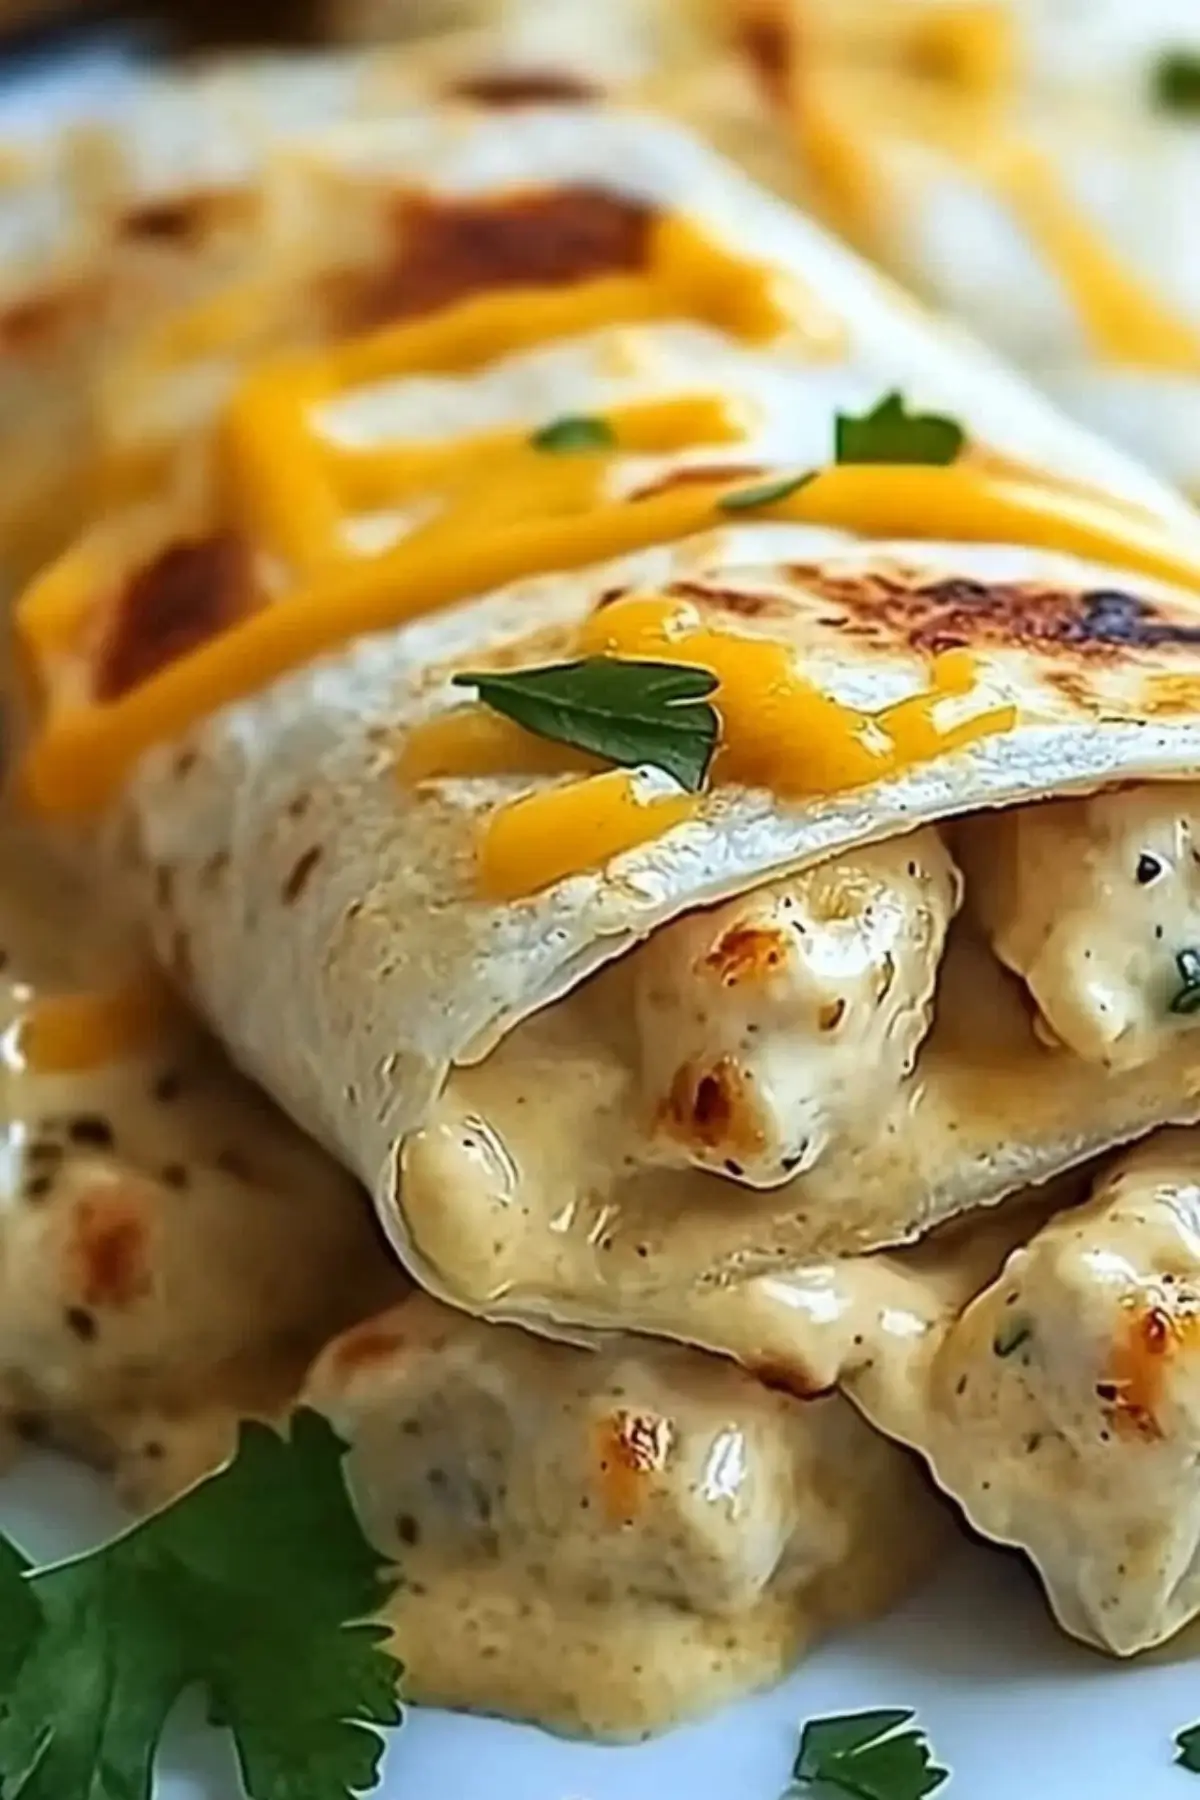
Last winter, after a long day of errands and cold wind chasing me home, I opened the fridge and saw just a few simple ingredients—leftover chicken, shredded cheese, tortillas, and a jar of garlic sauce. Within minutes, I had something warm, melty, and satisfying: cheesy garlic chicken wraps. It was such a hit that my friends begged me for the “recipe,” and now, it’s one of my favorite weeknight go-tos.
This Cheesy Garlic Chicken Wraps recipe is a dream for beginner cooks because it checks all the right boxes: it’s easy, fast, and doesn’t require fancy kitchen gadgets or skills. You’ll go from prep to plate in under 30 minutes, and the end result is a comforting, protein-packed wrap that feels like something you’d order at your favorite café. Plus, it’s flexible enough to adapt based on what you have in your fridge.
Why This Recipe is Special
Cheesy Garlic Chicken Wraps offer the ideal balance of flavor, texture, and ease. The seasoned chicken provides juicy bites with a hint of spice, the melted cheese adds richness and comfort, and the garlic sauce ties everything together with creamy, zesty flair. It’s also a fantastic recipe to build kitchen confidence—easy enough for beginners, but impressive enough to share.
This dish encourages creativity: swap the proteins, switch up the sauces, or toss in extra veggies. Whether you’re cooking for one or feeding a family, this wrap is your reliable weekday savior.
Ingredients and Preparation
Chicken Breast – The star of the dish. It delivers lean protein and soaks up the seasonings well. Dice it small so it cooks quickly and evenly.
Flour Tortillas – These act as the vessel. Look for soft, fresh ones for easy wrapping. Whole wheat or spinach tortillas make great alternatives.
Cheddar Cheese – Sharp and flavorful, it gives the wrap its richness. You can sub with Monterey Jack or Colby for a milder taste.
Mozzarella Cheese – Melty and stretchy, it pairs beautifully with cheddar. Try provolone or fontina for a different melt profile.
Garlic Powder – Adds warmth and savory depth without the risk of burnt bits. Use roasted garlic paste for a richer punch.
Onion Powder – Provides an underlying sweetness and balance to the garlic.
Paprika – Adds color and a hint of smoky flavor. Smoked paprika works well if you want extra dimension.
Salt and Pepper – Essential for seasoning and enhancing all the other ingredients.
Olive Oil – Helps with even cooking and browning. Any neutral oil like canola or avocado will also work.
Creamy Garlic Sauce – The flavor bridge that brings everything together. Ranch dressing, Caesar, or chipotle mayo are great swaps.
Fresh Parsley (optional) – For garnish and a touch of freshness. You can skip it, or use chives or green onions instead.
Step-by-Step Instructions
Step 1 Begin by dicing chicken breasts into small, uniform pieces, around half an inch. In a mixing bowl, toss the chicken with olive oil, garlic powder, onion powder, paprika, salt, and pepper. Mix well so every piece is coated. Let the chicken marinate for 5 minutes to absorb the flavors while you prep your tortillas and sauces.
Step 2 Heat a non-stick skillet over medium heat. When the pan is hot, add the seasoned chicken in a single layer. Avoid overcrowding—work in batches if needed. Cook for about 3 minutes per side, flipping once the bottoms are golden. The chicken should be fully cooked, juicy, and lightly crisped on the outside.
Step 3 Warm your flour tortillas in the microwave or a dry skillet to make them more pliable. On each tortilla, spread a layer of creamy garlic sauce, keeping a margin at the edges. Add a line of the freshly cooked chicken down the center and top with a mix of cheddar and mozzarella cheese.
Step 4 To fold, start by bringing the bottom edge up over the filling. Then fold the sides inward and roll tightly from the bottom up. A snug wrap helps keep everything in place while cooking.
Step 5 Return the wrapped tortillas to the skillet over medium-low heat. Gently press each with a spatula to help them crisp and seal. Cook each side for 2-3 minutes until the tortilla is golden and the cheese inside is fully melted.
Step 6 Remove from the skillet, let them rest for a minute, then slice diagonally. Garnish with fresh parsley if you like and serve while warm.
Beginner Tips and Notes
- If your chicken browns too quickly: Turn the heat down slightly or stir more frequently to avoid burning the spices.
- Wraps falling apart? Make sure the tortillas are warm and pliable before folding. Also, don’t overfill.
- No garlic sauce on hand? Mix a bit of mayo with minced garlic and lemon juice for a quick homemade version.
- Working with cold cheese? Shred it fresh from the block. Pre-shredded cheese often contains anti-caking agents that affect melting.
Serving Suggestions
Serve your cheesy garlic chicken wraps with a crisp side salad like cucumber or coleslaw to balance the richness. For something heartier, try baked sweet potato fries or a light tomato soup.
These wraps also make great leftovers. Wrap them in foil and refrigerate. To reheat, toss them back in a dry skillet over medium heat for 2-3 minutes per side to keep the tortilla crisp.
Conclusion
If you’ve been looking for an easy sheet pan dinner alternative or just want to make something fast and filling without sacrificing flavor, these cheesy garlic chicken wraps are the answer. With just a few pantry staples and a little time, you’ll create a quick and healthy meal that’s endlessly adaptable and perfect for any day of the week.
Try this lemon herb chicken wrap twist next time, or spice it up with pepper jack cheese for a little kick. And if you do make these, I’d love to hear how it turned out for you—drop a comment and share your take!
FAQ About Cheesy Garlic Chicken Wraps
Can I make these wraps ahead of time?
Yes, you can cook the chicken and prep the cheese and sauce in advance. However, for the best texture, assemble and grill the wraps just before serving.
What can I substitute for garlic sauce?
If you don’t have garlic sauce, ranch dressing, chipotle mayo, or a mix of mayonnaise and minced garlic with lemon juice will work beautifully.
How do I prevent the wrap from falling apart while cooking?
Make sure the tortilla is warm before wrapping, and don’t overfill. Roll tightly and grill seam-side down first to help it stay sealed.
More Relevant Recipes
- Slow Cooker Buffalo Wings
- How to make Pita Bread at home like a Pro
- Hawaiian Chicken with Coconut Rice

Cheesy Garlic Chicken Wraps
- Total Time: 25 minutes
- Yield: 4 wraps 1x
Description
These Cheesy Garlic Chicken Wraps are a fast, flavorful fix for busy nights. Juicy chicken, melted cheese, and creamy garlic sauce come together in crispy tortillas—ready in just 25 minutes. It’s a beginner-friendly recipe that tastes like a gourmet comfort meal.
Ingredients
- 2 large chicken breasts, diced
- 4 large flour tortillas
- 1 tablespoon olive oil
- 2 teaspoons garlic powder
- 1 teaspoon onion powder
- 1 teaspoon paprika
- Salt and pepper, to taste
- 1 cup shredded cheddar cheese
- 1/2 cup shredded mozzarella cheese
- 1/2 cup creamy garlic sauce
- Fresh parsley, chopped (optional)
Instructions
- Season the Chicken: Place diced chicken in a bowl and coat with olive oil, garlic powder, onion powder, paprika, salt, and pepper. Mix until all pieces are evenly seasoned and let rest for a few minutes while prepping the other ingredients.
- Cook the Chicken: Heat a non-stick skillet over medium heat. Once hot, add the chicken in a single layer, avoiding overcrowding. Sear until golden brown on each side and cooked through, about 6 to 8 minutes. Juices should run clear and no pink should remain in the center.
- Prepare the Tortillas: Gently warm the tortillas in a microwave or dry skillet to make them more flexible and less likely to tear during rolling.
- Assemble the Wraps: Spread a layer of creamy garlic sauce across each tortilla, leaving a small border. Add the cooked chicken down the center, followed by a blend of cheddar and mozzarella cheese.
- Roll the Wraps: Fold the bottom edge of the tortilla up over the filling, then fold in the sides and roll tightly from the bottom up. A snug wrap helps hold everything together during cooking.
- Crisp and Serve: Return the wraps to the skillet over medium-low heat. Cook each side for 2 to 3 minutes until golden brown and crispy, with cheese fully melted inside. Slice in half and garnish with fresh parsley if desired.
Notes
- For a spicier kick, add red pepper flakes or use pepper jack cheese.
- To save time during the week, prep the chicken in advance and store separately.
- These wraps are best enjoyed fresh but can be reheated in a pan to retain crispiness.
- If using pre-cooked chicken, warm it slightly in a pan with a bit of olive oil and seasoning before assembling.
- Prep Time: 10 minutes
- Cook Time: 15 minutes
- Category: Main Course
- Method: Pan-Grilled
- Cuisine: American
Nutrition
- Serving Size: 1 wrap
- Calories: 400
- Sugar: 2 g
- Sodium: 620mg
- Fat: 18 g
- Saturated Fat: 7 g
- Unsaturated Fat: 9 g
- Trans Fat: 0 g
- Carbohydrates: 30 g
- Fiber: 2 g
- Protein: 30 g
- Cholesterol: 85 mg