
I’ve been bringing this cake to potlucks for years and every time someone says the name out loud — Holy Cow Cake — the table leans in. I make it when I want a no-fail, showstopping dessert that looks like I worked all day but actually comes together quickly if you plan ahead.
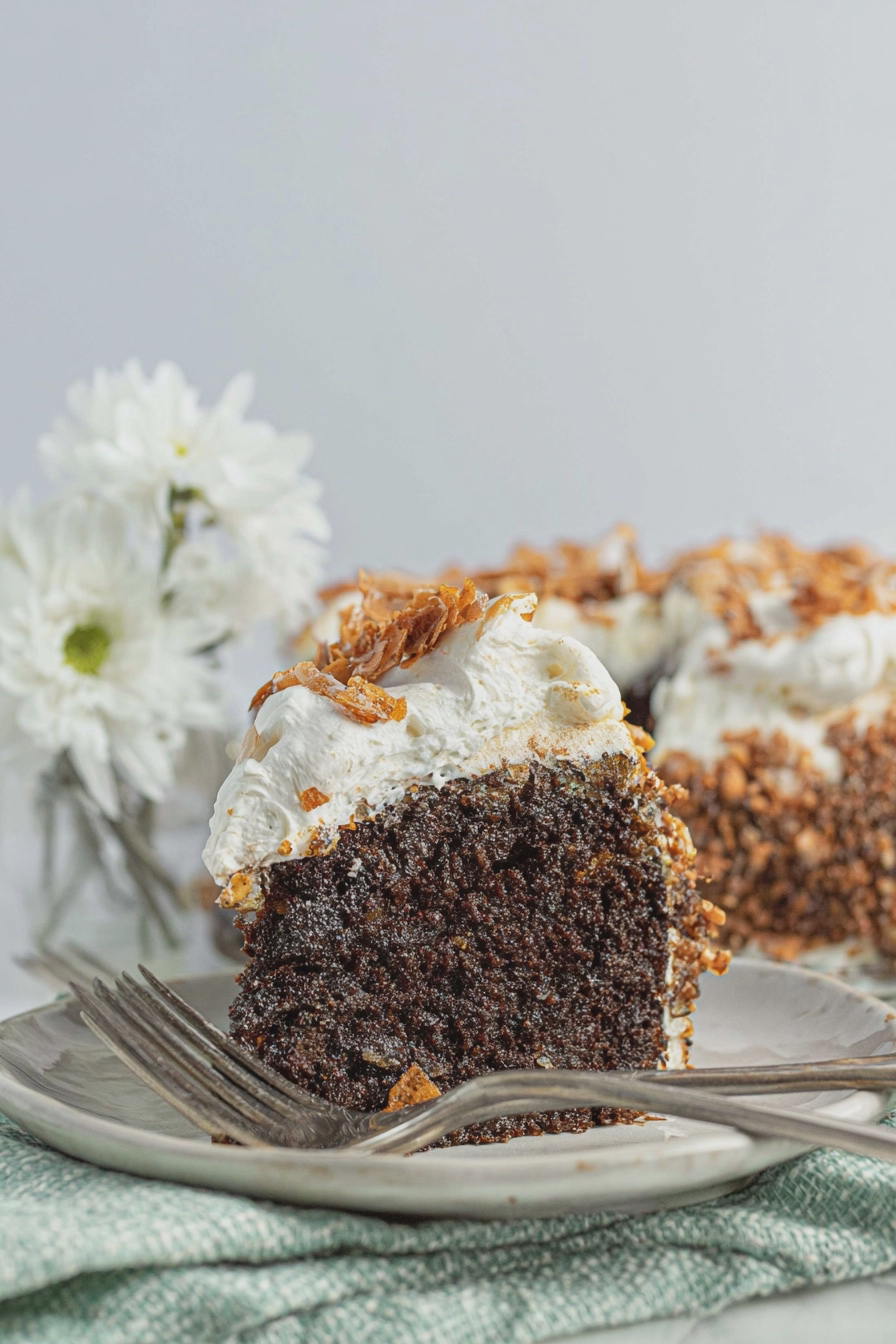
I love the way the glossy chocolate and warm caramel sink into the cake and then top it with pillowy whipped cream and shards of crunchy candy — it reads indulgent on the table and tastes even better. In my kitchen I learned which steps make the difference between a dense, soggy slab and a perfectly moist, layered dessert that people go back for seconds of.
This post contains my notes for getting every layer right — the cake, the soaking, the sauces, and a stable whipped topping that holds up at least through dessert service. I also include sensible variations for gluten-free and vegan guests so everyone at the party can enjoy a slice.
Why Holy Cow Cake Is the Dessert Your Party Needs
Holy Cow Cake earned its reputation because it gives you everything a party crowd looks for: dramatic appearance, multiple textures, and a familiar lineup of flavors. The base is chocolate — deep and slightly bitter — balanced by sweet caramel and hot fudge, finished with crunchy Butterfinger pieces and a cloud of whipped cream.
The cake is as much about the contrast of textures as it is about flavor. Imagine a moist chocolate layer that’s taken on ribbons of condensed milk and chocolate sauce so it’s lush but not falling apart, then contrasted with crunchy candy and silky whipped cream on top. Guests respond to that contrast every time.
There’s also a bit of nostalgia baked into the dish: candy on a cake reads like a celebration. If you want to round out a dessert table, I like to set this next to a lighter, brighter option to balance all that richness. Complement the flavors of your dessert spread with a refreshing no-bake passion fruit cheesecake that balances sweetness and tang.
What You’ll Need for Holy Cow Cake
Gathering everything ahead of time makes the assembly effortless the day you put the layers together. Below I list ingredients and tools, and I note simple swaps if you need gluten-free or vegan options.
- Chocolate cake mix (or homemade chocolate cake) – The cake is your base; choose a richer chocolate or use bitter-sweet chocolate in the batter for balance. For gluten-free use a labeled gluten-free mix or a homemade gluten-free cake batter.
- Bittersweet chocolate chips – Add into the batter for pockets of melty chocolate; bittersweet keeps the cake from tasting too sweet.
- Butterfinger-style candy bars – Provide crunch and that peanut-buttery, crispy texture; you can swap for other crisp candy bars if needed or use a gluten-free candy option.
- Sweetened condensed milk – The liquid that soaks into the cake and creates that luscious density; full-fat gives the best mouthfeel.
- Caramel sauce – Adds a buttery, deep sweetness; homemade or store-bought both work.
- Chocolate sauce / hot fudge – A thicker sauce gives glossy dark veins through the cake.
- Heavy cream – For the whipped topping; if you need vegan use chilled full-fat coconut cream or a stabilized aquafaba method.
- Vanilla and sugar (or instant pudding mix) – Sugar sweetens the whipped cream; instant pudding mix is an easy stabilizer to help the topping hold its shape.
- Tools – A mixing bowl, electric mixer (hand or stand), 9×13 baking pan, a small dowel or straw for poking holes, and a good spatula for spreading. A fine grater or peeler is handy for chocolate curls as a garnish.
Step-by-Step Instructions to Make Holy Cow Cake from Scratch
Below I focus on making the chocolate cake from scratch rather than using a boxed mix. Use room-temperature dairy and eggs for a lighter crumb, and measure by weight if you want consistency.
- Whisk together your dry ingredients: high-quality cocoa, all-purpose flour (or gluten-free blend), sugar, baking powder, and a pinch of salt.
- In a separate bowl, combine room-temperature eggs, a neutral oil or melted butter, warm coffee or hot water to bloom the cocoa, and vanilla; the warm liquid helps the cocoa fully dissolve and intensifies chocolate flavor.
- Fold wet into dry just until combined; overmixing tightens the crumb. If using chocolate chips, fold them in last so they don’t sink to the bottom.
- Pour the batter into a prepared pan and bake until a toothpick comes out with a few moist crumbs; the cake will continue to set as it cools.
- Cool the cake slightly before the soaking step; you want it warm enough to absorb but not piping hot.
Pro-Tips
- I always use room-temperature eggs and dairy — the batter emulsifies better and the crumb is lighter.
- For a deeper chocolate profile, replace part of the flour with a small amount of dutch-process cocoa.
- Chop candy bars while the cake bakes to streamline assembly.
Troubleshooting
- If your cake is gummy in the center, you likely underbaked; tent with foil and give it a few more minutes next time.
- If the cake collapses in the middle, check your leavening freshness and avoid overmixing the batter.
- I’ve noticed that very dense cakes don’t absorb sauces as well — if that happens, slice a few shallow slits with a knife to help liquids penetrate.
How to Soak the Cake Without Turning It Soggy
Soaking is where Holy Cow Cake earns its reputation, but it’s easy to overdo it. The goal is saturated, tender crumbs — not a pudding.
- Use a small dowel, skewer, or a sturdy straw to create an even network of holes across the warm cake; the holes should be numerous but not so large that the cake falls apart.
- Pour liquids in stages: first the sweetened condensed milk, waiting a few seconds between pours so the cake absorbs evenly, then the chocolate sauce and caramel. Watch the cake’s surface — once it looks glossy and slightly darkened, stop adding liquid.
- A good visual cue is the weight of the cake: it will feel noticeably heavier but still hold its structure. If liquid pools on top, you’ve added too much; gently blot the surface and chill to firm it up.
- Cover and refrigerate overnight so the flavors meld and the cake sets; the resting time is essential for the best texture.
Keeping the Whipped Topping Stable and Fluffy
The whipped topping needs to be soft, spreadable, and stable enough to sit on top of the soaked cake without weeping or collapsing during service.
- Start with very cold heavy cream and a chilled mixing bowl; cold fat traps air more effectively and gives better volume.
- Add sugar and a stabilizer — I use a small amount of instant pudding mix or cornstarch — to help the cream hold peaks longer and resist weeping.
- Whip to medium-stiff peaks; overbeating will make the cream grainy and more likely to separate.
- If the whipped cream refuses to thicken, it’s usually too warm; place the bowl over an ice bath and continue whipping.
- For additional ideas on stabilizing whipped toppings, see this guide featured in the strawberry shortcake cake recipe.
How to Store Your Holy Cow Cake
Proper storage preserves texture and prevents the topping from weeping into the cake excessively.
- Keep the cake refrigerated, covered loosely with plastic wrap or a cake dome to prevent the whipped cream from absorbing fridge odors and to keep the surface from drying.
- The cake holds well for several days; expect best quality for up to five days in the refrigerator. After that, textures and flavors begin to degrade.
- Look for signs of spoilage: off smells from dairy components, visible mold, or a separation between layers that looks curdled — discard if any of these appear.
Variations for Dietary Needs: Gluten-Free and Vegan Options
Adaptations can keep the spirit of Holy Cow Cake intact — rich, saucy, and crunchy — while meeting dietary needs. Below are practical swaps and what to expect from them.
- Gluten-Free Cake – Use a reliable gluten-free chocolate cake mix or a homemade blend with rice flour and starches; the texture may be slightly more tender, so handle gently and watch baking times.
- Gluten-Free Candy – Some candy bars contain wheat; choose a labeled gluten-free crunchy candy or rough up toasted nuts for texture instead.
- Vegan Cake – Make a vegan chocolate cake with a plant-based milk, flax or chia egg replacer, and neutral oil. The cake will be slightly different in crumb but still soaks well.
- Vegan “Whipped Cream” – Chill full-fat coconut cream, scoop the solidified portion, and whip with a little powdered sugar and vanilla. Aquafaba (chickpea brine) can be whipped into a stable topping if you prefer a lighter finish.
- Dairy-Free Sauces – Use dairy-free caramel and chocolate sauces made with coconut milk or plant-based butters; they won’t be identical in flavor but will give the same glossy, saucy look.
Creative Serving Suggestions or Garnishes to Elevate Presentation
Presentation makes people reach for a plate before they even taste the cake. Use color, height, and texture to make each slice sing.
- Finish the cake with chocolate curls, a drizzle of caramel, and a sprinkling of chopped candy bars for contrast.
- Arrange seasonal fruit — sliced strawberries, raspberries, or orange zest — around the platter to cut through the richness and brighten the plate.
- Serve slices on contrasting plates (white or pale colors) so the dark chocolate and caramel pop visually.
- For an eye-catching dessert table, consider adding a vibrant strawberry crunch cake as an additional sweet option.
Make-Ahead Timeline and Reheating for Parties
Plan your time so you can assemble without stress: this cake benefits from resting overnight, so schedule accordingly.
- Day before: Bake the cake base, poke and soak it with the condensed milk and sauces, then refrigerate covered overnight to set and meld flavors.
- Day of serving: Chop candy, whip and stabilize the cream, then top the cake and finish with garnishes a few hours before guests arrive.
- Freezing: You can freeze individual slices wrapped tightly; thaw in the refrigerator. Note that whipped cream texture may change after freezing, so it’s better to freeze unfrosted portions if possible.
- Reheating: This cake is served chilled — do not reheat. If you like a warmer element, serve a small ramekin of warm hot fudge at the table for guests to spoon over chilled slices.
- Planning your dessert ahead of time? Learn more about make-ahead cakes to streamline your party prep.
Frequently Asked Questions
Can I make Holy Cow Cake ahead of time?
Absolutely! In fact, it’s best to make it a day in advance and let it soak overnight in the fridge to enhance the flavors.
Is there a way to make this cake gluten-free?
Yes! You can use a gluten-free chocolate cake mix or make a homemade gluten-free cake to substitute for the standard cake.
Can I use whipped topping instead of homemade whipped cream?
Definitely! Store-bought whipped topping works well, but be sure to follow the tips for keeping it stable and fluffy.
What can I substitute for Butterfingers?
You can use any similar chocolate-covered candy bar or even mix and match different candies to create your unique twist.
How do I store leftovers?
Store any leftover Holy Cow Cake in an airtight container in the refrigerator for up to 5 days for optimal freshness.
Holy Cow Cake
Ingredients
Method
- Mix the batter for the chocolate cake according to the instructions but stir in 1/2 cup bittersweet chocolate chips.
- Bake the cake according to the recipe directions.
- Poke holes in hot cake using a small dowel or straw.
- Pour the Eagle Brand sweetened condensed milk over the hot cake, giving it a few seconds to soak in.
- Pour the chocolate syrup over the cake, giving it a few seconds to soak in.
- Pour the caramel over the cake.
- Cover and refrigerate overnight.
- Next day sprinkle the cake with 5 chopped Butterfingers.
- Whip the cream with the sugar and instant pudding mix until it is thick and spreadable.
- Top the cake with the whipped cream mixture and cover with the remaining chopped Butterfingers.


