There’s something deeply nostalgic about the smell of fresh bread baking in the oven. For me, it brings back vivid memories of watching my grandmother carefully knead dough on our old wooden kitchen table. Her homemade bread was soft on the inside, crisp on the outside, and always filled the house with warmth. Back then, it seemed like magic—something too complex for a novice cook. But the truth is, making your own bread can be surprisingly simple and incredibly satisfying, even for beginners.
This Homemade Bread Recipe for Beginners easy sheet pan dinner alternative focuses on a lemon herb chicken recipe that saves time, but today we’re going back to basics with another form of quick and healthy meals: homemade bread. This recipe strips away the complications and delivers a foolproof method perfect for anyone just stepping into the world of baking.
Why This Recipe is Special
This Homemade Bread Recipe for Beginners stands out because it demystifies what many perceive as an intimidating process. You don’t need a mixer, special equipment, or obscure ingredients. With just a few pantry staples and a little patience, you can produce two beautiful loaves that are perfect for sandwiches, toasts, or as a warm side with your favorite soup.
More than just food, this recipe invites you to slow down and reconnect with a timeless kitchen ritual. It’s practical, wholesome, and an excellent way to impress yourself—or someone else—with your cooking skills.
Ingredients and Preparation
Before we dive into steps, let’s explore what makes each ingredient essential—and what swaps you can consider if you’re missing something.
Bread Flour
Gives the bread structure and a chewy texture thanks to its high protein content. You can substitute with all-purpose flour, but expect a slightly softer crumb.
Water
Hydrates the flour and activates the yeast. Room-temperature water works best to encourage a proper rise without killing the yeast.
Instant Yeast
Acts as the rising agent. It’s beginner-friendly because it doesn’t need to be proofed. If using active dry yeast, dissolve it in warm water first.
Salt
Brings out the flavor in the dough and helps regulate yeast activity. Too much salt can hinder the rise, so use it thoughtfully.
Oil
Adds moisture and improves the bread’s texture. You can use vegetable oil, olive oil, or even melted butter for a richer flavor.
Step-by-Step Instructions
Step 1
In a large mixing bowl, combine your bread flour, instant yeast, and salt. Stir until evenly distributed.
Step 2
Gradually pour in the water while mixing with a spoon or your hands. The dough will be shaggy and sticky—don’t worry, that’s exactly what you want at this stage.
Step 3
Add the oil and continue mixing until it’s incorporated into the dough. Knead the dough lightly for about 5 minutes, just until it begins to smooth out.
Step 4
Cover the bowl with a clean towel and let the dough rise in a warm spot for 1 to 1.5 hours, or until it has doubled in size. If your kitchen is cool, place the bowl near your oven or a sunny window.
Step 5
Once risen, punch down the dough gently to release excess air. Divide it into two equal portions and shape them into loaves.
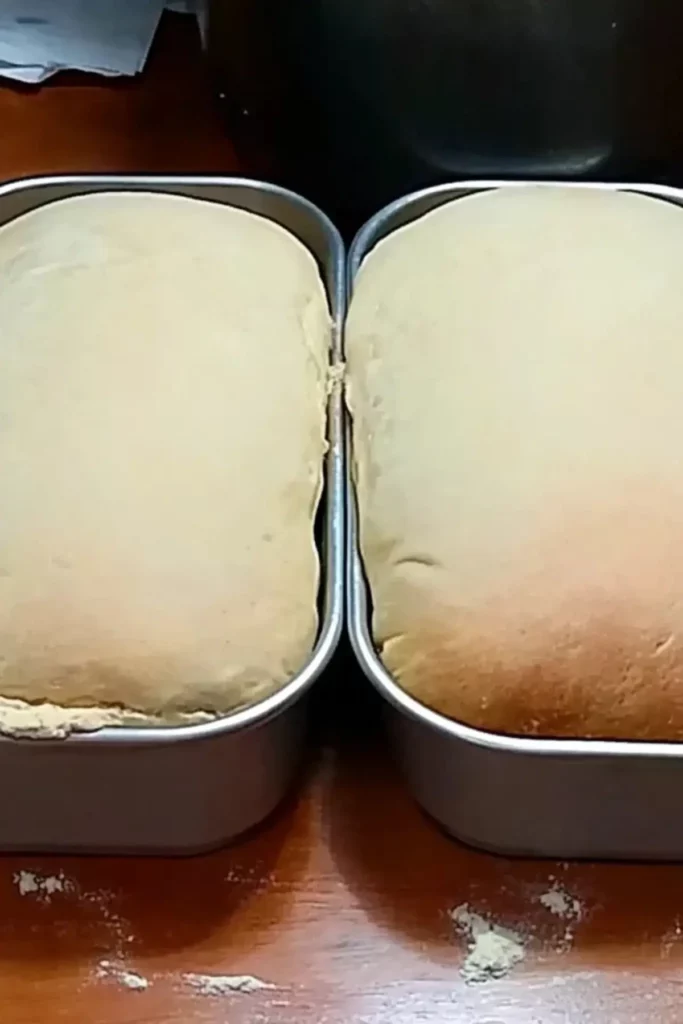
Step 6
Place each loaf into a greased baking pan or on a lined baking sheet. Cover and let rise again for 30–45 minutes, until they puff up noticeably.
Step 7
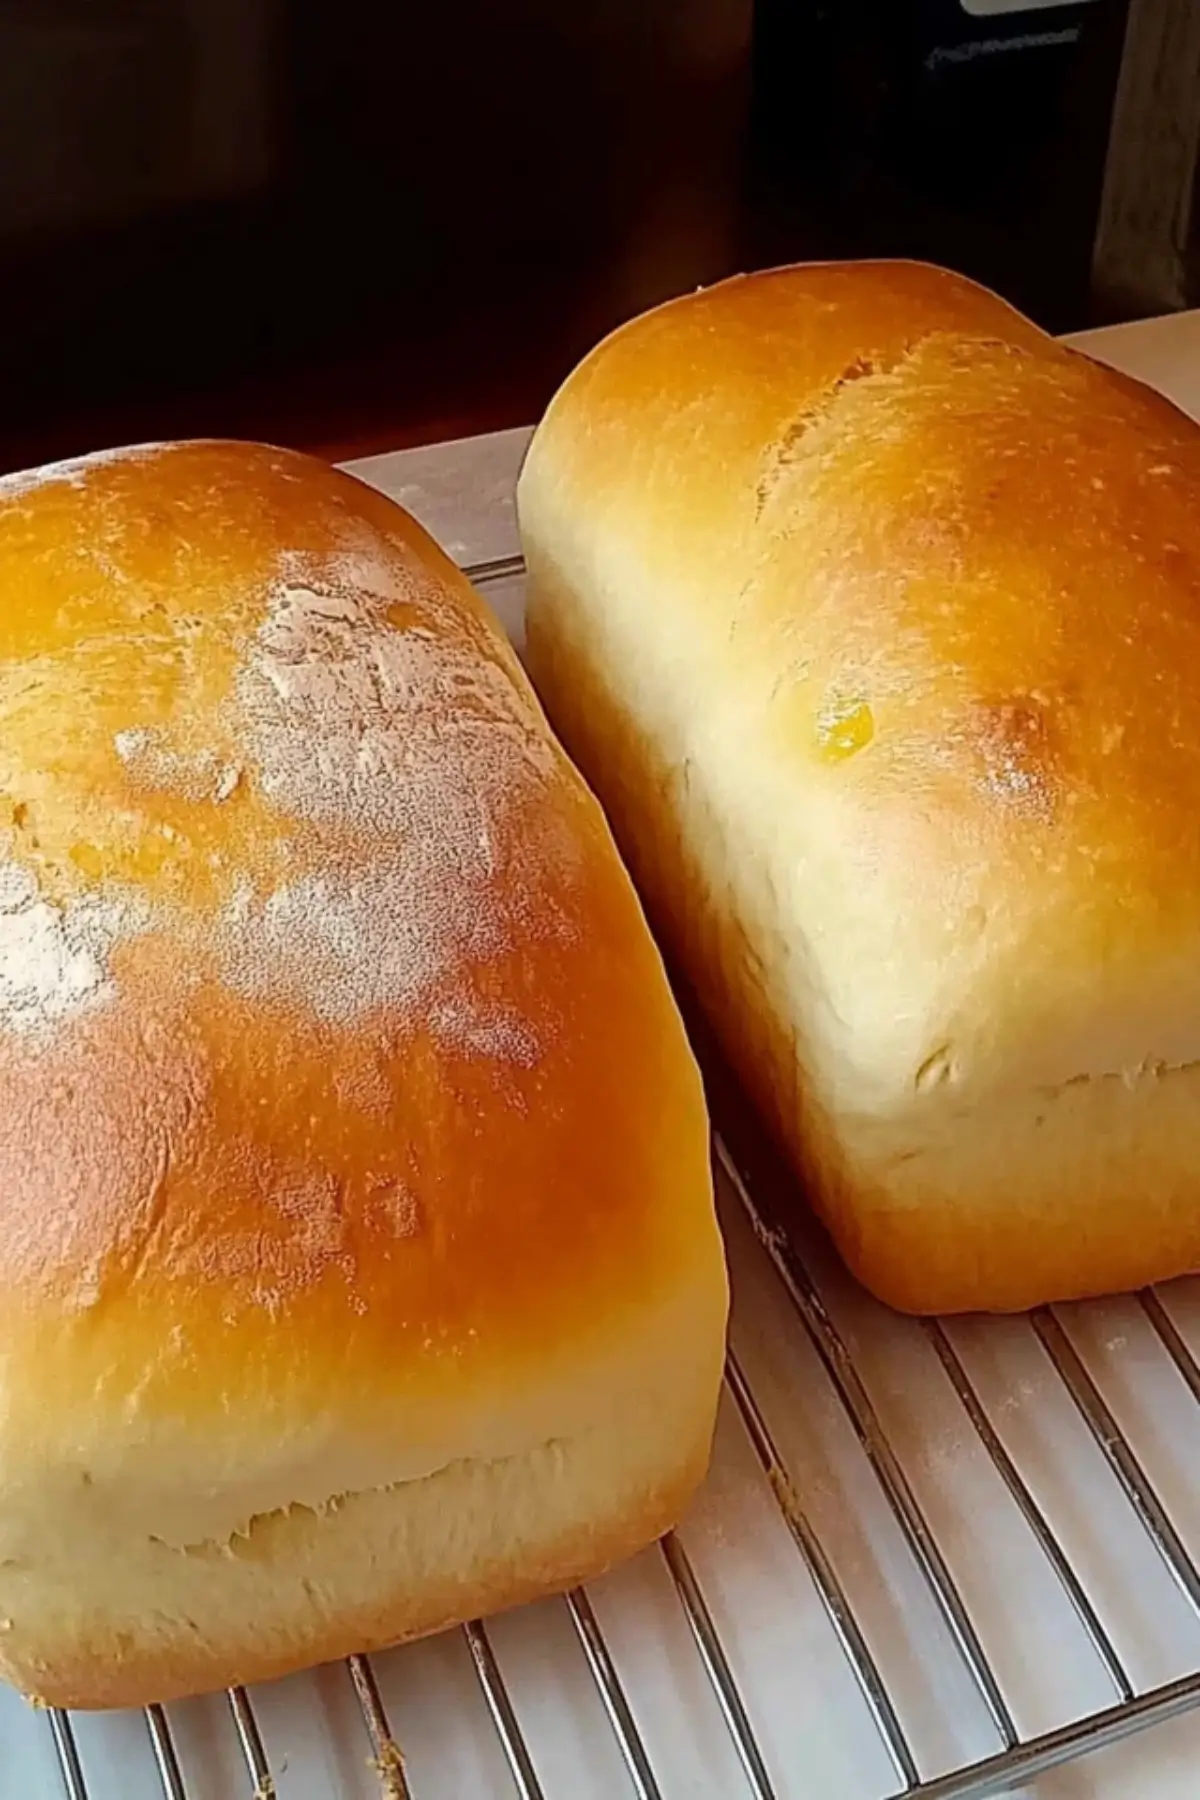
Preheat your oven to 400°F (200°C). Bake the loaves for 35–40 minutes, or until they’re golden brown and sound hollow when tapped on the bottom.
Step 8
Remove from the oven and allow the bread to cool on a wire rack. This prevents sogginess and keeps the crust crisp.
Beginner Tips and Notes
If your dough feels too sticky: Lightly flour your hands instead of the dough. Adding too much flour can dry it out.
To avoid overproofing: Don’t let the dough rise too long. Once it doubles in size, it’s ready.
No stand mixer? No problem: Hand-kneading works just fine. It’s also a great arm workout and helps you connect with the dough.
If the crust browns too quickly: Loosely cover the loaves with foil during the last 10 minutes of baking.
Want a softer crust? Brush the top with melted butter right after baking.
Serving Suggestions
This Homemade Bread Recipe for Beginners is versatile and pairs well with a wide range of meals. Enjoy it warm with a smear of butter or honey, or turn it into the foundation for sandwiches, avocado toast, or even French toast.
For dinner, it complements soups, stews, and pasta dishes beautifully. Try serving it alongside a salad with lemon vinaigrette for a complete quick and healthy meal.
To store, wrap the loaves in a clean kitchen towel and keep them at room temperature for up to three days. For longer storage, slice and freeze in a zip-top bag—just toast slices straight from the freezer when needed.
Conclusion
Homemade Bread Recipe for Beginners might seem like a big leap if you’re just starting out in the kitchen, but this recipe proves it’s an easy sheet pan dinner alternative that happens to come out of the oven as a loaf. With minimal ingredients and maximum comfort, it’s a recipe that builds confidence as much as flavor.
Give it a try, and let us know how your first loaves turned out. Did they remind you of a childhood memory or inspire a new weekend ritual? Share your experience in the comments below—we’d love to hear your story.
FAQ About Homemade Bread Recipe for Beginners
Q1: Can I use all-purpose flour instead of bread flour?
Yes, all-purpose flour can be used in place of bread flour, though the texture may be slightly less chewy. It’s still a great option for beginners.
Q2: Do I need a stand mixer for this recipe?
No, this recipe is designed for hand mixing and kneading. It’s perfect for anyone without special kitchen equipment.
Q3: How do I know when the bread is fully baked?
The bread is done when it’s golden brown and sounds hollow when tapped on the bottom. You can also use a thermometer—internal temp should be around 190°F.
More Relevant Recipes
Print
Homemade Bread Recipe for Beginners
- Total Time: 2 hours 40 minutes
- Yield: 2 loaves 1x
- Diet: Vegetarian
Description
A simple and foolproof homemade bread recipe perfect for beginner bakers. With just five basic ingredients, this recipe yields two golden, crusty loaves that are great for sandwiches, toasts, or warm with butter.
Ingredients
- 7 cups bread flour
- 3 cups water
- 2 tablespoons instant yeast (or 2 packets)
- 3 teaspoons salt
- 2 tablespoons oil (vegetable, olive, or melted butter)
Instructions
- In a large mixing bowl, combine bread flour, instant yeast, and salt. Stir until evenly mixed.
- Gradually add water while mixing with a spoon or hands until a shaggy dough forms.
- Add oil and mix until incorporated. Knead lightly for about 5 minutes until the dough begins to smooth out.
- Cover the bowl with a clean towel and let the dough rise in a warm place for 1 to 1.5 hours or until doubled in size.
- Punch down the dough, divide into two equal portions, and shape into loaves.
- Place loaves into greased pans or on a lined baking sheet. Cover and let rise for 30–45 minutes until noticeably puffed.
- Preheat oven to 400°F (200°C). Bake for 35–40 minutes or until golden brown and hollow-sounding when tapped.
- Remove from oven and cool on a wire rack to maintain a crisp crust.
Notes
- If dough is too sticky, flour your hands instead of adding extra flour to the dough.
- Do not overproof the dough; once doubled in size, proceed to the next step.
- Hand-kneading works fine—no stand mixer required.
- Cover loaves loosely with foil if the crust browns too quickly during baking.
- For a softer crust, brush the top with melted butter immediately after baking.
- Prep Time: 2 hours
- Cook Time: 40 minutes
- Category: Bread
- Method: Baking
- Cuisine: American
Nutrition
- Serving Size: 1 slice (1/16 of loaf)
- Calories: 160
- Sugar: 1g
- Sodium: 290mg
- Fat: 2g
- Saturated Fat: 0.3g
- Unsaturated Fat: 1.5g
- Trans Fat: 0g
- Carbohydrates: 30g
- Fiber: 1g
- Protein: 5g
- Cholesterol: 0mg