There is something truly magical about the smell of freshly baked bread wafting through the kitchen. It brings warmth, nostalgia, and a sense of home. I remember the first time I attempted to bake a batch of soft mini buns; I was nervous about handling yeast, kneading the dough correctly, and achieving the perfect texture. However, with a simple and straightforward recipe like this one, I quickly learned that baking bread doesn’t have to be intimidating.
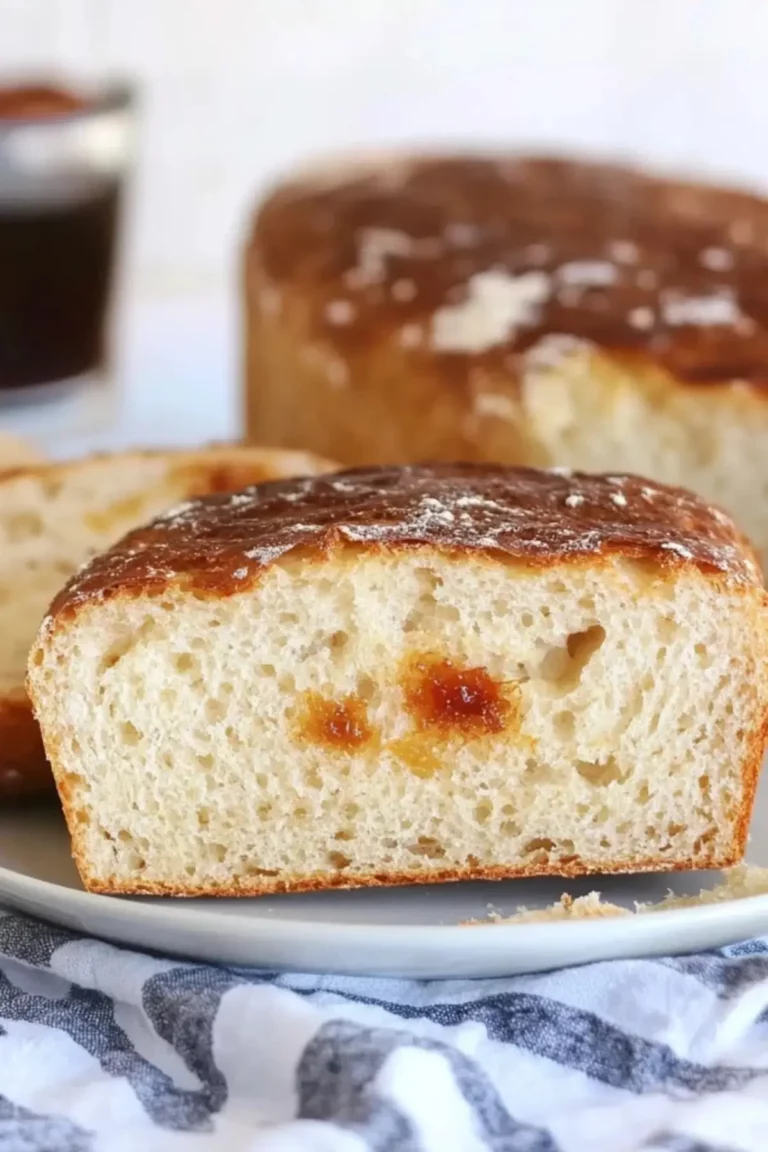
Milk and Sugar Mini Buns are the perfect beginner-friendly recipe. They are soft, slightly sweet, and sprinkled generously with a milk-sugar mixture that melts beautifully into the warm bread. These bite-sized treats are easy to make and ideal for breakfast, snack time, or even as a delightful addition to afternoon tea. If you are new to baking, this recipe will guide you through each step with ease.

Why This Recipe is Special
This recipe stands out because it delivers a bakery-quality result with minimal effort. The combination of milk and sugar creates a tender, slightly sweet dough that is both fluffy and flavorful. The buns are small and bite-sized, making them perfect for sharing. Here’s why this recipe is perfect for you:
- Beginner-friendly: Simple steps and easy-to-follow instructions make this an ideal recipe for first-time bakers.
- Minimal ingredients: Uses basic pantry staples like flour, sugar, yeast, and milk powder.
- Customizable: Can be flavored with cinnamon, vanilla, or even filled with jam or chocolate.
- Soft and fluffy texture: The milk in the dough ensures a pillowy-soft texture that stays moist.
- Perfect for any occasion: Great for breakfast, tea time, or as a snack for kids.
Ingredients and Their Role
Each ingredient in this recipe serves a purpose in creating the perfect mini buns.
- Flour: Provides the structure and base for the buns.
- Yeast: The leavening agent that makes the dough rise, creating a light and airy texture.
- Warm Water: Activates the yeast and helps with gluten development.
- Milk: Enhances the softness of the dough and adds a subtle richness.
- Egg: Contributes to the structure and gives the bread a nice golden color.
- Butter: Adds moisture, softness, and a slight buttery flavor.
- Sugar: Sweetens the dough and activates the yeast.
- Salt: Balances the sweetness and enhances the overall flavor.
- Milk Powder: Adds a rich, creamy flavor and makes the buns extra tender.
- Egg Wash: Gives the buns a shiny, golden-brown finish.
Ingredient Substitutes
- Flour Alternative: Bread flour can be used for a slightly chewier texture.
- Dairy-Free Option: Substitute milk with almond or oat milk and use dairy-free butter.
- Sugar Swap: Honey or maple syrup can be used in place of sugar.
- Vegan Version: Replace the egg with a flaxseed or chia seed mixture.
Step-by-Step Instructions
Step 1: Activate the Yeast
In a small bowl, dissolve the yeast in warm water (about 110°F). Let it sit for about 5 minutes until it becomes foamy. This step ensures that the yeast is active and ready to make the dough rise.
Step 2: Mix the Wet Ingredients
In a large mixing bowl, combine the warm milk, softened butter, sugar, egg, and salt. Stir well until everything is fully mixed. Then, add the activated yeast mixture and mix again.
Step 3: Form the Dough
Gradually add 3 cups of flour to the wet ingredients, stirring continuously. Slowly incorporate additional flour as needed until the dough starts forming into a soft, slightly sticky ball.
Step 4: Knead the Dough
Transfer the dough to a lightly floured surface. Knead for 6-10 minutes until it becomes smooth, elastic, and stretchy. If the dough is too sticky, add a little more flour, but avoid over-flouring, as this can make the buns dense.
Step 5: First Rise
Place the kneaded dough in a greased bowl, cover it with plastic wrap or a kitchen towel, and let it rise for about 1 to 1.5 hours, or until doubled in size.
Step 6: Shape the Mini Buns
Once the dough has risen, punch it down gently and divide it into small portions, about 1½ inches in diameter. Roll each portion into a smooth ball and arrange them closely together in a greased 9×13-inch baking pan.
Step 7: Second Rise
Cover the shaped buns with a towel and let them rise again for another hour until they become puffy and double in size.
Step 8: Prepare the Topping
In a small bowl, mix milk powder and sugar. Set aside for sprinkling later.
Step 9: Bake the Buns
Preheat the oven to 350°F (175°C). Brush the tops of the buns with a beaten egg to give them a glossy golden finish. Sprinkle half of the milk-sugar mixture evenly over the buns before baking.
Step 10: Final Touches
Bake the buns for 17-22 minutes, or until golden brown. Remove from the oven, let them cool slightly, and then sprinkle the remaining milk-sugar mixture over the warm buns.
Step 11: Enjoy!
Serve warm and enjoy the delicate sweetness and fluffy texture of these mini buns.

Beginner Tips and Notes
- How to Know If Your Dough Is Kneaded Enough: Stretch a small piece between your fingers—if it forms a thin, elastic “windowpane” without tearing, it’s ready.
- Troubleshooting Yeast Issues: If your yeast doesn’t foam after sitting in warm water, it may be expired or the water was too hot.
- Evenly Sized Buns: Use a kitchen scale to weigh each dough portion for uniform buns.
- Prevent Overbaking: Check at the 17-minute mark. If the tops brown too quickly, cover with foil.
Serving Suggestions
- With Coffee or Tea: Perfect for an afternoon snack with a cup of tea or coffee.
- With Butter or Jam: Spread with butter, honey, or jam for extra flavor.
- As a Dessert: Drizzle with melted chocolate or serve with whipped cream.
- For Breakfast: Pair with eggs and fresh fruit for a balanced meal.
Storage Tips
- Room Temperature: Store in an airtight container for up to 3 days.
- Refrigeration: Keep in the fridge for up to a week and warm slightly before serving.
- Freezing: Freeze for up to 2 months. Reheat in the oven or microwave before serving.
Conclusion
These Milk and Sugar Mini Buns are the ultimate beginner-friendly recipe. They are simple, soft, and have a subtle sweetness that makes them irresistible. Whether you’re new to baking or just looking for a quick and easy homemade treat, this recipe guarantees a rewarding experience.
Have you tried making these mini buns? Let me know how they turned out in the comments below! Share your baking journey, tips, or any creative twists you added. Happy baking!
FAQ About Milk and Sugar Mini Buns
Can I use instant yeast instead of active dry yeast?
Yes, you can use instant yeast instead of active dry yeast. If using instant yeast, you can mix it directly with the dry ingredients and skip the proofing step in warm water.
Why did my buns turn out dense instead of soft?
Dense buns usually result from not kneading the dough long enough or using too much flour. Ensure you knead until the dough is elastic and only add flour gradually to prevent a dry dough.
Can I make these buns without egg?
Yes, you can substitute the egg with ¼ cup of unsweetened applesauce or a flaxseed egg (1 tablespoon ground flaxseed mixed with 3 tablespoons of water).
More Relevant Recipes
- Yogurt Flatbreads. 2 basic ingredients. So easy & ready in minutes!
- Seeded Oat Bread (No Kneading!)
- Sweet Alabama Pecan Bread

Milk and Sugar Mini Buns
- Total Time: 2 hours 30 minutes (including rising time)
- Yield: 50–55 mini buns 1x
- Diet: Vegetarian
Description
Milk and Sugar Mini Buns are soft, bite-sized bread rolls sprinkled with a sweet milk powder mixture for a delicate, melt-in-your-mouth texture. Perfect for breakfast, snacks, or pairing with coffee, these light and fluffy buns are easy to make, even for beginners.
Ingredients
For the Dough:
- ¼ cup warm water (110-115°F)
- 2 ¼ teaspoons active dry yeast
- ¾ cup warm milk
- 1 large egg
- ¼ cup unsalted butter, softened
- ¼ cup sugar
- 1 teaspoon salt
- 3 ¼ cups all-purpose flour (plus extra if needed)
For Topping:
- 1 large egg (for egg wash)
- ½ cup sugar
- ½ cup milk powder
Instructions
- Activate the yeast: In a small bowl, dissolve the yeast in warm water and let it sit for about five minutes until it becomes foamy. This step ensures the yeast is active and ready to help the dough rise.
- Mix the wet ingredients: In a large mixing bowl, combine the warm milk, softened butter, sugar, egg, and salt. Stir well to ensure all ingredients are fully incorporated before adding the activated yeast mixture.
- Form the dough: Gradually add 3 cups of flour to the wet ingredients while mixing continuously. If the dough remains too sticky, gradually incorporate a little more flour until it forms a soft and slightly tacky ball.
- Knead the dough: Transfer the dough to a lightly floured surface and knead for 6-10 minutes until it becomes smooth, elastic, and stretchy. The dough is ready when it passes the “windowpane test,” meaning it stretches thin without tearing.
- Let the dough rise: Place the kneaded dough in a greased bowl and cover it with plastic wrap or a clean towel. Allow it to rise for 1 to 1.5 hours until it doubles in size. This step is crucial for achieving soft and airy buns.
- Shape the mini buns: Gently punch down the risen dough to release air bubbles. Divide it into small portions, approximately 1½ inches in diameter, and roll each piece into a smooth ball. Arrange them closely in a greased 9×13-inch baking pan.
- Second rise: Cover the shaped buns with a kitchen towel and let them rise again for about an hour until they puff up and double in size. This second proofing ensures light and fluffy results.
- Prepare the topping: In a small bowl, mix the sugar and milk powder thoroughly. This will be sprinkled over the buns before and after baking for a deliciously sweet and milky finish.
- Bake the buns: Preheat the oven to 350°F (175°C). Lightly beat one egg and brush it over the tops of the risen buns for a golden, glossy finish. Sprinkle half of the milk-sugar mixture evenly over the buns before placing them in the oven. Bake for 17-22 minutes until they turn golden brown.
- Final touch: Let the buns cool slightly after baking, then sprinkle the remaining milk-sugar mixture over them while they are still warm. This adds an extra layer of sweetness and enhances their soft, melt-in-your-mouth texture.
Notes
- Ensure the yeast is fresh and foamy; otherwise, your dough may not rise properly.
- If the dough is too sticky, add flour a little at a time, but avoid over-flouring to maintain softness.
- You can substitute whole milk with almond or oat milk for a dairy-free version.
- Store the buns in an airtight container at room temperature for up to 3 days or freeze for up to 2 months.
- Prep Time: 20 minutes
- Cook Time: 17-22 minutes
- Category: Bread & Rolls
- Method: Baking
- Cuisine: International
Nutrition
- Serving Size: 1 mini bun
- Calories: 164 kcal
- Sugar: 9g
- Sodium: 140mg
- Fat: 4g
- Saturated Fat: 2g
- Unsaturated Fat: 1.5g
- Trans Fat: 0g
- Carbohydrates: 27g
- Fiber: 1g
- Protein: 4g
- Cholesterol: 28mg