This No Bake Heavenly Oreo Dessert is a true crowd-pleaser, combining an Oreo crust, creamy layers, and a delicious topping that’s perfect for any occasion. Whether you’re hosting a party or craving a quick sweet treat, this dessert is an absolute winner. The beauty of this recipe lies in its simplicity — no baking required, just a few layers of ingredients, and the result is a rich, creamy, and indulgent dessert that’s sure to satisfy your sweet tooth.
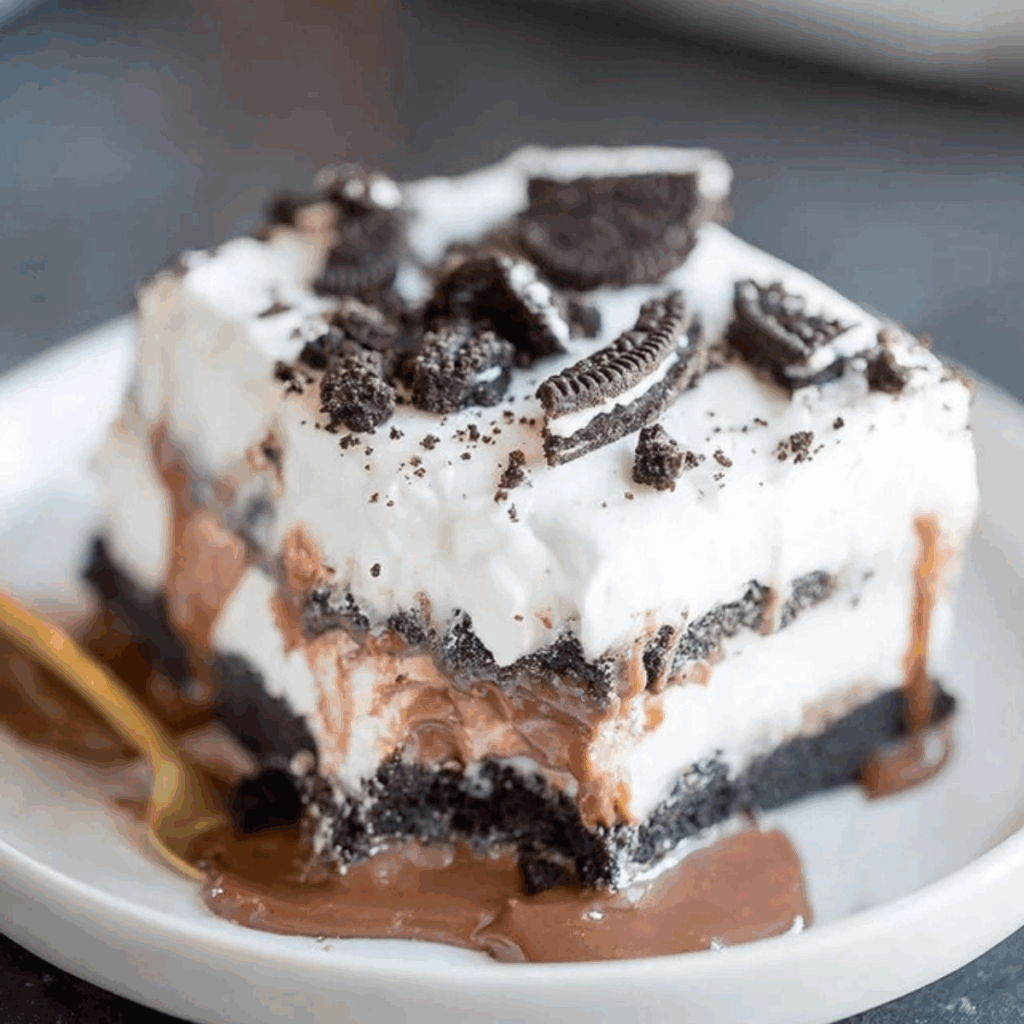
Table of Contents
Why You’ll Love This No Bake Heavenly Oreo Dessert
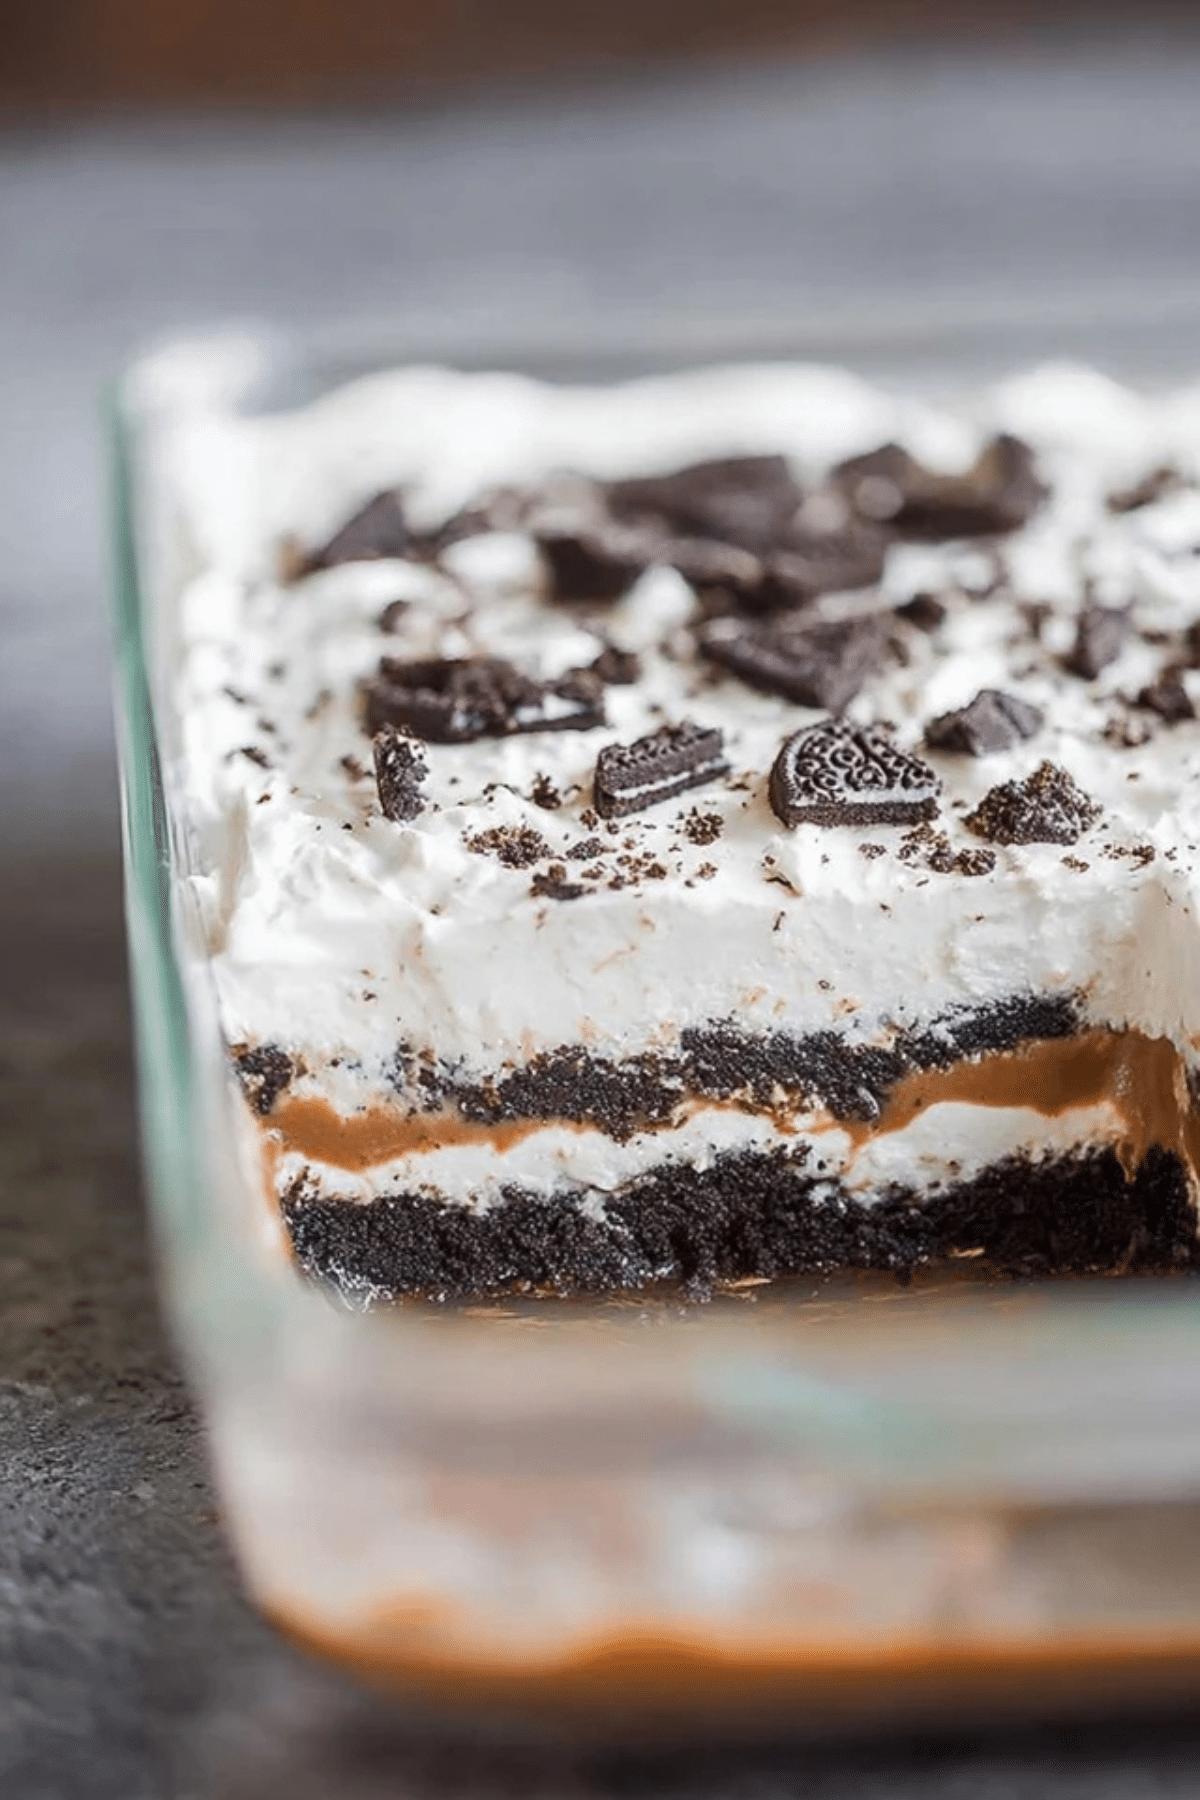
This No Bake Heavenly Oreo Dessert stands out because it’s effortless yet packed with flavor. The layers of crushed Oreos, cream cheese, chocolate pudding, and Cool Whip create a perfect balance of texture and taste. It’s the ideal treat for those who want a no-fuss, no-bake dessert, especially during warm weather when turning on the oven isn’t an option. Plus, it’s a family-friendly dessert that’s perfect for kids and adults alike. The combination of sweet creaminess and Oreo crunch makes it irresistible.
Ingredients
For this No Bake Heavenly Oreo Dessert, the ingredients are simple yet deliver a fantastic taste and texture:
• Double Stuff Oreos: These cookies are the star of the crust, giving it a rich, chocolatey base with a little extra creaminess.
• Unsalted Butter: This helps bind the Oreo crumbs together, forming a solid crust.
• Cream Cheese: A key ingredient in the cream cheese layer, offering a smooth and tangy contrast to the sweet elements of the dessert.
• Powdered Sugar: Adds just the right amount of sweetness to the cream cheese layer.
• Cool Whip: Used in both the cream cheese layer and as the final topping, Cool Whip adds lightness and smoothness to the dessert.
• Instant Chocolate Pudding: The chocolate pudding layer adds richness and a deep chocolate flavor to balance the dessert’s sweetness.
• Milk: The essential ingredient to mix with the pudding mix to create the creamy chocolate layer.
Ingredient Alternatives
Not every ingredient needs to be set in stone. Here are some alternatives if you have dietary preferences or are missing an ingredient:
• Gluten-Free Oreos: For those needing a gluten-free dessert, simply swap in gluten-free Oreos for the regular ones.
• Whipped Cream: If you prefer to use fresh whipped cream instead of Cool Whip, it works fine, but note that it may not hold up as well in warmer temperatures.
• Sugar Substitute: For a lower sugar option, powdered erythritol or other sugar alternatives can be used in place of powdered sugar.
Step-by-Step Instructions for No Bake Heavenly Oreo Dessert
Making this No Bake Heavenly Oreo Dessert is incredibly simple and requires no oven! Just follow these easy steps:
- Prepare the Oreo Crust: Start by crushing your Oreo cookies into small crumbs, either in a Ziploc bag using a rolling pin or in a food processor. Set aside ½ cup of the crumbs for topping. Combine the rest of the crumbs with melted butter, then press the mixture into a 9×13-inch baking dish to form the crust. Refrigerate while you prepare the other layers.
- Make the Cream Cheese Layer: In a mixing bowl, beat the cream cheese until smooth and fluffy, about 3 minutes. Gradually add powdered sugar and beat until fully incorporated. Gently fold in Cool Whip to lighten the texture, then spread this mixture over the prepared Oreo crust.
- Prepare the Pudding Layer: Whisk together the instant chocolate pudding mix and milk for about 2 minutes. Let the mixture sit for 5 minutes to thicken. Once set, spread the pudding evenly over the cream cheese layer.
- Top with Cool Whip and Oreo Crumbs: Spread the remaining Cool Whip over the pudding layer, then sprinkle the reserved Oreo crumbs on top for an extra crunch.
- Chill the Dessert: Cover and refrigerate the dessert for at least 4 hours, or overnight for the best texture.
Tips & Tricks
• Make-Ahead Dessert: This No Bake Heavenly Oreo Dessert is perfect for preparing in advance. Simply make it the night before and let it chill overnight for optimal flavor and texture.
• Texture Check: Be sure to check the consistency of each layer as you go. The cream cheese layer should be smooth and creamy, and the pudding layer should set firmly.
• Leftover Storage: Store leftovers in the fridge in an airtight container for up to 3 days. The dessert may lose some of its firmness over time, so try to enjoy it within a few days for the best texture.
Pairing Ideas and Variations
This No Bake Heavenly Oreo Dessert pairs beautifully with a cup of coffee or a glass of cold milk. You can also add variations to suit your taste:
• Add Fresh Fruit: For a refreshing twist, top the dessert with fresh berries or sliced bananas.
• Peanut Butter Lovers: Add a layer of peanut butter between the cream cheese and pudding layers for a rich, nutty flavor.
• Chocolate Drizzle: Drizzle some melted chocolate or caramel sauce over the top for extra indulgence.
• Make It a Cake: Layer the dessert in a trifle dish or in individual serving cups for a fancier presentation.
Health Benefits and Seasonal Appeal
Although this No Bake Heavenly Oreo Dessert isn’t exactly light, it’s a perfect treat for warmer months. The no-bake aspect means less time in the kitchen during the hot summer days, and the dessert’s cool and creamy texture is refreshing. It’s great for outdoor gatherings, barbecues, and holidays like Christmas and Thanksgiving when you want to serve something indulgent but not too heavy.
This dessert brings together the best of Oreo cookies and classic dessert flavors in a way that’s easy to prepare and share with family and friends.
Conclusion
The No Bake Heavenly Oreo Dessert is the perfect combination of simplicity and indulgence. With minimal ingredients and no baking required, it’s a go-to treat for busy days or special occasions. The layers of Oreo crust, creamy cream cheese, rich chocolate pudding, and fluffy Cool Whip make every bite a little slice of heaven. Whether you’re serving it at a family gathering or enjoying it as an after-dinner treat, this dessert is guaranteed to impress. It’s a crowd-pleaser that’s as easy to make as it is to eat, offering a comforting, chocolatey experience with every spoonful.
Frequently Asked Questions (FAQ)
1. Can I use regular Oreos instead of Double Stuff Oreos?
Yes, you can absolutely use regular Oreos if you prefer. The Double Stuff Oreos add extra creaminess, but regular Oreos will work just as well for the crust and topping.
2. How long does this No Bake Heavenly Oreo Dessert need to chill in the fridge?
For the best results, refrigerate the dessert for at least 4 hours. However, overnight chilling will give you the perfect texture and flavor, allowing the layers to set completely.
3. Can I make this No Bake Heavenly Oreo Dessert gluten-free?
Yes, to make this dessert gluten-free, simply use gluten-free Oreos and ensure that all other ingredients are gluten-free. There are many gluten-free options for Cool Whip and chocolate pudding available.
More Relevant Recipes
- Heavenly Lemon Oreo: A Refreshing No-Bake Dessert Delight
- Oreo Layered Dessert
- Triple Chocolate Cheesecake with Oreo Crust
No Bake Heavenly Oreo Dessert
- Total Time: 4 hours 30 minutes
- Yield: 12 servings 1x
- Diet: Vegetarian
Description
This No Bake Heavenly Oreo Dessert features a delicious Oreo crust, a creamy layer of cream cheese, a rich chocolate pudding layer, and a light, fluffy Cool Whip topping. It’s a perfect dessert for any occasion, especially during the summer when you want something easy and refreshing without turning on the oven.
Ingredients
- 15.35 oz (435.17 g) Double Stuff Oreo Cookies
- ½ cup (113.5 g) unsalted butter, melted and slightly cooled
- 8 oz (226.8 g) cream cheese, softened
- 1 cup (120 g) powdered sugar
- 8 oz (226.8 g) tub Cool Whip
- 5.1 oz (144.58 g) box instant chocolate pudding
- 3 cups (854 ml) milk
- 8 oz (226.8 g) tub Cool Whip (for topping)
Instructions
- Crush the Oreo cookies into small crumbs and reserve ½ cup for the topping. Combine the remaining crumbs with melted butter and press into a 9×13-inch baking dish. Refrigerate while preparing the cream cheese layer.
- In a mixing bowl, beat the cream cheese until smooth. Gradually add powdered sugar, then fold in Cool Whip. Spread over the crust.
- In a separate bowl, whisk together the chocolate pudding mix and milk. Let sit for 5 minutes to thicken, then spread over the cream cheese layer.
- Spread the remaining Cool Whip over the pudding layer and sprinkle with the reserved Oreo crumbs. Cover and refrigerate for at least 4 hours, or overnight for the best texture.
Notes
- Use gluten-free Oreos to make this dessert gluten-free.
- Store leftovers in an airtight container in the fridge for up to 3 days.
- For a richer flavor, consider adding a layer of peanut butter between the cream cheese and pudding layers.
- This dessert can be made the night before and left in the fridge overnight for the best results.
- Prep Time: 30 minutes
- Cook Time: 0 minutes
- Category: Dessert
- Method: No-bake
- Cuisine: American
Nutrition
- Serving Size: 1 serving
- Calories: 486 kcal
- Sugar: 43 g
- Sodium: 458 mg
- Fat: 25 g
- Saturated Fat: 13 g
- Unsaturated Fat: 0 g
- Trans Fat: 0 g
- Carbohydrates: 59 g
- Fiber: 1 g
- Protein: 6 g
- Cholesterol: 54 mg

