I still remember the first time I attempted homemade bread. I was intimidated by the idea of kneading, rising, and all the unknowns that felt like sorcery in the kitchen. But then I discovered No knead rosemary bread. One simple recipe changed my kitchen confidence forever—and rosemary bread quickly became my favorite. There’s something about the aroma of rosemary and garlic wafting through the house that makes a place feel like home.
This easy sheet pan dinner-style bread—baked in a skillet or Dutch oven—requires minimal effort, yet delivers maximum flavor. With just 15 minutes of hands-on time, this recipe is perfect for beginner bakers who want to create bakery-quality bread without fancy tools or techniques. Plus, it’s a quick and healthy meal component you’ll find yourself making again and again.
Why This Recipe is Special
No knead rosemary bread is the perfect entry point for beginners because it removes the most daunting part of bread making: kneading. Instead, it lets time and yeast work their magic while you go about your day. What makes this bread even more magical is how customizable and forgiving it is. With just a few pantry staples and a single mixing bowl, you’ll end up with a rustic loaf that’s golden on the outside and tender on the inside.
This recipe strikes a lovely balance—rich in flavor, warm with herbs, and incredibly versatile. Serve it with soups, pasta, or on its own with a smear of butter. And best of all, it’s naturally vegetarian, uses no sugar, and is loaded with heart-healthy herbs like rosemary and garlic.
Ingredients and Preparation
All-Purpose Flour
Forms the structure of the bread. It’s versatile and creates the perfect balance of chew and fluff. You can swap one cup with whole wheat flour for a nuttier taste and added fiber.
Garlic (Minced)
Adds a robust, savory flavor that intensifies as it bakes. For a milder twist, try roasted garlic or garlic powder.
Fresh Rosemary (Chopped)
The star of the show—earthy and aromatic. Dried rosemary works too (use 1/3 the amount), or substitute with thyme or sage.
Kosher Salt
Enhances flavor. Sea salt or table salt works in a pinch—just use a bit less if swapping.
Black Pepper (Freshly Ground)
Adds a subtle kick and complexity. Optional, but highly recommended.
Instant Yeast
The engine of the rise. Be sure it’s not expired. Active dry yeast works too—just activate it in warm water first.
Room Temperature Water
The hydrating agent. Makes the dough come together and activates the yeast. Use filtered water if possible for better taste.
Cornmeal
Used to dust the skillet, creating a barrier to prevent sticking and giving the bottom a nice crunch. You can substitute with semolina or even flour.
Step-by-Step Instructions
Step 1 In a large bowl, combine flour, garlic, rosemary, salt, pepper, and yeast. Mix dry ingredients thoroughly to ensure even distribution of the yeast and herbs.
Step 2 Add water and stir with a wooden spoon or your hands until a wet, sticky dough forms. It will look messy, but that’s exactly what you want—resist the urge to add more flour.
Step 3 Cover the bowl tightly with plastic wrap and let it rest at room temperature for 18 to 24 hours. You’ll know it’s ready when bubbles form on the surface and the dough looks a bit jiggly.
Step 4 Lightly oil a 10-inch cast iron skillet or Dutch oven, then sprinkle the bottom with cornmeal to prevent sticking.
Step 5 On a floured surface, gently coax the dough into a round shape using your hands. Do not knead—just shape. Then transfer the dough into your prepared skillet.
Step 6 Cover with a clean dish towel and let it rest again for 1.5 to 2 hours. The dough should double in size and spring back slightly when poked.
Step 7 Preheat your oven to 450°F (230°C). Once ready, place your skillet in the oven and bake for 30 to 40 minutes, or until the crust is golden brown and the loaf sounds hollow when tapped.
Step 8 Let cool slightly before slicing. Serve warm for maximum deliciousness.
Beginner Tips and Notes
If your dough is too sticky to handle: That’s normal. Lightly flour your hands and the work surface. Don’t overwork the dough or it may become dense.
If your bread doesn’t rise: Check your yeast. Old or improperly stored yeast won’t activate. Also, ensure your kitchen isn’t too cold—yeast loves warmth.
Want a crustier loaf? Use a Dutch oven with the lid on for the first 20 minutes, then remove the lid to finish baking.
No cast iron? Use an oven-safe baking dish, but note that cast iron or Dutch oven yields the best crust.
Save time next round: Mix the dough the night before and let it rest overnight for a warm, fresh-baked loaf by dinner the next day.
Serving Suggestions
This bread is phenomenal alongside hearty stews, creamy pasta dishes, or roasted vegetables. For a quick snack, toast a slice and top with butter or hummus.
Try pairing it with:
- Tomato basil soup
- Garlic butter shrimp
- A simple olive oil and balsamic dip
Leftover storage: Wrap tightly in foil or place in an airtight container. Store at room temperature for up to 3 days or freeze for up to 3 months. Reheat in the oven at 350°F for 5–10 minutes to bring it back to life.
Conclusion
Bread baking doesn’t have to be hard. This No knead rosemary bread proves that anyone—even total beginners—can bake something truly spectacular at home. If you’ve never made homemade bread before, this is your sign to start. It’s simple, satisfying, and totally foolproof.
Give this easy sheet pan dinner-style bread a go, and don’t forget to share your baking journey in the comments. Whether you stick to the classic rosemary and garlic or jazz it up with cheese and chili flakes, I’d love to hear how it turns out. Happy baking!
FAQ About No-Knead Rosemary Bread
Can I use active dry yeast instead of instant yeast?
Yes, you can use active dry yeast, but you’ll need to activate it first by dissolving it in the warm water before mixing it with the dry ingredients. This extra step ensures the yeast is alive and ready to rise.
What if I don’t have a cast iron skillet?
No problem! You can use a Dutch oven or any oven-safe baking dish. The crust may vary slightly in texture, but the bread will still bake beautifully.
Why didn’t my dough rise properly?
This is often due to expired or improperly stored yeast. Also, cooler room temperatures can slow down the rise. Ensure your yeast is fresh and your kitchen is warm enough.
More Relevant Recipes
- Best Banana Bread Recipe (Moist!) from The Food Charlatan
- How to make Pita Bread at home like a Pro
- Cheesy Garlic Bread Recipe
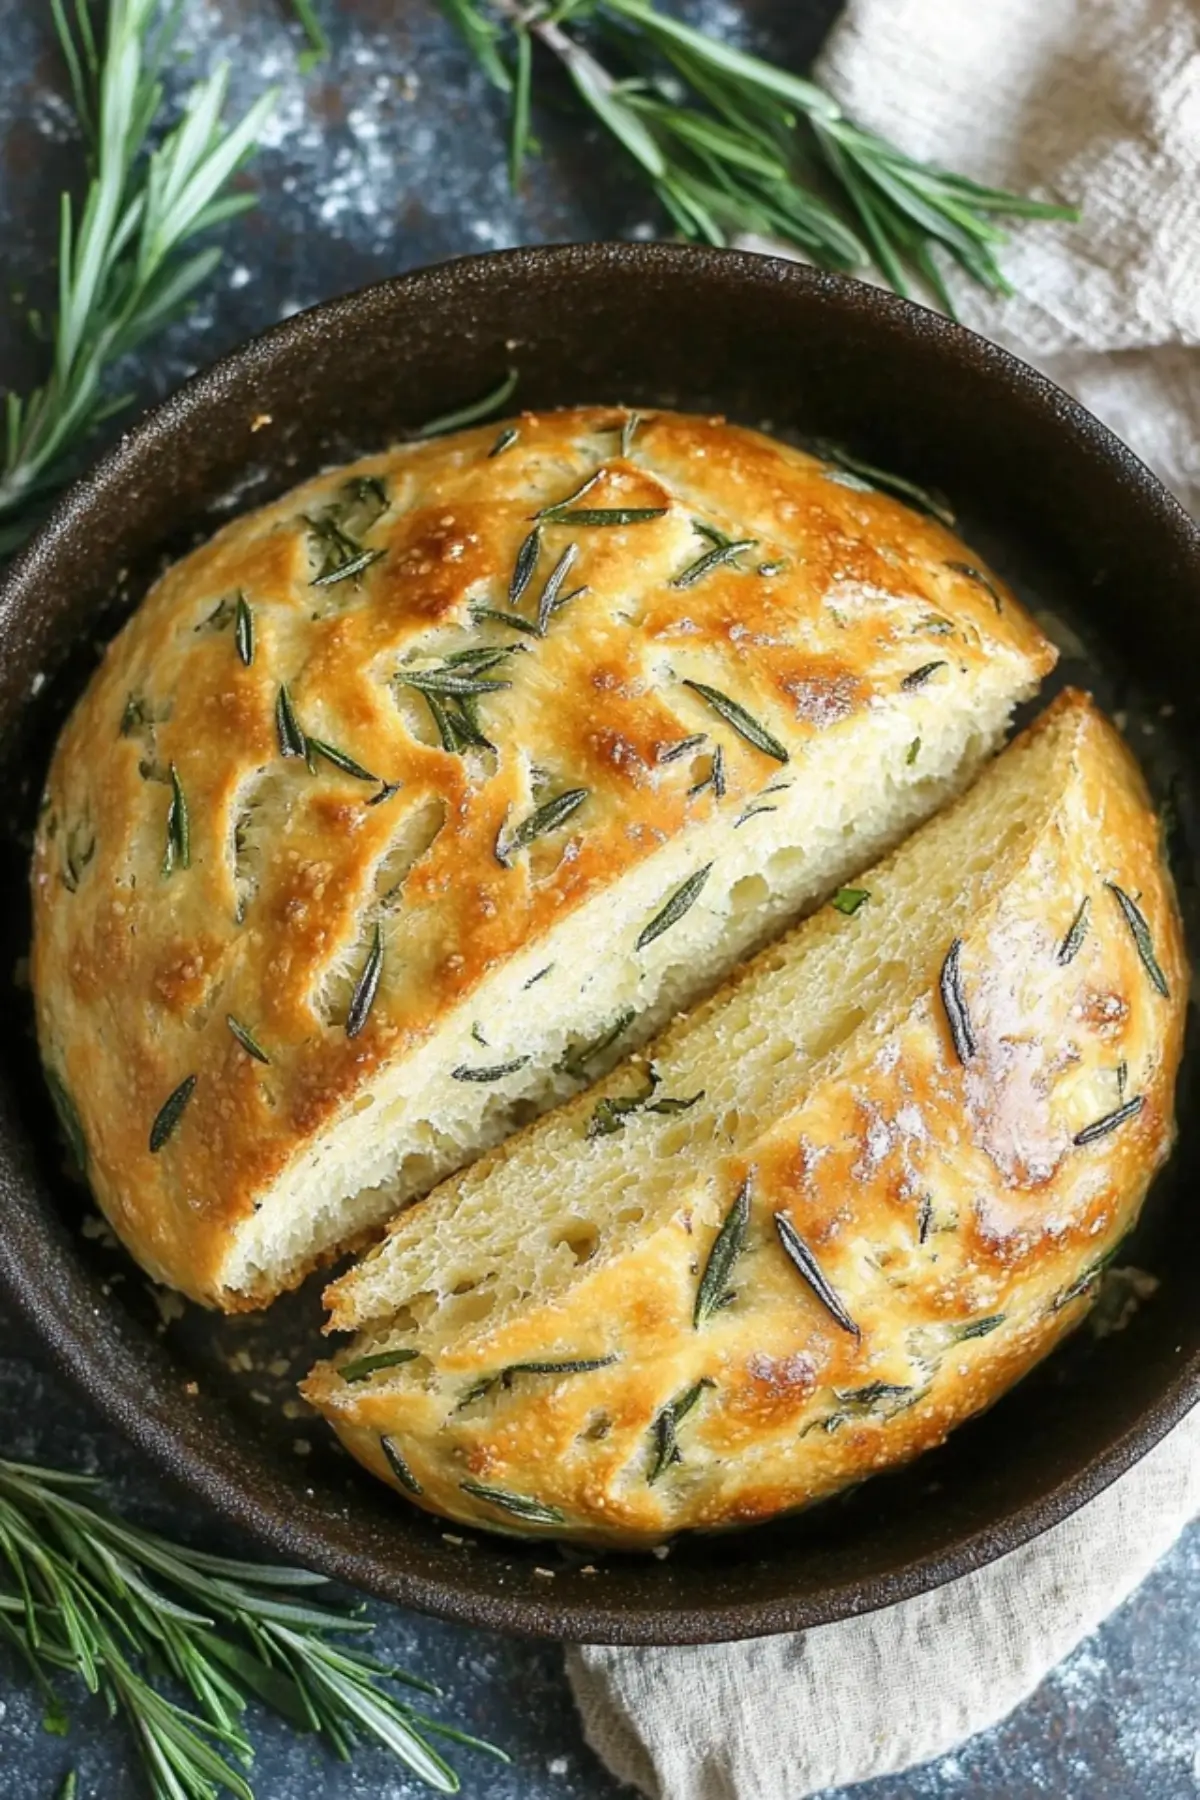
No knead rosemary bread
- Total Time: ~24 hours
- Yield: 1 loaf (about 8 slices) 1x
- Diet: Vegetarian
Description
This no-knead rosemary bread is the ultimate beginner-friendly recipe—simple, aromatic, and bakery-worthy with just a few ingredients and minimal effort. Perfect for pairing with soups, pastas, or enjoying on its own.
Ingredients
- 3 cups all-purpose flour
- 3 cloves garlic, minced
- 1 tablespoon finely chopped fresh rosemary (or more, to taste)
- 1 ¼ teaspoons kosher salt
- ¾ teaspoon freshly ground black pepper
- ½ teaspoon instant yeast
- 1 ½ cups water (at room temperature)
- 2 tablespoons cornmeal
- Olive oil or nonstick spray (for greasing the skillet)
Instructions
- Mix the Dry Ingredients: In a large mixing bowl, combine the flour, garlic, rosemary, salt, pepper, and yeast. Stir well so everything is evenly distributed before adding any liquid.
- Add the Water: Pour in the room temperature water and use a wooden spoon or clean hands to mix until a shaggy, sticky dough forms. This should take less than a minute. The dough will look messy—that’s perfect.
- Let It Rest: Cover the bowl tightly with plastic wrap and leave it at room temperature for 18 to 24 hours. When ready, the surface should be bubbly and slightly jiggly, showing that fermentation has worked its magic.
- Shape the Dough: Lightly flour your work surface and gently shape the dough into a rough round. No need to knead. The dough may be sticky, so flour your hands and surface as needed.
- Prepare the Pan: Lightly oil a 10-inch cast iron skillet or Dutch oven and sprinkle the bottom with cornmeal. Carefully place the shaped dough into the pan, seam side down.
- Final Rise: Cover the dough loosely with a clean dish towel and let it sit at room temperature for about 2 hours. It should roughly double in size and slowly spring back when gently poked.
- Bake the Bread: Preheat your oven to 450°F. Bake uncovered for 30 to 40 minutes until the crust is deeply golden and the loaf sounds hollow when tapped. Let it cool slightly before slicing to avoid crushing the interior.
Notes
- For added flavor, mix in grated cheese, chili flakes, or additional herbs before the first rise.
- If your dough is too wet to shape, add a tablespoon of flour at a time until manageable—avoid over-flouring to keep it light.
- Prep Time: 15 minutes (plus resting time)
- Cook Time: 40 minutes
- Category: Bread
- Method: Baking
- Cuisine: American
Nutrition
- Serving Size: 1 slice (1/8 of loaf)
- Calories: 170
- Sugar: 0.2g
- Sodium: 310mg
- Fat: 1.5g
- Saturated Fat: 0.2g
- Unsaturated Fat: 1.3g
- Trans Fat: 0g
- Carbohydrates: 34g
- Fiber: 1.5g
- Protein: 5g
- Cholesterol: 0mg


