I still remember the first time I handed my daughter a Starbucks cake pop. Her eyes lit up like it was the best treat she’d ever had. Something about that little bite of cake on a stick made it feel extra special. As much as we loved grabbing one with our coffee or hot chocolate, I knew there had to be a way to make them at home—easier on the wallet and just as joyful.
This Starbucks Cake Pops Recipe homemade version is perfect for beginner bakers. It’s simple, doesn’t require fancy equipment, and the steps are incredibly forgiving. These cake pops are also a fun way to get kids involved in the kitchen, and they store well—ideal for birthday parties or just a sweet after-school snack.
Why This Recipe is Special
- Familiar Flavors: Inspired by Starbucks’ famous birthday cake pops, these are a hit for anyone who loves a classic vanilla treat.
- Customizable: You can switch out cake flavors, coating colors, and sprinkles to suit any occasion.
- Perfect for Gifting or Parties: Individually portioned and pretty to look at, they make an impressive presentation.
- Beginner-Friendly Process: Uses boxed cake mix and store-bought frosting to keep things easy while still achieving delicious results.
Ingredients and Preparation
- Vanilla Cake Mix: This forms the base. Use a classic mix, and follow the box directions for baking. You can substitute with chocolate, red velvet, or strawberry for variety.
- Vanilla Frosting: Helps bind the crumbled cake into a smooth dough. Choose a pre-made version or make your own. Cream cheese frosting also works for a tangier flavor.
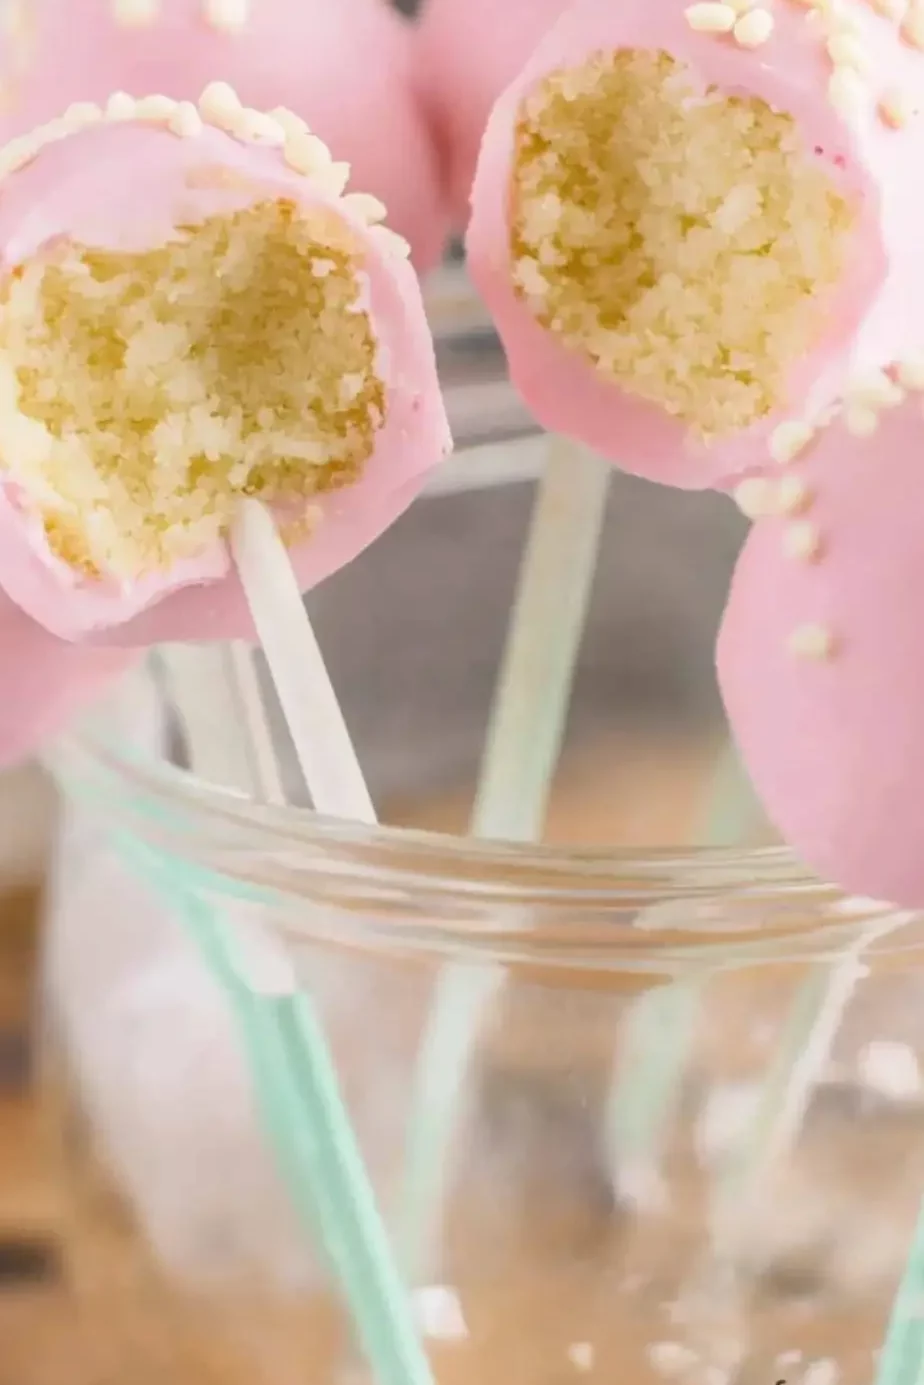
- Candy Melts (Pink or any color): These create the candy shell. Pink is classic, but white chocolate, red, or pastel shades work beautifully. Almond bark can also be used and tinted with food coloring.
- Cake Pop Sticks or Lollipop Sticks: Essential for the signature “pop” format. Skewers or wooden sticks work in a pinch.
- White Sprinkles: For decoration and texture. Try rainbow jimmies or sanding sugar for different looks.
Step-by-Step Instructions
Step 1
Bake the vanilla cake according to the box instructions, then let it cool completely at room temperature. Cooling is crucial, or the texture will turn gummy.
Step 2
Once cool, remove the cake from the pan and carefully trim off the brown outer layer (top, sides, and bottom). This gives you a smoother, more consistent texture in the pops.
Step 3
Crumble the trimmed cake into a large bowl using your hands or a fork until the crumbs are uniform and fine.
Step 4
Add the frosting and mix until the texture resembles soft dough. You should be able to press it together easily—if it crumbles, add more frosting one spoonful at a time.
Step 5
Use a cookie scoop or your hands to form 24–36 even-sized balls. Place them on a parchment-lined tray and chill them in the freezer for 10–15 minutes. This helps them firm up for dipping.
Step 6
Melt your candy melts in the microwave in 30-second intervals, stirring between each session until smooth and pourable. If the coating is too thick, add a small amount of vegetable oil or shortening to thin it out.
Step 7
Dip the tip of each stick into the melted candy before inserting it halfway into a cake ball. This helps anchor the stick and prevents slipping.
Step 8
Place the pops back in the freezer for 10–15 minutes to set the stick in place.
Step 9
Dip each pop fully into the melted candy, twirling gently to coat all sides. Let the excess drip back into the bowl. While still wet, add sprinkles or decorations.
Step 10
Place finished pops upright in a block of Styrofoam or a cardboard box with small holes to dry and harden completely before serving.
Beginner Tips and Notes
- If the cake is too dry: Add extra frosting slowly until the texture sticks together without being mushy.
- If the coating is too thick: Add vegetable oil or coconut oil a teaspoon at a time to thin the melted candy.
- Make ahead: You can prepare the cake balls and freeze them (uncoated) for up to one month. Just thaw slightly before decorating.
- Stick support: Dipping the stick in melted candy before inserting it helps hold the pop firmly in place.
Serving Suggestions
- Party Platter: Serve these with mini cupcakes or macarons for a beautiful dessert spread.
- With Drinks: These pair wonderfully with hot coffee, tea, or a vanilla bean frappuccino.
- Leftover Storage: Store decorated cake pops in an airtight container in the fridge for up to 5 days, or freeze them (wrapped individually) for up to 2 months.
Conclusion
There’s something so satisfying about making your own version of a treat you usually buy out. These Starbucks Cake Pops Recipe are just as fun to make as they are to eat—and way easier than they look. Whether you’re baking for your kids, prepping for a party, or just feeling crafty in the kitchen, this is one recipe you’ll want to bookmark.
If you give this a try, I’d love to hear how it goes. Drop your results, tweaks, or questions in the comments below. Let’s make sweet memories one pop at a time!
FAQ About Starbucks Cake Pops Recipe
Can I use homemade cake instead of boxed mix?
Yes, a homemade vanilla cake works just as well as a boxed mix. Just ensure it’s fully cooled and slightly dense, which makes it easier to crumble and bind with frosting.
Why are my cake pops falling off the stick?
This often happens if the mixture is too soft or the stick wasn’t secured well. Dip each stick in melted candy before inserting it into the cake ball, then chill them to firm up before dipping.
Can I freeze cake pops?
Absolutely. You can freeze undecorated cake balls for up to a month. Once coated, store the pops in an airtight container in the fridge for five days or freeze them individually wrapped.
More Relevant Recipes
- Strawberry Chocolate Cake
- Strawberry Crunch Poke Cake | The Domestic Rebel
- Strawberry Shortcake Kabobs

Starbucks Cake Pops Recipe
- Total Time: 55 minutes
- Yield: 24–36 cake pops 1x
- Diet: Vegetarian
Description
This easy Starbucks Cake Pops Recipe is a fun, delicious dessert perfect for parties or gifting. With minimal ingredients and simple steps, even beginners can recreate this sweet treat at home with confidence.
Ingredients
- 1 box classic vanilla cake mix (plus ingredients required on the box, usually eggs, oil, and water)
- 3 tablespoons vanilla frosting (store-bought or homemade)
- 24–36 cake pop or lollipop sticks
- 12 oz pink candy melts
- White sprinkles
Instructions
- Bake the Cake: Prepare the boxed cake mix according to the package instructions and bake in a standard cake pan. Allow the cake to cool completely at room temperature to prevent soggy texture in the cake pops.
- Trim and Crumble: Once the cake is cool, remove it from the pan and trim off the browned top and edges. Use your hands or a fork to crumble the remaining cake into fine, even crumbs in a large bowl.
- Mix with Frosting: Add the vanilla frosting to the crumbled cake and mix thoroughly until the texture resembles a soft dough. It should hold its shape when squeezed—add a little more frosting if it’s too dry.
- Form Cake Balls: Roll the mixture into evenly sized balls using your hands or a cookie scoop. Place them on a lined baking sheet and transfer to the freezer for 10–15 minutes until firm.
- Insert Sticks: Melt a small amount of the candy melts in the microwave. Dip each stick into the melted candy, then insert halfway into each cake ball. This helps secure the stick once it sets.
- Coat with Candy: Melt the remaining candy melts until smooth and pourable. Remove the cake pops from the freezer and dip each one into the candy coating, twirling gently to cover all sides. Let the excess drip off before decorating.
- Add Sprinkles and Dry: Immediately after dipping, add white sprinkles before the coating sets. Place each cake pop upright in a Styrofoam block or cardboard stand to dry and harden completely.
- Serve and Store: Once the coating is fully set, the cake pops are ready to serve. Store in the refrigerator for up to five days or freeze individually wrapped for longer storage.
Notes
- You can use chocolate, strawberry, or red velvet cake for variety. If the candy coating is too thick, stir in a teaspoon of vegetable oil to thin it out. Make sure to fully cool the cake before crumbling to avoid sticky clumps. Use oil-based food coloring if you’re tinting almond bark or white chocolate to avoid seizing.
- Prep Time: 10 minutes
- Cook Time: 30 minutes
- Category: Dessert
- Method: No-Bake
- Cuisine: American
Nutrition
- Serving Size: 1 cake pop
- Calories: 111
- Sugar: 14g
- Sodium: 126mg
- Fat: 3g
- Saturated Fat: 2g
- Unsaturated Fat: 1g
- Trans Fat: 0g
- Carbohydrates: 19g
- Fiber: 1g
- Protein: 1g
- Cholesterol: 5mg


