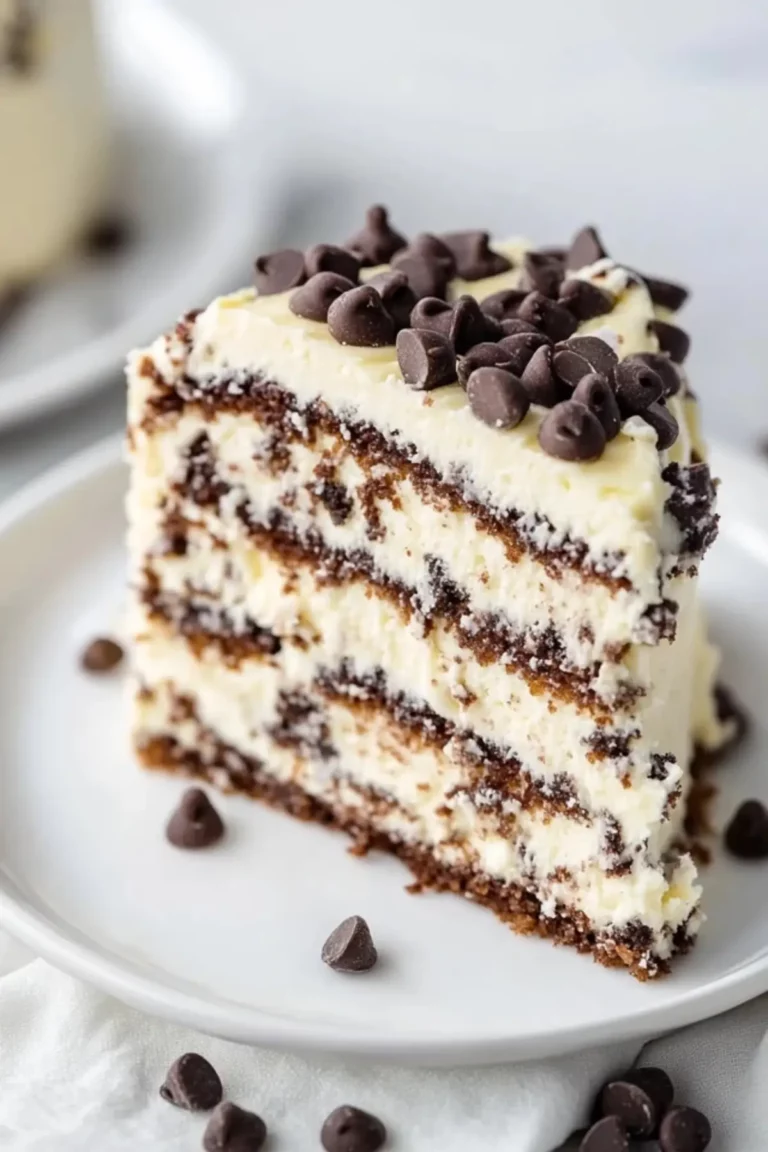
Get ready to indulge in the ultimate Halloween treat with this Bloody Good Halloween Cheesecake! This fun and spooky dessert features a crunchy chocolate cookie base, a creamy white chocolate cheesecake filling, and a dramatic cocoa-vanilla blood drip for that perfect eerie touch. Whether you’re hosting a Halloween party or enjoying a quiet night in, this cheesecake will steal the show.

Table of Contents
Why You’ll Love This Bloody Good Halloween Cheesecake Recipe
This Bloody Good Halloween Cheesecake is everything you need for a spooky yet delicious Halloween treat. It combines the best of both worlds: a rich, indulgent dessert with a playful, horror-inspired presentation. The crisp chocolate cookie base complements the smooth, creamy white chocolate cheesecake, while the blood-red drip adds a thrilling visual that will get everyone talking.
Not only is this cheesecake a feast for the eyes, but it’s also incredibly easy to make. No intricate decorating skills or fancy ingredients required—just a few simple steps and a bit of creativity. It’s a perfect dessert for Halloween lovers of all ages and can be made with minimal effort for maximum impact.
Ingredients for Bloody Good Halloween Cheesecake Recipe
For the chocolate cookie base:
• Oreos: Adds a rich, chocolatey crunch that creates the perfect foundation for the cheesecake.
• Salted Butter: Helps bind the cookie crumbs together and adds richness to the base.
For the white chocolate cheesecake:
• White Chocolate: Provides a creamy, sweet base for the cheesecake filling.
• Full-fat Cream Cheese: Gives the cheesecake its smooth, velvety texture.
• Vanilla Extract: Enhances the flavor profile with a warm, aromatic note.
• Lemon Juice: Balances the sweetness of the cheesecake and helps set the texture.
• Pinch of Salt: Elevates the flavors and balances the sweetness.
• Double Cream: Adds richness and helps achieve the perfect creamy consistency for the cheesecake.
For the red drip:
• Condensed Milk: Creates the sweet, thick consistency for the blood drip.
• Cocoa Powder: Adds depth and richness to the blood color.
• Vanilla Extract: Enhances the overall flavor of the red drip.
• Red Food Coloring Paste or Gel: Gives the drip its signature bloody appearance.
Alternative Ingredient Suggestions
If you’re looking to make this Bloody Good Halloween Cheesecake even more personalized, here are a few ingredient swaps:
• Swap Oreos for gluten-free cookies for a gluten-free version of this cheesecake.
• If you prefer a tangier flavor, replace the white chocolate with dark chocolate for a twist.
• For a dairy-free version, use dairy-free cream cheese and coconut cream instead of double cream.
Step-by-Step Instructions for Bloody Good Halloween Cheesecake Recipe
For the Chocolate Cookie Base:
- Prepare a 23cm (8in) springform tin by lining it with greaseproof paper.
- Crush your Oreos into crumbs using a food processor, or place them in a freezer bag and crush them with a rolling pin until they form coarse crumbs.
- Melt the butter in a small saucepan over low heat or in the microwave.
- Combine the melted butter with the cookie crumbs until the mixture resembles wet sand. You may not need all the butter, so add gradually.
- Press the mixture into the prepared tin to form an even, firm base. Chill in the fridge for at least 30 minutes to firm up while you prepare the cheesecake filling.
For the White Chocolate Cheesecake:
- Melt the white chocolate in a heatproof bowl over a pan of simmering water or in the microwave. Allow it to cool slightly.
- In a large bowl, beat together the cream cheese, vanilla extract, lemon juice, and salt until smooth.
- Whip the double cream in a separate bowl until stiff peaks form, then gently fold it into the cream cheese mixture.
- Fold the melted white chocolate into the mixture, ensuring it’s fully incorporated.
- Remove the cookie base from the fridge and spread the cheesecake mixture over it. Smooth the top for an even surface.
- Place the cheesecake in the fridge for at least 2 hours to allow it to firm up.
For the Red Drip:
- In a medium bowl, combine condensed milk, cocoa powder, vanilla extract, and a few drops of red food coloring. Stir until the mixture reaches a vivid red color and smooth consistency.
- Once the cheesecake has chilled, carefully remove it from the springform tin and place it on a serving plate.
- Spoon the red drip mixture over the cheesecake, letting it spill gently down the sides.
- For added effect, stab a knife through the center of the cheesecake to mimic a dramatic, horror-inspired scene.

Tips & Tricks
• Avoid Overmixing: When mixing the cream cheese and whipped cream, be careful not to overmix as this can cause the cheesecake to become too dense.
• Chill Time is Key: Make sure to refrigerate the cheesecake long enough to allow it to firm up properly. This will give you a smoother, more stable texture when slicing.
• Customize the Blood Drip: You can adjust the red color by using more or less food coloring, or try experimenting with a different color for a unique look.
Pairing Ideas and Variations
Looking for some delicious pairings? This Bloody Good Halloween Cheesecake goes wonderfully with:
• A scoop of vanilla or cinnamon ice cream for a creamy contrast.
• Fresh berries, like raspberries or blackberries, to balance the sweetness.
• A drizzle of chocolate or caramel sauce to intensify the dessert’s richness.
For variations, consider trying a chocolate drip instead of the red one for a Halloween-themed cheesecake with a twist. You could also add some Halloween-themed sprinkles or a few creepy decorations on top for extra flair.
Why This Bloody Good Halloween Cheesecake is Perfect for the Season
This Bloody Good Halloween Cheesecake Recipe is the ultimate Halloween treat, perfect for parties, gatherings, or a spooky night in. It brings the best of both worlds: delicious and scary! The dramatic blood drip adds a fun and spooky touch to a deliciously creamy cheesecake. It’s a dessert that’s sure to impress guests, spark conversations, and leave everyone asking for more. The smooth white chocolate filling and crunchy Oreo base will make it a hit for any Halloween lover, whether you’re carving pumpkins or binge-watching your favorite horror movies.
Enjoy this Bloody Good Halloween Cheesecake with friends and family—it’s a dessert that combines delicious flavors with a terrifyingly fun presentation.
Conclusion
This Bloody Good Halloween Cheesecake is the perfect way to elevate your Halloween celebrations with a gory twist on a classic dessert. Whether you’re planning a spooky soirée or just want to treat yourself, this cheesecake is sure to impress with its delicious white chocolate filling, crunchy Oreo base, and dramatic blood-red drip. Simple to prepare and fun to serve, it’s a must-try for any Halloween enthusiast. So, grab your ingredients, get creative with the blood drip, and enjoy a devilishly good treat that will leave everyone in awe.
Frequently Asked Questions (FAQs) about Bloody Good Halloween Cheesecake Recipe
Can I make this Bloody Good Halloween Cheesecake in advance?
Yes! In fact, this cheesecake tastes even better the next day as the flavors have more time to set and develop. You can prepare it up to 2 days in advance and keep it in the fridge for a smooth, creamy texture. Just add the red drip and knife before serving for the best effect.
How can I store leftovers of this Halloween cheesecake?
Store any leftover cheesecake in an airtight container in the fridge for up to 3 days. Make sure the cheesecake is fully chilled before covering to avoid condensation. You can enjoy it cold, or let it sit at room temperature for a few minutes to soften slightly.
Can I use a different type of cookie for the base?
Absolutely! While Oreos give the cheesecake a rich chocolate flavor, you can swap them out for any other cookie you prefer, like chocolate digestives or even graham crackers. Just make sure to use a similar quantity to ensure the base holds together properly.
More Relevant Recipes
- Mummy Brownies: A Spooky Treat for Halloween
- Ghost Cupcakes: Spooky and Delicious Halloween Treat
- Halloween Chocolate Pretzel Spider Webs: A Sweet and Salty Halloween Treat

Bloody Good Halloween Cheesecake Recipe
- Total Time: 2 hours 45 minutes
- Yield: 8 servings 1x
- Diet: Vegetarian
Description
This Bloody Good Halloween Cheesecake features a crunchy chocolate cookie base topped with a creamy white chocolate cheesecake filling and a spooky cocoa-vanilla red drip. It’s the perfect dessert for any Halloween celebration, combining rich flavors with an eerie, eye-catching appearance.
Ingredients
- 200g (7oz) Oreos
- 70g (5 tbsp) salted butter
- 200g (7oz) white chocolate
- 600g (21oz) full-fat cream cheese
- 1 tsp vanilla extract
- Juice of ½ a lemon
- Pinch of salt
- 300ml (1 ¼ cups) double cream
- 150g (½ cup) condensed milk
- 1 tsp cocoa powder
- 1 tsp vanilla extract
- Red food coloring paste or gel
Instructions
- Prepare a 23cm (8in) springform tin by lining it with greaseproof paper.
- Crush your Oreos into crumbs using a food processor or by placing them in a freezer bag and crushing them with a rolling pin.
- Melt the butter in a small saucepan or microwave. Add it to the crushed Oreos and mix until the texture is like wet sand.
- Press the Oreo mixture into the bottom of the prepared tin and refrigerate for 30 minutes to firm up.
- In a heatproof bowl, melt the white chocolate until smooth and let it cool slightly.
- In a large bowl, beat the cream cheese, vanilla extract, lemon juice, and salt until smooth.
- Whip the double cream until stiff peaks form and fold it gently into the cream cheese mixture.
- Fold the melted white chocolate into the mixture and spread it over the chilled cookie base. Refrigerate for at least 2 hours.
- For the red drip, mix condensed milk, cocoa powder, vanilla extract, and red food coloring until the mixture becomes a vivid red liquid.
- Once the cheesecake is set, remove it from the tin and place it on a serving plate.
- Spoon the red drip mixture over the cheesecake, allowing it to spill down the sides. For extra effect, stab a knife through the center of the cheesecake.
- Serve immediately and enjoy!
Notes
- For a gluten-free version, use gluten-free cookies for the base.
- You can substitute the white chocolate with dark chocolate for a richer flavor.
- The cheesecake can be made up to 2 days in advance and stored in the fridge.
- For best results, allow the cheesecake to firm up in the fridge for at least 2 hours before serving.
- Prep Time: 45 minutes
- Cook Time: 0 minutes
- Category: Dessert
- Method: No-bake
- Cuisine: American
Nutrition
- Serving Size: 1 slice
- Calories: 450
- Sugar: 35g
- Sodium: 220mg
- Fat: 28g
- Saturated Fat: 14g
- Unsaturated Fat: 12g
- Trans Fat: 0g
- Carbohydrates: 45g
- Fiber: 2g
- Protein: 5g
- Cholesterol: 55mg