There’s something magical about the aroma of fresh-baked bread wafting through the kitchen. I still remember the first time I Easiest Rustic Bread Recipe Ever it was during a lazy Sunday afternoon when I had nothing but pantry basics and a sudden craving for something warm and crusty. What emerged from my oven was a golden, crackling loaf that made me feel like a kitchen hero.
If you’ve never baked bread before, this is the perfect recipe to start with. It’s incredibly forgiving, requires no fancy equipment, and turns out impressively every time. With just a handful of ingredients, a bit of patience, and a warm oven, you’ll have a crusty loaf that pairs perfectly with anything—from soups to spreads. Best of all, this rustic bread is ideal for anyone looking for quick and healthy meals, with its minimal ingredients and simple prep. Welcome to your go-to easy sheet pan dinner sidekick.

Why This Recipe is Special
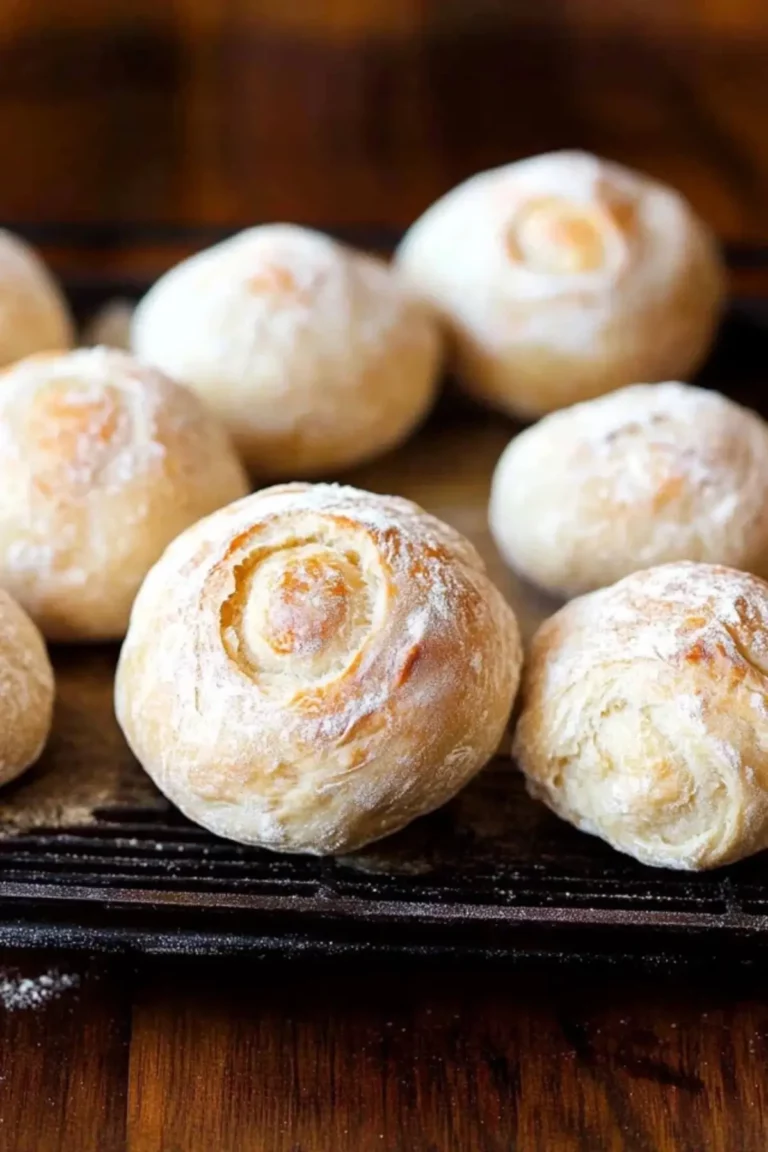
Rustic bread is all about embracing imperfection. Its freeform shape, chewy center, and crisp, golden crust make it a favorite among home bakers who want delicious results without complicated steps. Unlike artisan loaves that require sourdough starters or hours of kneading, this Easiest Rustic Bread Recipe Ever bread is no-knead, no-stress, and no-fail.
Its charm lies in its simplicity and flexibility—you can toss in herbs, cheese, or olives for a gourmet twist or keep it plain and humble. It’s also a fantastic recipe for using up staple ingredients, making it budget-friendly and ideal for shelf-cooking.
Ingredients and Preparation
This rustic bread uses basic ingredients, but each one plays a role in building flavor and structure. Here’s what you’ll need (no measurements listed here—follow your recipe card):
- Flour – The backbone of the bread, giving it structure and chew. All-purpose or bread flour works best. You can even mix in whole wheat flour for added nutrition.
- Warm Water – Activates the yeast and hydrates the dough. It should feel like warm bathwater—not too hot.
- Active Dry Yeast – Your leavening agent. It helps the dough rise and develop airiness.
- Salt – Enhances the flavor and balances the yeast’s activity.
- Sugar – Feeds the yeast and gives a subtle boost to the flavor and browning.
Optional Add-ins: Fresh rosemary, thyme, roasted garlic, shredded cheese, or chopped olives add fun flavor variations.
Substitution Tips: Out of active yeast? Try instant yeast and skip the proofing time. Gluten-free flour blends can also work but might need tweaks for hydration and structure.
Step-by-Step Instructions
Step 1
In a large bowl, combine warm water, yeast, and sugar. Let it sit for about 10 minutes until it becomes bubbly—this shows the yeast is alive and active.
Step 2
Add flour and salt to the yeast mixture and stir until a sticky dough forms. It should feel tacky but not runny. If it’s too sticky, sprinkle in a little more flour.
Step 3
Cover the bowl with plastic wrap and a kitchen towel. Let the dough rise at room temperature for 1–3 hours. The longer the rise, the better the texture and flavor.
Step 4
Preheat your oven to 450°F (232°C). Place a pizza stone or an upside-down baking sheet inside to heat up. Add a pan of water on the bottom rack to create steam—this helps develop a crisp crust.
Step 5
Lightly flour your work surface and turn out the dough. Gently fold it a few times and divide into two equal parts. Shape them into round loaves—no kneading needed!
Step 6
Score the tops with an “X” using a sharp knife. This helps the bread expand in the oven.
Step 7
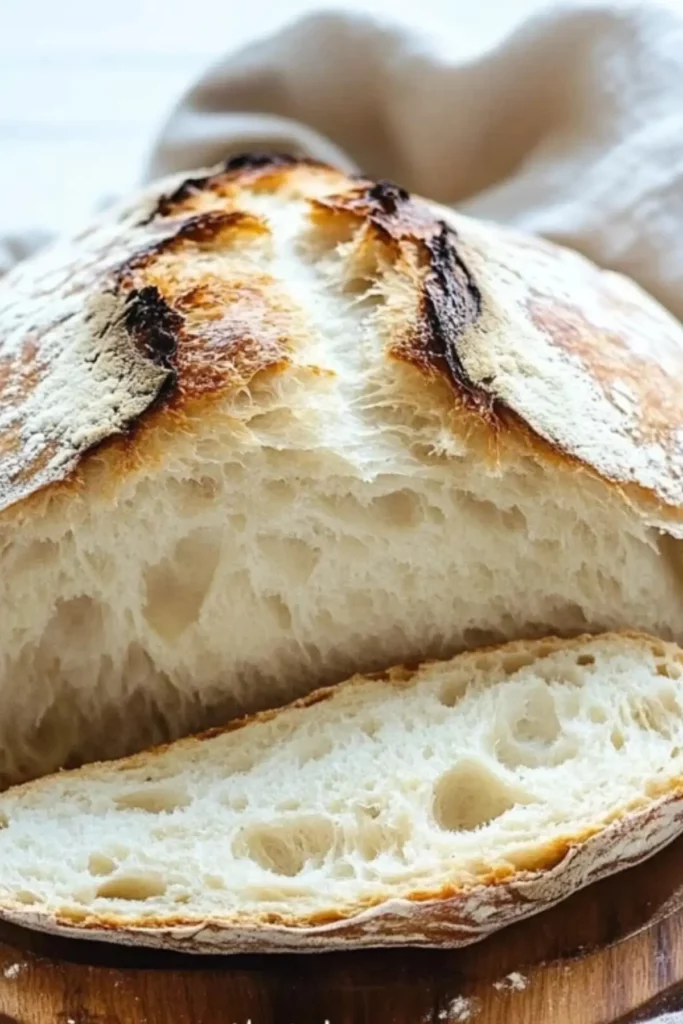
Place the loaves on a floured pan or parchment paper and transfer to the hot stone or baking sheet. Bake for 25–30 minutes, or until the crust is golden and the bottom sounds hollow when tapped.
Step 8
Let the bread cool for at least one hour before slicing. This helps the crumb set and prevents the loaf from deflating.
Beginner Tips and Notes
- Sticky Dough? Don’t panic. This dough is naturally wet. Lightly oil your hands or dust with flour to manage it.
- No Pizza Stone? A regular baking sheet flipped upside down works just as well.
- Too Brown Too Fast? Tent foil over the loaves midway through baking to prevent burning.
- Unsure if It’s Done? Use a thermometer—internal temperature should be at least 190°F. Or tap the bottom; if it sounds hollow, it’s ready.
Serving Suggestions
- Pair with Soup – Ideal with tomato basil, chicken noodle, or creamy broccoli soup.
- Elevate Dinner – Serve with lemon herb chicken and a crisp salad for an easy sheet pan dinner with flair.
- Make It a Snack – Slice and toast it with garlic butter for cheesy bread or transform leftovers into homemade croutons.
- Breakfast Option – Use it for avocado toast or classic French toast.
Leftover Storage:
Keep slices in an airtight container at room temp for up to 3 days. Whole loaves store best in a paper bag. Freeze extra slices in a zip-top bag for easy grab-and-go options.
Conclusion
There’s no greater confidence boost for a beginner cook than pulling a crusty, golden loaf out of the oven—especially one as easy and delicious as this. Whether you’re cooking up quick and healthy meals, impressing friends with a cozy dinner, or just enjoying a quiet slice with butter and jam, this rustic bread will quickly become your favorite.
Give it a try, experiment with your own twists, and come back to share your experience. Did you add herbs? Use a Dutch oven? Let me know in the comments—I’d love to hear how it turned out.
FAQ About Easiest Rustic Bread Recipe Ever
1. Can I use instant yeast instead of active dry yeast?
Yes, you can! If using instant yeast, you can skip the 10-minute proofing step and mix it directly with the flour and other ingredients.
2. Why is my dough so sticky?
Rustic bread dough is meant to be sticky. However, if it’s too runny to handle, add flour one tablespoon at a time. Sticky dough helps create a light crumb.
3. How do I know if my bread is fully baked?
Tap the bottom of the loaf—if it sounds hollow, it’s done. You can also use a thermometer; the internal temp should be at least 190°F (88°C).
More Relevant Recipes
Print
Easiest Rustic Bread Recipe Ever
- Total Time: 2 hours
- Yield: 2 loaves 1x
- Diet: Vegetarian
Description
This no-knead rustic bread recipe is perfect for beginners, using just five pantry ingredients to create a crusty loaf with a soft, airy interior.
Ingredients
- 3 cups warm water
- 2 1/4 tsp (1 packet) active dry yeast
- 1 tbsp sugar
- 6 cups (750 g) all-purpose or bread flour
- 3 tsp salt
Instructions
- Mix warm water, yeast, and sugar in a large bowl. Let it sit for 10 minutes until bubbly.
- Add flour and salt. Stir until a sticky dough forms.
- Cover the bowl with plastic wrap and a towel. Let the dough rise at room temperature for 1 to 3 hours.
- Preheat the oven to 450°F. Place a pizza stone or upside-down baking sheet inside and a pan of water on the bottom rack.
- Lightly flour your work surface, turn out the dough, divide in two, and shape into round loaves.
- Score an “X” on each loaf and place them on a floured or parchment-lined baking sheet.
- Transfer to the hot stone or sheet and bake for 25–30 minutes until golden and crusty.
- Let cool for at least 1 hour before slicing.
Notes
- Dough should be slightly sticky; add flour gradually if needed.
- If crust browns too quickly, tent with foil halfway through baking.
- Internal temperature should reach 190°F for doneness.
- Don’t slice immediately—cooling helps set the crust.
- Store in an airtight bag for 2–3 days or freeze slices for longer storage.
- Prep Time: 1 hour 30 minutes
- Cook Time: 30 minutes
- Category: Side Dish
- Method: Baking
- Cuisine: American
Nutrition
- Serving Size: 1 slice (estimated from 1/20th of a loaf)
- Calories: 140
- Sugar: 1g
- Sodium: 220mg
- Fat: 0.5g
- Saturated Fat: 0g
- Unsaturated Fat: 0.5g
- Trans Fat: 0g
- Carbohydrates: 29g
- Fiber: 1g
- Protein: 4g
- Cholesterol: 0mg