Taco nights have always been a special occasion in my home, bringing family and friends together over a meal that’s both fun and flavorful. While traditional tacos require a bit of hands-on time with assembling, these 20 Minute Mini Baked Chicken Tacossimplify the process while keeping all the deliciousness intact. If you’re new to cooking or just looking for a quick, fuss-free dinner, this recipe is the perfect place to start.
Why are these tacos ideal for beginners? They require minimal ingredients, come together in just 20 minutes, and don’t involve complicated cooking techniques. Plus, baking them ensures that each taco is crispy on the outside and loaded with warm, melty cheese on the inside. Let’s dive into what makes these tacos special and how you can master them with ease.
Why This Recipe is Special
- Time-Saving and Simple – Unlike stovetop tacos that require constant attention, these tacos bake in the oven, freeing you up for other tasks.
- Beginner-Friendly – No need to worry about overcooking or under-seasoning. Pre-cooked shredded chicken ensures a fail-proof result.
- Crispy Yet Juicy – Baking creates a crunchy taco shell while locking in the juicy flavors of seasoned chicken and melted cheese.
- Customizable – Whether you love classic taco flavors or want to add extra toppings like beans, corn, or veggies, this recipe is endlessly adaptable.
Ingredients and Preparation
This recipe keeps it simple with just a few key ingredients. Here’s what you’ll need and how each one plays a role in the dish.
- Shredded Chicken – The base of the tacos, offering a lean source of protein. You can use store-bought rotisserie chicken or homemade slow-cooked shredded chicken.
- Taco Seasoning – Provides a bold, zesty flavor with a mix of cumin, chili powder, garlic powder, and paprika.
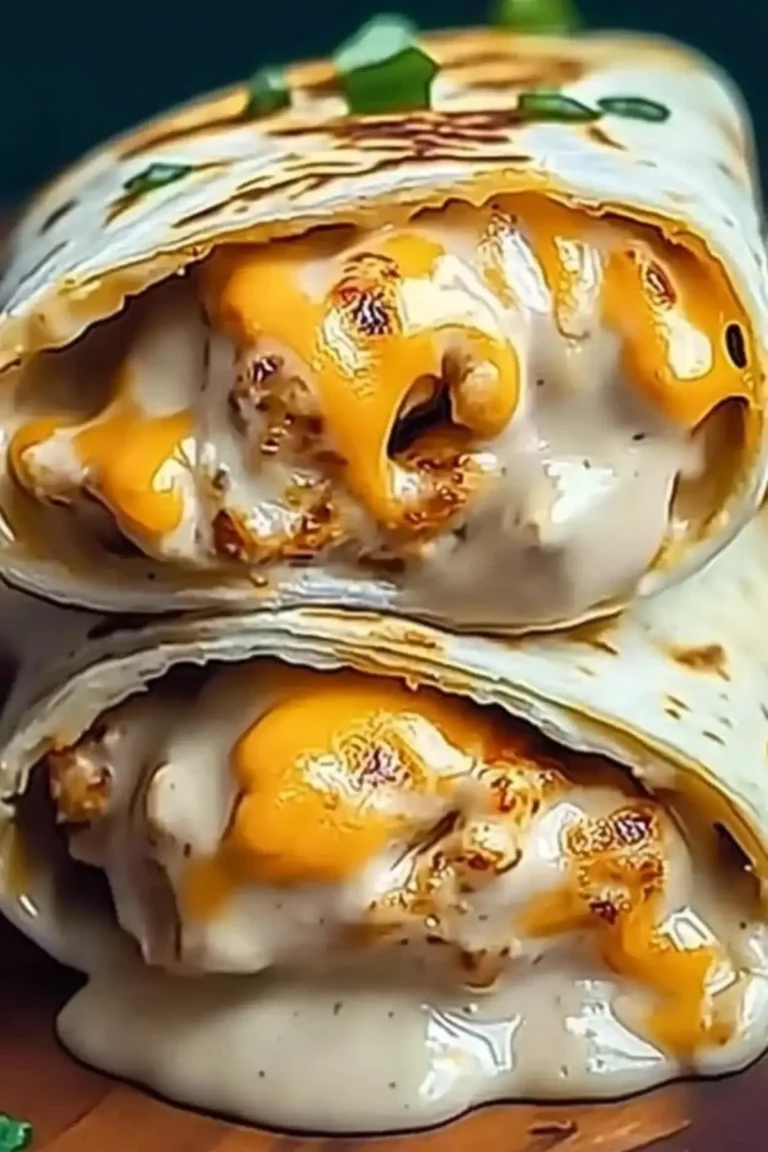
- Cheese – A key ingredient for that creamy, gooey filling. Colby Jack, cheddar, or a Mexican blend all work well.
- Corn Tortillas – These crisp up beautifully in the oven, adding a satisfying crunch.
- Olive Oil or Cooking Spray – Helps the tortillas crisp up without frying.
- Optional Additions – Black beans, diced tomatoes, bell peppers, onions, or green chiles for extra flavor and texture.
Ingredient Substitutions
- If you prefer a vegetarian version, swap out the chicken for black beans, refried beans, or crumbled tofu.
- If corn tortillas aren’t your thing, flour tortillas will work, though they won’t get as crispy.
- Dairy-free? Use a vegan cheese alternative or simply skip the cheese altogether.
Step-by-Step Instructions
Step 1: Preheat and Prep
Preheat your oven to 425°F (220°C). Lightly spray or brush both sides of the tortillas with olive oil to ensure they crisp up evenly during baking.
Step 2: Assemble the Tacos
Lay the tortillas flat on a baking sheet. Add about a heaping tablespoon of seasoned shredded chicken to each tortilla, then sprinkle a generous amount of shredded cheese on top.
Step 3: Pre-Bake for Cheese Melting
Bake the open-faced tacos for 2 minutes or until the cheese just begins to melt. This helps the tortillas become pliable so they can hold their shape.
Step 4: Fold and Bake Until Crispy
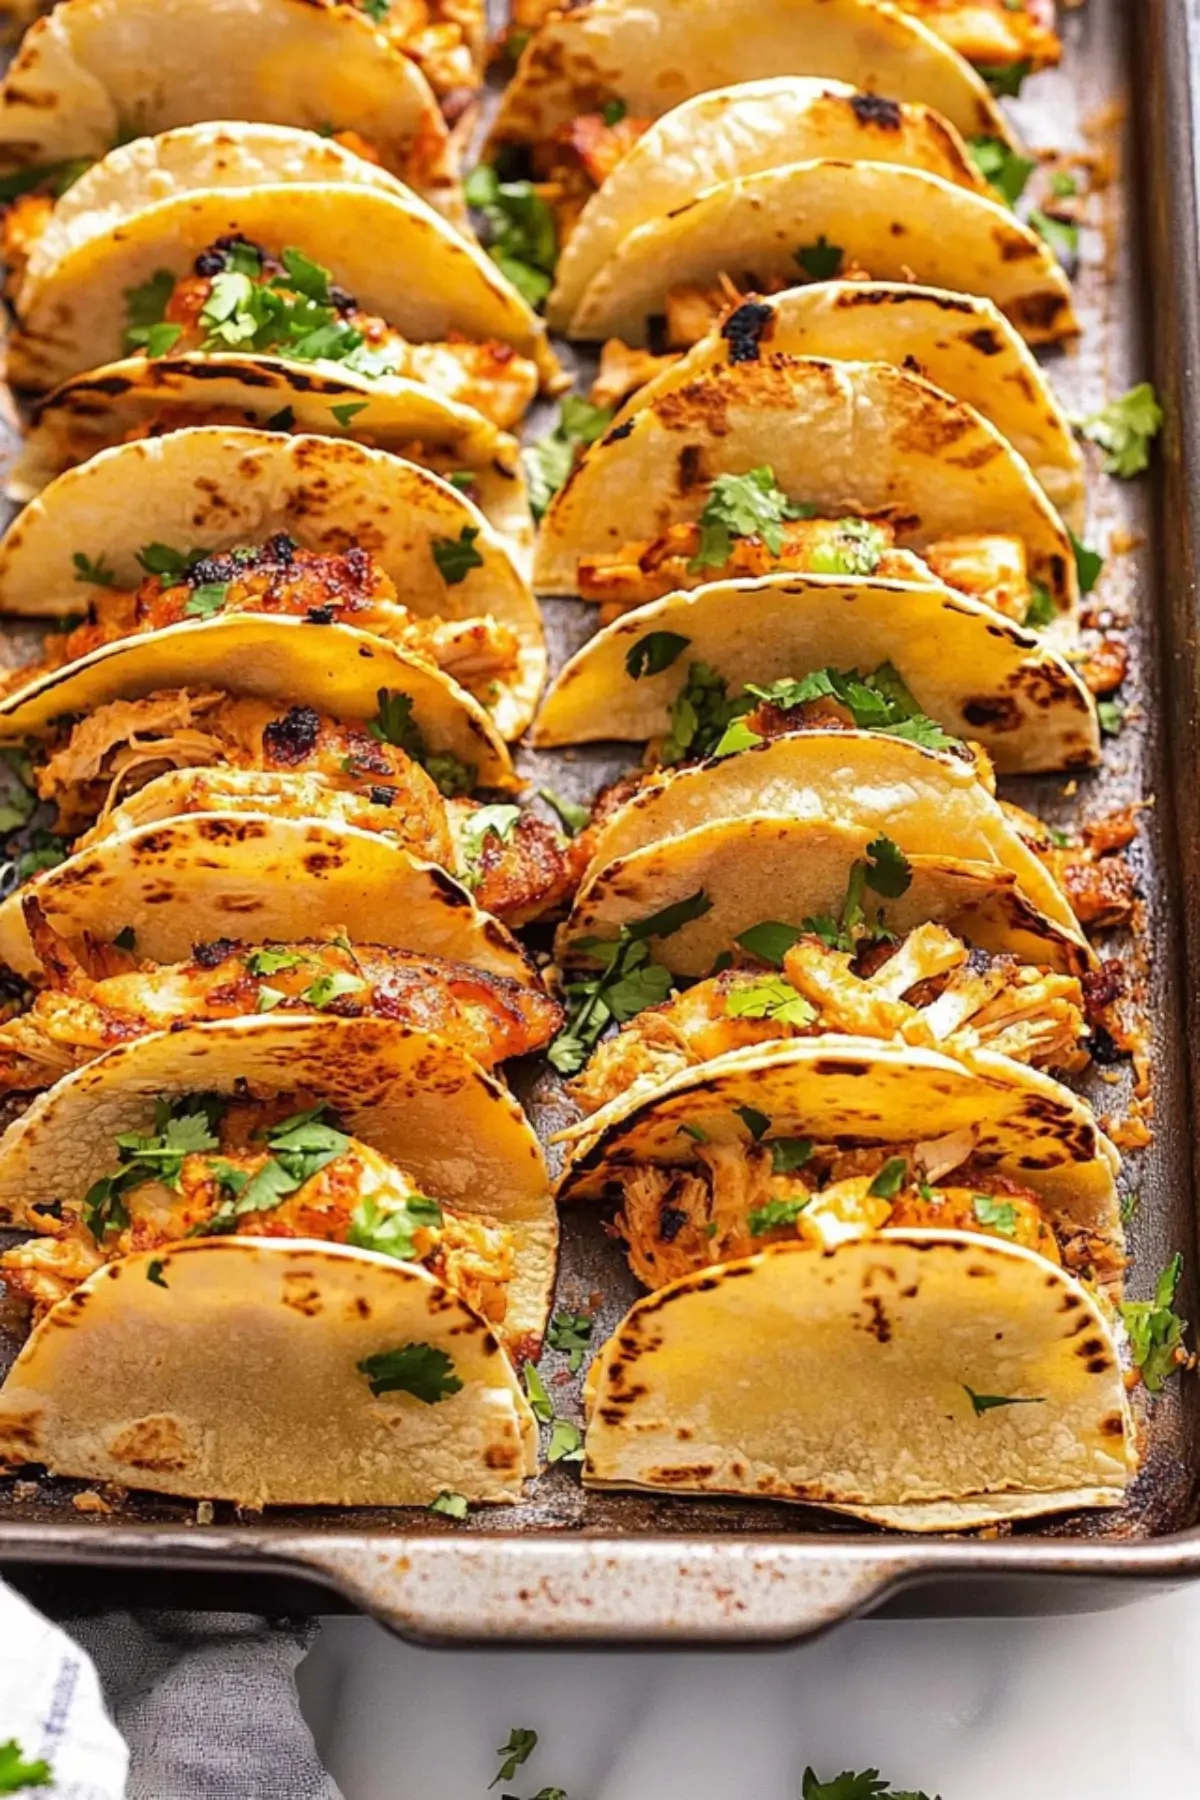
Carefully fold each tortilla in half, gently pressing down to form a taco shape. Return the baking sheet to the oven and bake for 12-15 minutes, or until the tacos are golden brown and crispy.
Step 5: Serve and Enjoy
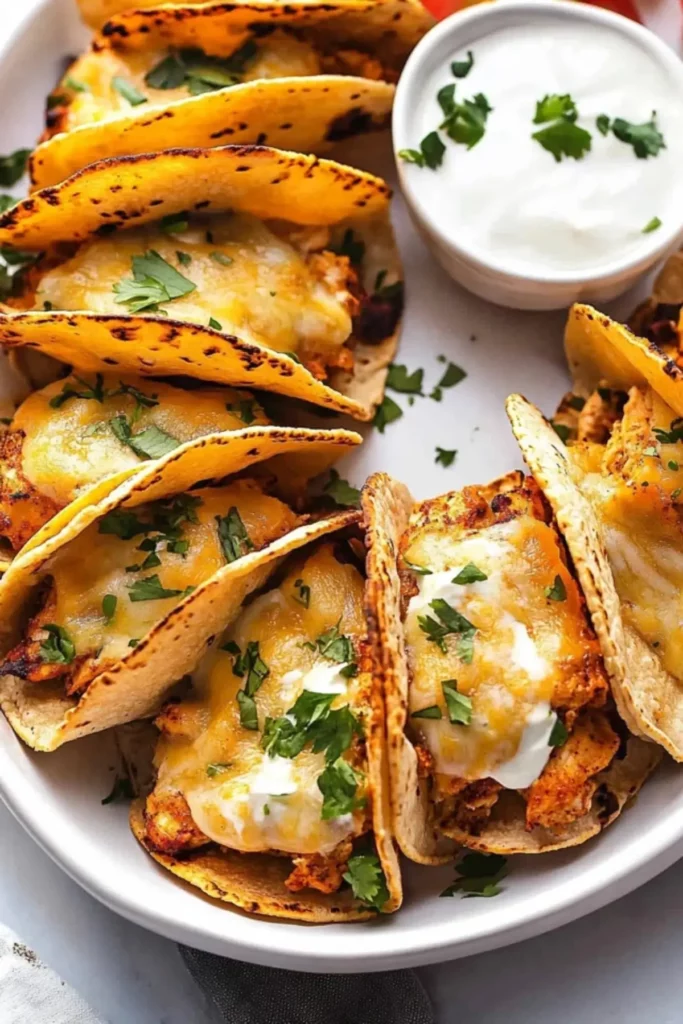
Remove the tacos from the oven and let them cool for a minute before serving. Garnish with sour cream, salsa, fresh cilantro, or a squeeze of lime juice.
Beginner Tips and Notes
- How to Avoid Soggy Tacos – Make sure not to overstuff the tacos with too much filling, as excess moisture can make them soft instead of crispy.
- Reheating Tips – To keep leftovers crispy, reheat them in the oven at 350°F for 5 minutes rather than microwaving.
- Easy Shredded Chicken Hack – If you don’t want to cook chicken from scratch, grab a rotisserie chicken from the store and shred it with a fork. Mix with a bit of salsa and taco seasoning for instant flavor.
- Alternative Cooking Methods – These tacos can also be made in an air fryer (400°F for 5-8 minutes) or on the stovetop in a skillet.
Serving Suggestions
Pair your crispy baked chicken tacos with delicious sides to round out the meal:
- Mexican Street Corn Salad – A creamy, zesty corn dish with cotija cheese.
- Homemade Pico de Gallo – Fresh tomatoes, onions, and cilantro for a bright contrast.
- Guacamole or Avocado Sauce – A creamy topping that balances the crispy texture.
- Southwest Salad – A refreshing side with black beans, corn, and a tangy dressing.
Storing and Freezing Instructions
- Make-Ahead Tips – You can prep the shredded chicken in advance and store it in the fridge for up to 3 days. When ready to bake, simply assemble and pop them in the oven.
- Storage – Leftover tacos can be stored in an airtight container in the fridge for up to 3 days.
- Freezing – If you want to freeze these, do so before baking. Assemble the tacos, place them in a freezer-safe bag, and store for up to 3 months. When ready to eat, bake straight from frozen, adding an extra 5 minutes to the cooking time.
Final Thoughts
These easy baked chicken tacos are a game-changer for busy weeknights, casual gatherings, or even meal prepping. With just a handful of ingredients and no complicated techniques, they’re the perfect recipe for beginners who want a delicious, satisfying meal with minimal effort.
Give this recipe a try, and let me know how it turns out! What toppings did you add? Share your experience in the comments below—I’d love to hear your taco creations.
FAQ About Easy Baked Chicken Tacos
Can I use flour tortillas instead of corn tortillas?
Yes, but keep in mind that flour tortillas won’t crisp up as well as corn tortillas in the oven. If using flour tortillas, consider brushing them with a little olive oil to enhance crispiness.
How do I prevent my tacos from getting soggy?
Avoid overfilling them with too much chicken or cheese, and ensure the tortillas are lightly oiled before baking. Baking them at a high temperature (425°F) also helps create a crispier texture.
Can I make these tacos ahead of time?
Yes! You can assemble the tacos and store them in the fridge for up to 24 hours before baking. If you want to freeze them, do so before baking for the best texture.
More Relevant Recipes
Print
20 Minute Mini Baked Chicken Tacos
- Total Time: 20 minutes
- Yield: 20–24 tacos 1x
Description
These crispy baked chicken tacos are a quick and easy dinner option that’s perfect for busy nights. With just a handful of ingredients, they come together in under 20 minutes, making them ideal for beginners. The combination of seasoned shredded chicken, melted cheese, and crispy corn tortillas creates a flavorful, satisfying meal that the whole family will love.
Ingredients
- 1 lb. cooked shredded seasoned chicken breast (about 3–4 cups)
- 8 oz. shredded Colby Jack cheese
- 20–24 street taco corn tortillas
- Olive oil or cooking spray
Serve With
- Sour cream
- Salsa
- Fresh chopped cilantro
Instructions
- Preheat the Oven: Set your oven to 425°F (220°C) and line a baking sheet with parchment paper. Lightly spray or brush both sides of the tortillas with olive oil to help them crisp up in the oven.
- Assemble the Tacos: Lay the tortillas flat on the baking sheet. Add a heaping tablespoon of shredded chicken to each tortilla, followed by a generous sprinkle of shredded cheese.
- Melt the Cheese: Place the baking sheet in the oven and bake for 2 minutes, just until the cheese starts to melt. This makes the tortillas more pliable and easier to fold.
- Fold and Bake Until Crispy: Carefully fold each tortilla in half, gently pressing them together in a taco shape. Return the tacos to the oven and bake for 12-15 minutes until the shells are crispy and golden brown.
- Serve and Enjoy: Remove the tacos from the oven and let them cool slightly before serving. Garnish with sour cream, salsa, and fresh cilantro for extra flavor.
Notes
- Shredded Chicken Options: Use store-bought rotisserie chicken, slow-cooked shredded chicken, or even canned chicken for convenience.
- Alternative Fillings: Add black beans, diced tomatoes, green chiles, or bell peppers for extra flavor and texture.
- Storage: Store leftover tacos in an airtight container in the fridge for up to 3 days. Reheat in the oven at 350°F for the best texture.
- Freezing Tips: Assemble the tacos and freeze them unbaked for up to 3 months. When ready to eat, bake directly from frozen, adding 5 extra minutes to the cooking time.
- Air Fryer Method: Cook at 400°F for 5-8 minutes, flipping halfway, for a quicker alternative.
- Prep Time: 5 minutes
- Cook Time: 15 minutes
- Category: Main Dish
- Method: Oven
- Cuisine: Mexican
Nutrition
- Serving Size: 1 taco
- Calories: 101
- Sugar: 0.5g
- Sodium: 131.6mg
- Fat: 4.8g
- Saturated Fat: 1.9g
- Unsaturated Fat: 2.5g
- Trans Fat: 0g
- Carbohydrates: 7.3g
- Fiber: 1.1g
- Protein: 7.5g
- Cholesterol: 23.8mg