There’s something magical about icebox cakes—they’re nostalgic, comforting, and surprisingly effortless. I remember the first time I made a No Bake Cookie Butter Icebox Cake. It was a sweltering summer afternoon, and I desperately wanted a dessert that didn’t require turning on the oven. I grabbed a jar of cookie butter, a pack of Biscoff cookies, and some cream. That first bite—chilled, creamy, and spiced with a warm caramel undertone—felt like uncovering a hidden gem. Since then, it’s become my go-to treat when I want to impress without the stress.
If you’re new to the kitchen or simply short on time, this easy sheet pan dinner alternative—except sweet!—is the perfect starting point. With no baking required, minimal ingredients, and a melt-in-your-mouth texture, this No Bake Cookie Butter Icebox Cake dessert cousin checks all the boxes for a quick and healthy meal finale.
Why This Recipe is Special
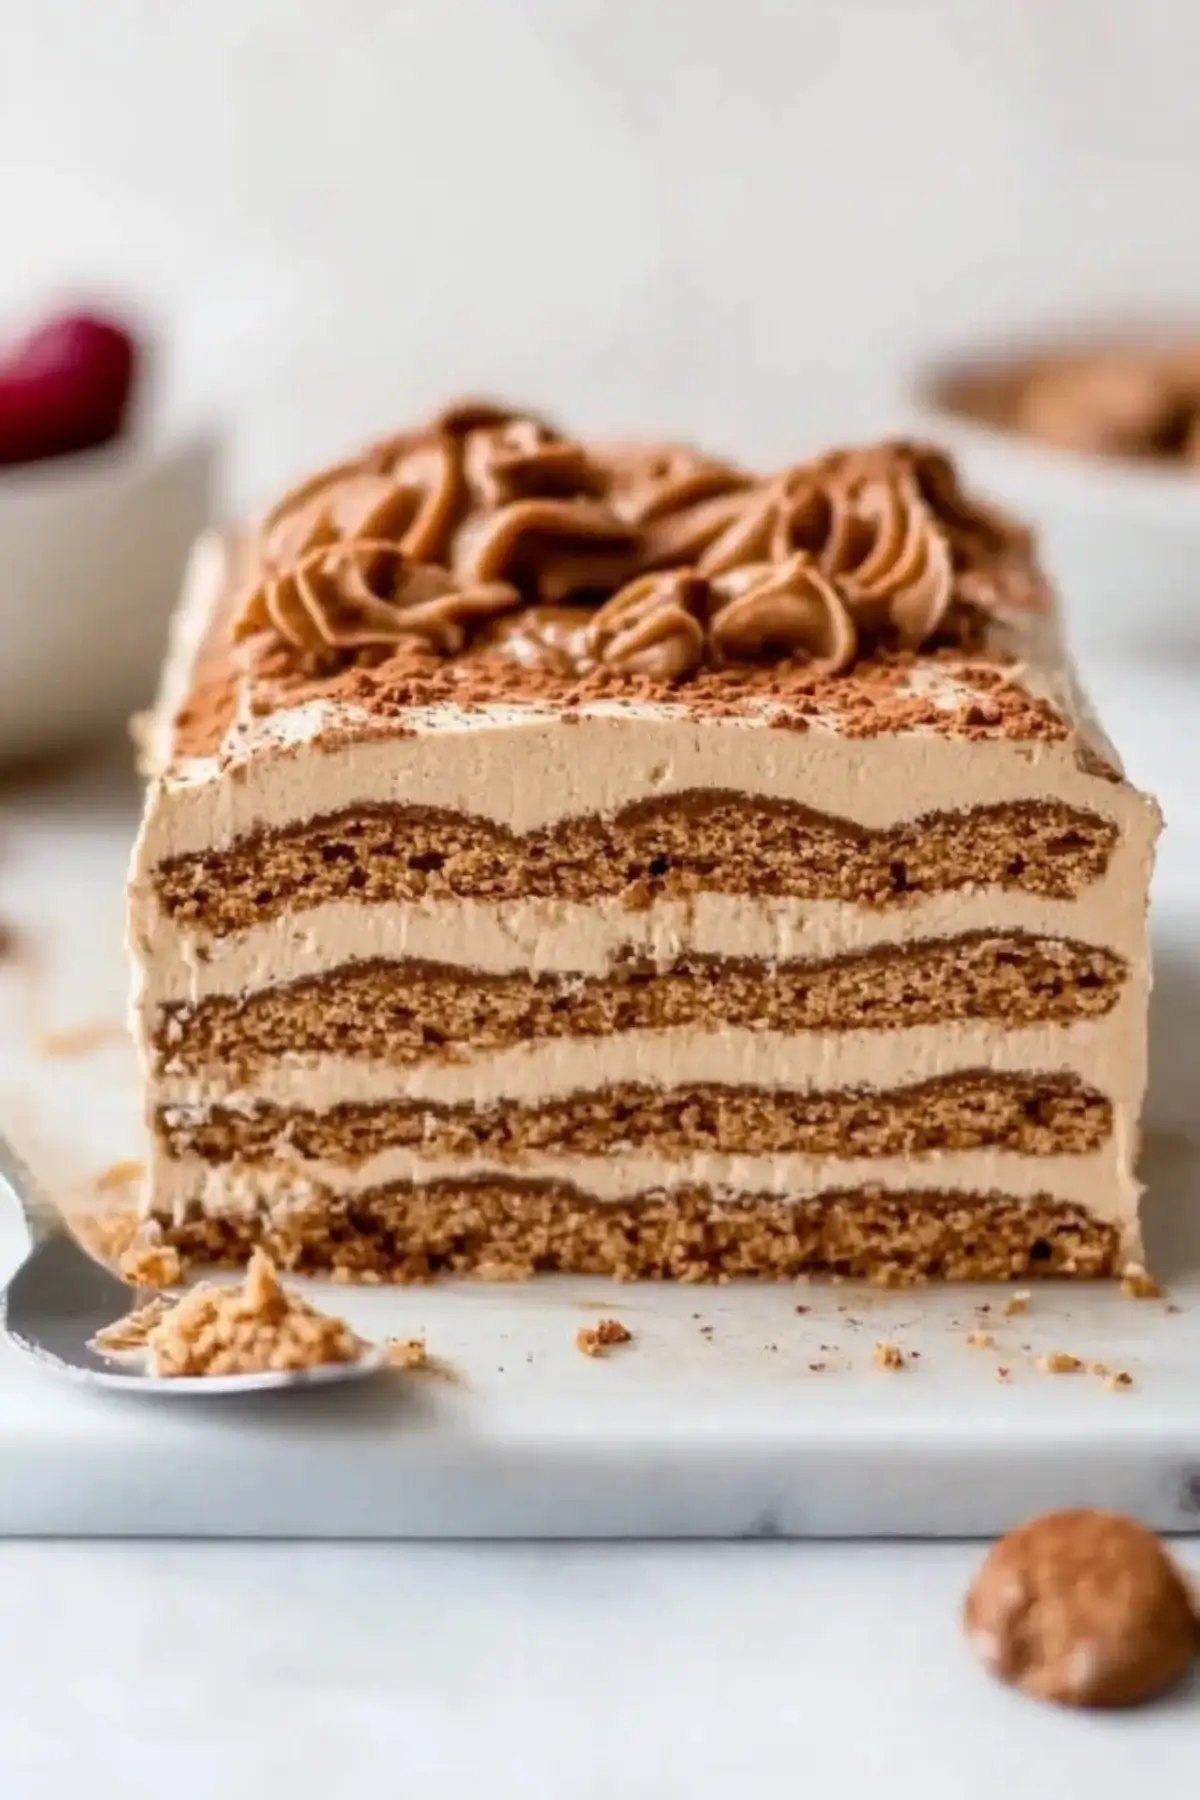
This No Bake Cookie Butter Icebox Cake combines the rich, spiced flavor of Biscoff cookies with a luscious, homemade whipped cream folded with mascarpone and cookie butter. What makes it particularly beginner-friendly is that it relies on layering rather than cooking. No ovens, no fancy equipment—just a loaf pan, a mixing bowl, and a spoon.
It’s also incredibly forgiving. The chilling process naturally softens the cookies, so precision isn’t necessary. You can prepare it the night before and forget about it until dessert time—ideal for meal preppers, busy parents, or anyone wanting to make a showstopping dish with minimal effort.
Ingredients and Preparation
Heavy Cream
This forms the base of the whipped filling. It’s what gives the cake its light, airy texture. Always use cold cream for better whipping results.
Cookie Butter (Biscoff Spread)
Infuses the cream with warm, cinnamon-spice flavors and a rich, buttery smoothness. You can also use crunchy cookie butter for a bit of texture. Almond or peanut butter could be swapped in a pinch, but the signature taste comes from Biscoff.
Mascarpone Cheese
Adds subtle tang and thickens the cream mixture. It cuts through the sweetness, offering a balanced bite. Cream cheese is an acceptable alternative, though the texture will be denser.
Vanilla Extract
Rounds out the flavors and brings warmth. If you don’t have vanilla, try almond extract for a nuttier profile.
Kosher Salt
Just a pinch helps enhance all the sweet and spiced notes, making the dessert more complex.
Confectioner’s Sugar
Sweetens the cream while keeping it smooth. Granulated sugar can be used, but you’ll need to beat it longer to dissolve.
Biscoff Cookies (Speculoos)
The hero of this cake. Their caramelized, spiced crunch softens during chilling, creating layers similar to cake. Graham crackers or gingersnaps could be used in a pinch, but they’ll alter the flavor.
Step-by-Step Instructions
Step 1 Start by lining a standard loaf pan with plastic wrap, leaving overhang on the sides so you can easily lift the cake out later. This helps with clean removal and easy slicing.
Step 2 In a large mixing bowl, whip the cold heavy cream until soft peaks form. Then add the cookie butter, mascarpone, vanilla extract, kosher salt, and confectioner’s sugar. Continue whipping until everything is well combined and medium peaks hold. The mixture should look thick and fluffy.
Step 3 Place a single layer of Biscoff cookies on the bottom of your lined loaf pan. Break them if needed to fit snugly. Spread a thick layer of the whipped cookie butter cream over the cookies, smoothing with a spatula. Continue alternating layers of cookies and cream until you reach the top, finishing with a cookie layer.
Step 4 Cover the top with plastic wrap and refrigerate for at least 24 hours. This step is crucial as it allows the cookies to soften and the flavors to meld into a cake-like texture.
Step 5 When ready to serve, remove the plastic wrap and invert the cake onto a serving plate. Carefully peel away the wrap. For the finishing touch, drizzle warm melted cookie butter over the top and sprinkle with crushed Biscoff cookies. Slice and enjoy!

Beginner Tips and Notes
Whip Wisely: Ensure your cream is cold for the best volume. If using a hand mixer, start slow to avoid splashing, then increase speed gradually.
Loaf Pan Flexibility: Any pan will work. Just adjust the number of cookies and cream accordingly. A 9×5 inch pan typically needs about 1½ packages of cookies.
Watch the Texture: If your whipped cream looks grainy, you may have overmixed. Stop as soon as medium peaks form to keep the filling light.
Cookie Crunch: Prefer a bit of crunch? Add a layer of crushed cookies between the cream layers or opt for crunchy cookie butter.
Tool Substitutions: No mixer? Chill a bowl and beaters in the freezer for 10 minutes and whip by hand. It takes longer but works in a pinch.
Serving Suggestions
Serve this No Bake Cookie Butter Icebox Cake cold, straight from the fridge. For an indulgent twist, microwave cookie butter in 30-second bursts, stirring until pourable, and drizzle generously on each slice. A sprinkle of crushed cookies adds crunch and elegance.
Pair with fresh berries like strawberries or raspberries to brighten the richness. Want to turn it into a plated dessert? Add a dollop of whipped cream and a mint leaf on the side.
Storage Tips:
Leftovers keep well in the fridge for up to 3 days, tightly wrapped or stored in an airtight container. To freeze, wrap slices in plastic and place in a freezer-safe container. Thaw in the fridge overnight before serving.
Conclusion
This No Bake Cookie Butter Icebox Cake proves that even the most decadent desserts can be beginner-friendly. With no baking, just layering and chilling, you can create a showstopper that feels gourmet. Whether you’re hosting, celebrating, or just indulging, this cake promises creamy, dreamy satisfaction in every bite. Try it out and let me know how it goes in the comments—I’d love to hear your twist on this easy sheet pan dinner-style dessert!
FAQ About No Bake Cookie Butter Icebox Cake
1. Can I use store-bought whipped cream instead of making it from scratch?
Yes, you can use store-bought whipped cream, but homemade whipped cream gives the cake a lighter, fluffier texture and a richer flavor. If you opt for store-bought, choose a high-quality, stabilized version to maintain structure.
2. How far in advance can I make this cookie butter icebox cake?
You can make it up to 3 days in advance. Just keep it tightly wrapped in plastic wrap or in an airtight container in the fridge. The flavors continue to meld, making it even better with time.
3. What’s the best way to melt cookie butter for drizzling?
Place about 1/3 cup of cookie butter in a microwave-safe bowl and heat it in 30-second increments, stirring in between, until it’s warm and pourable.
More Relevant Recipes
Print
No Bake Cookie Butter Icebox Cake
- Total Time: 1 day 15 minutes
- Yield: 8 servings 1x
- Diet: Vegetarian
Description
This No Bake Cookie Butter Icebox Cake is a rich, creamy dessert made with layers of Biscoff cookies and a luscious cookie butter whipped cream. Perfect for beginners and make-ahead entertaining.
Ingredients
- 2 cups heavy cream
- 1/2 cup Lotus Biscoff spread
- 1/3 cup mascarpone cheese
- 1 tsp vanilla extract
- Pinch of Kosher salt
- 2 Tbsp confectioner’s sugar
- 2 packages Lotus Biscoff cookies (32 cookies per package)
- 1/3 cup warmed Biscoff spread (for serving)
Instructions
- Line a loaf pan with plastic wrap, leaving enough overhang to lift the cake out later.
- In a mixing bowl, whip the cold heavy cream until medium peaks form. Add cookie butter, mascarpone, vanilla extract, salt, and confectioner’s sugar. Whip again until fully combined and fluffy.
- Layer Biscoff cookies on the bottom of the lined pan. Spread a layer of whipped cream mixture on top. Repeat layers until the top of the pan is reached, ending with cookies.
- Cover with plastic wrap and refrigerate for at least 24 hours.
- To serve, unmold the cake onto a plate, peel off the plastic, and drizzle with warmed cookie butter. Sprinkle with crushed cookies if desired and slice to serve.
Notes
- Ensure the heavy cream is cold for better whipping results.
- You can use cream cheese in place of mascarpone if needed.
- Adjust the number of cookies based on your loaf pan size.
- To melt cookie butter, microwave in 30-second increments, stirring in between.
- Leftovers can be stored in the fridge for up to 3 days or frozen for longer storage.
- Prep Time: 15 minutes
- Cook Time: 0 minutes
- Category: Dessert
- Method: No-Bake
- Cuisine: American
Nutrition
- Serving Size: 1 slice
- Calories: 370
- Sugar: 10g
- Sodium: 42mg
- Fat: 33g
- Saturated Fat: 18g
- Unsaturated Fat: 7g
- Trans Fat: 0g
- Carbohydrates: 16g
- Fiber: 0g
- Protein: 4g
- Cholesterol: 77mg


