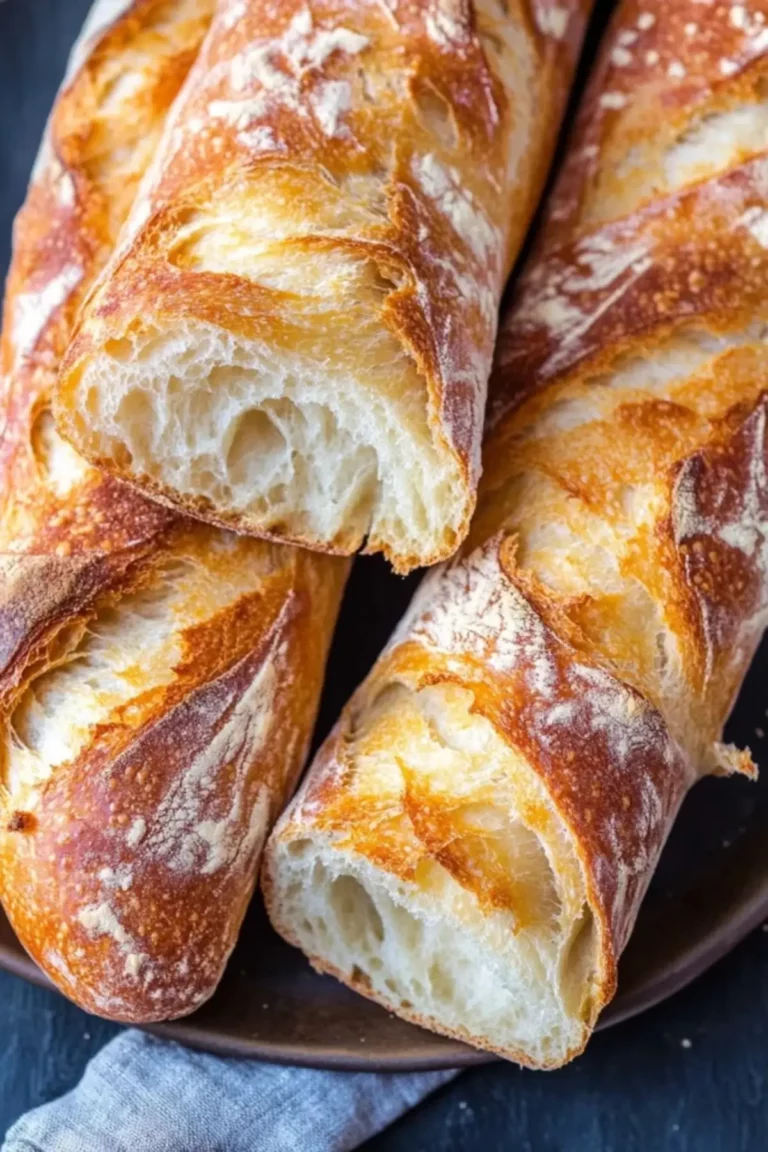
There’s something magical about the aroma of freshly baked bread wafting through the kitchen. I still remember the first time I made rustic French bread—it was a rainy afternoon, and I was craving something warm, cozy, and homemade. I had no fancy tools, barely any baking experience, and yet, what came out of my oven was a crusty, golden loaf that made me feel like a pro baker.
If you’re new to bread making, this Rustic French Bread (Dutch Oven) is the perfect place to start. It’s unfussy, requires minimal ingredients, and doesn’t demand hours of hands-on work. Best of all, the reward is a wholesome, delicious loaf that’s crusty on the outside, soft and airy on the inside—ideal for sandwiches, soups, or simply warm with butter. Welcome to the wonderful (and very doable) world of baking your own bread.

Why This Recipe is Special
Rustic French Bread (Dutch Oven) is a classic that embodies simplicity. Unlike more complex loaves, this bread needs no special scoring skills or sourdough starters. You’ll only need a handful of pantry staples, a bit of patience while the dough rises, and either a Dutch oven or a baking sheet. It’s a beginner-friendly recipe with a bakery-style finish—and there’s something empowering about creating something so nourishing from scratch.
This recipe also fits beautifully into the world of quick and healthy meals: there are no preservatives, no added fats, and it pairs well with nutritious toppings like avocado, hummus, or lean proteins. Whether you’re prepping for the week or simply want to impress friends with your new baking skills, this easy sheet pan (or Dutch oven) bread has your back.
Ingredients and Preparation
All-Purpose Flour
This is your bread’s structure. All-purpose flour creates a chewy interior and crisp crust. For an even chewier texture, you can substitute bread flour.
Warm Water
The key here is temperature—between 105°F and 115°F. This activates the yeast without killing it. Tap water usually works fine if warmed gently.
Active Dry Yeast
The leavening agent that gives your bread its rise. It’s essential here—instant yeast behaves differently. No swaps recommended unless you know how to adjust.
Sugar
Not for sweetness, but to help activate the yeast. You could also use honey or maple syrup if you want a slightly different flavor profile.
Salt
Adds flavor and regulates yeast growth. Sea salt or kosher salt works best, but regular table salt is just fine in a pinch.
Step-by-Step Instructions
Step 1 Combine warm water, sugar, and yeast in a large bowl or stand mixer. Let it sit for about five minutes until it starts to foam. This step is crucial—it means your yeast is alive and ready to work.
Step 2 Add half of your flour and all the salt. Using a dough hook (or a spoon and elbow grease), begin mixing on medium-low. Slowly add the rest of the flour until a sticky, shaggy dough forms. Don’t worry if it looks messy—that’s normal.
Step 3 Transfer the dough to a lightly floured bowl. Cover it with a clean towel and let it rise at room temperature for 2 hours, or until it doubles in size. A warm, draft-free spot like an unheated oven works best.
Step 4 Gently turn out the dough onto a floured surface. Shape it into a smooth round ball—don’t knead too hard, just tuck the sides under and pat it gently. Let it rest, covered, for another 30 minutes.
Step 5 While the dough rests, preheat your oven to 425°F. If using a Dutch oven, place it (with the lid) inside the oven to heat up for at least 20 minutes. This helps create that iconic crunchy crust.
Step 6 When ready to bake, carefully place the dough onto a piece of parchment paper. Score the top with a very sharp knife—an “X” or star works well. This helps the bread expand in the oven.
Step 7 Using oven mitts, remove the hot Dutch oven. Lower the dough in with the parchment paper (or place directly inside if you’re confident). Cover and bake for 30 minutes, then remove the lid and bake for 10 more minutes until the top is golden brown.
Step 8 Remove the bread from the oven and place it on a cooling rack. Let it rest for at least 20–30 minutes before slicing. This allows the crumb (interior) to set properly.

Beginner Tips and Notes
Too sticky to handle? Dust your hands and surface with extra flour but don’t go overboard. A slightly sticky dough often bakes into a better loaf.
Bread browning too quickly? Tent it with foil during the final minutes.
No Dutch oven? Use a baking sheet. You’ll lose some crustiness, but it still works. Just skip the preheating and bake for 35 minutes.
Kneading by hand? You can! It’ll take about 10 minutes. Look for a dough that’s smooth and elastic.
Forgot to score? No worries—it may crack unpredictably but still taste amazing.
Serving Suggestions
This Rustic French Bread (Dutch Oven) is the ultimate companion to just about anything. Serve it warm with a pat of butter or alongside hearty soups like minestrone or tomato basil. Slice it for open-faced sandwiches, bruschetta, or avocado toast.
Leftovers? Store the cooled loaf in a sealed bag or container at room temperature for up to five days. For longer storage, wrap it tightly and freeze it for up to six months. To reheat, let it thaw at room temperature and crisp it up in the oven at 350°F for 10 minutes.
Conclusion
There’s a quiet joy in baking bread—a sense of accomplishment that comes from something so simple, yet so satisfying. This Rustic French Bread (Dutch Oven) is more than just flour and water. It’s your introduction to the warm world of homemade baking. Whether you’re looking to master easy sheet pan dinners or fill your kitchen with the scent of lemon herb chicken recipes and quick and healthy meals, this loaf is a comforting place to begin.
Give it a try, and don’t forget to share your experience in the comments. Did your loaf crack in a cool way? Did you dip it in soup or slather it with jam? I’d love to hear how it turned out!
FAQ About Rustic French Bread (Dutch Oven)
Can I use instant yeast instead of active dry yeast?
Yes, you can substitute instant yeast, but you should reduce the rise time slightly as instant yeast works faster. You can also skip the activation step where the yeast sits in warm water.
Why is my dough too sticky to handle?
A slightly sticky dough is normal and actually helps create a light and airy crumb. However, if it’s unmanageable, sprinkle a small amount of flour on your hands and work surface to help.
Do I need a Dutch oven to bake this bread?
No, while a Dutch oven helps create a crusty exterior due to its steam-trapping design, you can also bake the bread on a sheet pan. Just bake it uncovered and extend the bake time slightly.
More Relevant Recipes
- How to make Pita Bread at home like a Pro
- Chocolate Banana Bread (Gluten Free, Vegan, Refined Sugar Free).
- Fluffy Garlic Butter Breadsticks

Rustic French Bread (Dutch Oven)
- Total Time: 4 hours 10 minutes
- Yield: 1 large round loaf 1x
- Diet: Vegetarian
Description
This Rustic French Bread (Dutch Oven) is a foolproof way to enjoy bakery-style bread at home. With just five ingredients, it’s perfect for beginners who want a warm, crusty loaf without the stress. It’s a healthy, preservative-free staple that works with any meal.
Ingredients
- 3 ¼ cups all-purpose flour
- 1 teaspoon sugar
- 1 teaspoon salt
- 1 ½ teaspoons active dry yeast
- 1 ¼ cups warm water (105–115°F)
Instructions
- Activate the yeast: In a large mixing bowl or stand mixer, combine warm water, sugar, and yeast. Let it sit for about five minutes until foamy to ensure the yeast is activated.
- Mix the dough: Add half of the flour and all the salt to the yeast mixture. Using a dough hook or mixing by hand, stir the mixture until just combined. Slowly incorporate the remaining flour and mix until a shaggy dough forms. The dough should be sticky but hold together.
- First rise: Transfer the dough to a lightly floured bowl. Cover it with a clean towel and let it rise in a warm place for 2 hours, or until it has doubled in size.
- Shape the dough: Turn the dough out onto a floured surface and gently shape it into a round loaf by folding the edges under. Let it rest, covered with a large bowl or towel, for another 30 minutes.
- Preheat the oven and Dutch oven: Set your oven to 425°F. If using a Dutch oven, place it inside the oven with the lid on for at least 20 minutes to preheat.
- Score and transfer: Use a sharp knife to score the top of the loaf with an “X” or star pattern. Carefully place the dough onto a piece of parchment paper and lower it into the hot Dutch oven.
- Bake the bread: Cover the Dutch oven and bake for 30 minutes. Remove the lid and continue baking for another 10 minutes until the top is golden and crusty. If using a baking sheet, bake uncovered for 35 minutes total.
- Cool and store: Remove the bread and place it on a cooling rack. Let it cool completely before slicing to preserve the texture. Store at room temperature in a sealed container for up to five days.
Notes
- If using bread flour, the loaf may have a slightly chewier texture.
- For a softer crust, wrap the warm loaf in a kitchen towel as it cools.
- To freeze, wrap tightly in plastic wrap and store in a freezer bag for up to six months.
- Prep Time: 3 hours 30 minutes
- Cook Time: 40 minutes
- Category: Bread
- Method: Baking
- Cuisine: French
Nutrition
- Serving Size: 1 slice (about 75g)
- Calories: 180
- Sugar: 1g
- Sodium: 290mg
- Fat: 0.5g
- Saturated Fat: 0g
- Unsaturated Fat: 0.5g
- Trans Fat: 0g
- Carbohydrates: 37g
- Fiber: 2g
- Protein: 5g
- Cholesterol: 0mg


