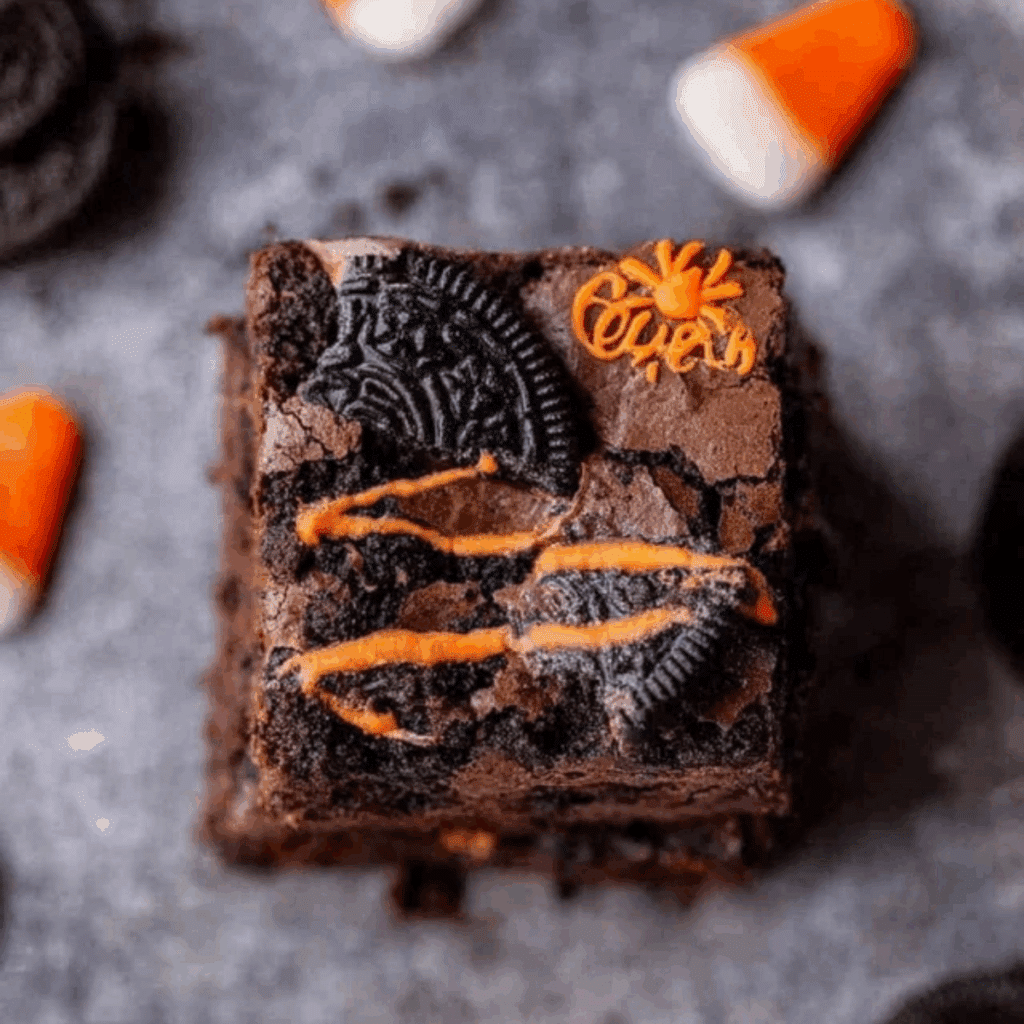
Looking for the perfect dessert to wow guests at your next Halloween bash? These Halloween Oreo Brownies are rich, fudgy, and irresistibly festive. Made with a decadent cocoa base and packed with seasonal Halloween Oreos, this spooky twist on a classic brownie is both simple to make and scary good. Whether you’re planning a kid-friendly party or just want a cozy fall treat, this recipe will become your go-to Halloween dessert.
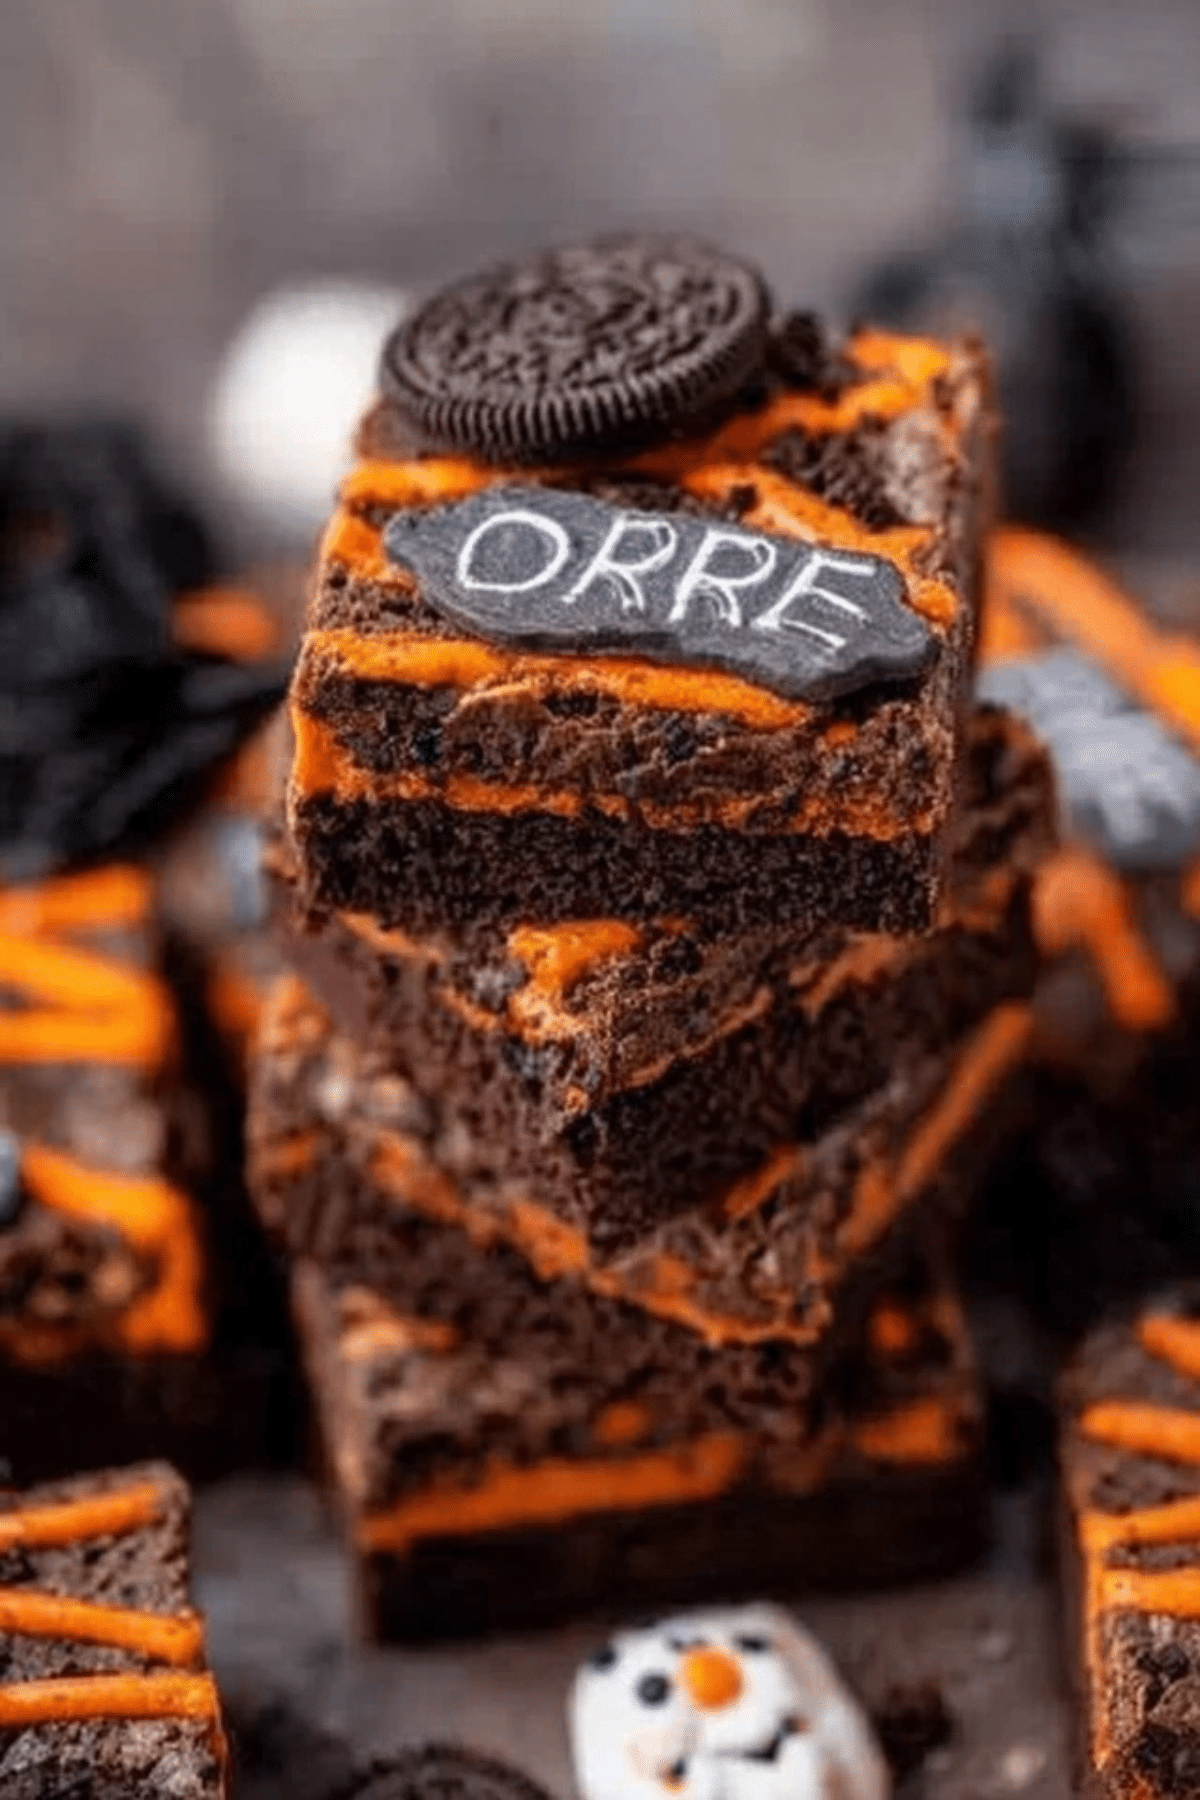
Table of Contents
Why These Halloween Oreo Brownies Are a Must-Make
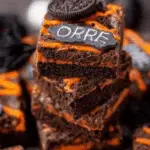
These Halloween Oreo Brownies strike the perfect balance between indulgent and fun. Their gooey center, crinkly top, and crunchy cookie chunks make them a sensory delight. Best of all? They’re made with pantry staples and come together in under an hour.
• Perfect for Halloween parties: The vibrant orange filling of the Halloween Oreos adds festive flair.
• Fudgy and rich: These brownies are ultra-chocolaty and moist, with a perfect crinkle top.
• Kid-friendly recipe: No advanced baking skills needed—perfect for making with little ones.
• Customizable year-round: Swap Halloween Oreos for any seasonal or flavored Oreos.
What You’ll Need to Make Halloween Oreo Brownies
• Butter: Provides richness and helps create a soft, fudgy texture.
• Vegetable Oil: Adds extra moisture for gooey brownies.
• Granulated Sugar: Sweetens and contributes to the shiny, crackly top.
• Brown Sugar: Adds depth and a hint of molasses flavor.
• Cocoa Powder: Brings intense chocolate flavor to the brownies.
• Eggs: Bind the ingredients and help create structure.
• Vanilla Extract: Enhances the overall flavor with a warm note.
• All-Purpose Flour: Gives the brownies body without making them cakey.
• Salt: Balances out the sweetness.
• Halloween Oreos: The star ingredient—adds crunch, color, and spooky vibes.
Smart Swaps for Spooky Customization
Don’t have Halloween Oreos or need to tweak the recipe? Here are some creative substitutes that work like a charm:
• Regular Oreos: Use classic or Double Stuf if you can’t find the Halloween version.
• Gluten-Free Cookies: Substitute with gluten-free sandwich cookies for a celiac-friendly version.
• Chocolate Chunks or Chips: Add a handful of semi-sweet or dark chocolate for extra richness.
• Mint Oreos: For a cool, spooky-green variation with a different flavor profile.
• Candy Mix-ins: Crushed Halloween candy like Reese’s or M&M’s make a colorful, festive addition.
How to Make the Best Halloween Oreo Brownies
- Preheat the oven to 350°F and line an 8×8-inch baking pan with parchment paper.
- Melt the butter, vegetable oil, granulated sugar, and brown sugar in a microwave-safe bowl. Heat in 30-second intervals, stirring in between, until smooth and glossy. Microwave once more for 1 minute and mix well to dissolve the sugars.
- Whisk in the eggs and vanilla extract, one at a time, until fully incorporated. The batter should pull away slightly from the bowl when mixed.
- Fold in the dry ingredients—cocoa powder, flour, and salt—until just combined. Do not overmix.
- Pour half the batter into the prepared pan and spread evenly.
- Layer the Halloween Oreos—whole and halved—on top of the first brownie layer.
- Spread the remaining brownie batter gently over the Oreos, covering them completely.
- Top with chopped Oreos and lightly press them into the surface.
- Bake for 30 minutes or until the edges are set and the center is slightly underdone (they’ll set as they cool).
- Cool completely on a wire rack—preferably for at least 4–8 hours—for clean slices and the best fudgy texture.
Foolproof Tips for Perfect Halloween Brownies
• Let them cool completely before slicing—this ensures clean cuts and that iconic crinkle top.
• Use a hot knife: Dip your blade in warm water, wipe it dry, and slice—repeat between each cut.
• High-quality ingredients matter: Choose good cocoa powder and fresh butter for best results.
• Don’t overmix: Stop folding the batter as soon as the flour disappears for that perfect chewy bite.
• Microwave reheat: Want gooey brownies later? Just warm them up for 10–15 seconds.
Fun Ways to Serve and Customize Your Halloween Oreo Brownies
These brownies are show-stopping on their own but even better with a little flair:
• Top with Orange Frosting: Pipe or spread frosting after cooling for a festive pop.
• Add Chocolate Ganache: Drizzle or layer on top for a bakery-style finish.
• Serve with Ice Cream: Vanilla, pumpkin spice, or chocolate pairs perfectly.
• Use Themed Sprinkles: Before baking, press Halloween sprinkles into the top layer.
• Make Mini Brownies: Bake in a muffin tin for grab-and-go spooky bites.
Make-Ahead & Storage Tips
• Room Temp: Store in an airtight container for up to 5 days.
• Fridge: Keeps well for up to 10 days—bring to room temperature before serving.
• Freezer: Freeze in layers with parchment paper for up to 3 months. Reheat in microwave to enjoy warm and gooey!
Halloween Oreo Brownies: Not Just for Halloween
Though they shine during spooky season, this recipe is easily adaptable for year-round indulgence. Just swap out the Oreo flavor and color based on the season—peppermint for Christmas, lemon for summer, or red velvet for Valentine’s Day. The Halloween Oreo Brownies formula remains the same, but the vibe is totally up to you!
These fudgy, chocolate-loaded bars with festive Oreo crunch are the ultimate treat for any chocolate and cookie lover. Make them once, and you’ll find yourself baking them for every celebration—Halloween or not.
Conclusion
These Halloween Oreo Brownies deliver everything you want in a festive fall dessert—gooey, rich chocolate flavor, a satisfying cookie crunch, and a fun, seasonal look that’s perfect for any Halloween celebration. Whether you’re whipping them up for a party, treating your family, or just satisfying your own sweet tooth, this recipe is easy enough for beginners but indulgent enough to impress everyone. Once you try them, they’ll quickly become a Halloween tradition in your kitchen.
Frequently Asked Questions About Halloween Oreo Brownies
Can I double the recipe for a larger batch?
Yes! Simply double all the ingredients and use a 9×13-inch baking pan. Keep an eye on the baking time—it may need an extra 5–10 minutes. Check doneness with a toothpick in the center; it should come out with a few moist crumbs.
Can I make Halloween Oreo Brownies in advance?
Absolutely. These brownies actually taste better the next day once the flavors have had time to settle. Bake them the day before your event, store in an airtight container, and slice just before serving.
What’s the best way to cut brownies cleanly without crumbling?
Always let the brownies cool completely—preferably for at least 4–6 hours. Use a sharp knife dipped in warm water and wiped dry before each slice. This helps achieve clean, bakery-style cuts without tearing the brownie.
More Relevant Recipes
- Pumpkin Snickerdoodles: Soft, Chewy & Perfect for Fall
- Milk Chocolate Stuffed Jack-O’-Lantern Cookies – The Ultimate Fall Treat
- Halloween Crack: The Ultimate Sweet and Salty Treat for Spooky Season
Halloween Oreo Brownies
- Total Time: 45 minutes
- Yield: 16 brownies 1x
- Diet: Vegetarian
Description
These Halloween Oreo Brownies are rich, fudgy, and filled with festive Halloween Oreos. Perfect for spooky parties or a seasonal treat, they combine a gooey chocolate brownie base with a crunchy cookie center and topping. Easy to make, kid-friendly, and endlessly customizable for any time of year.
Ingredients
- 2/3 cup butter
- 1/4 cup vegetable oil
- 1 cup granulated sugar
- 1/3 cup brown sugar
- 2/3 cup cocoa powder
- 2 large eggs (cold)
- 1 tsp vanilla extract
- 1/2 tsp salt
- 1/2 cup all-purpose flour
- 15 Halloween Oreos (plus 5 extra for topping)
Instructions
- Preheat the oven to 350°F (175°C) and line an 8×8 inch baking pan with parchment paper.
- In a microwave-safe bowl, melt the butter, oil, granulated sugar, and brown sugar in 30-second intervals, stirring between each, until fully combined. Microwave once more for 1 minute and stir vigorously.
- Whisk in the eggs one at a time, then add the vanilla extract. The batter should slightly pull away from the bowl.
- Fold in the cocoa powder, flour, and salt just until the flour disappears. Do not overmix.
- Pour half of the brownie batter into the prepared pan and spread evenly.
- Place the Halloween Oreos in a single layer on top of the batter—use whole and halved Oreos.
- Top with the remaining brownie batter and gently spread to cover the cookies.
- Sprinkle crushed Oreos over the top and gently press them in.
- Bake for 30 minutes, or until the edges are set and the center appears slightly underdone.
- Cool completely on a wire rack—preferably for 4–8 hours—before slicing.
Notes
- Use high-quality cocoa powder for richer flavor.
- Cool brownies fully before slicing for clean, crinkle-top squares.
- Dip your knife in warm water and wipe between cuts for perfect slices.
- Store at room temperature for up to 5 days, or freeze for up to 3 months.
- Swap Halloween Oreos with any seasonal Oreo flavor for year-round variations.
- Prep Time: 15 minutes
- Cook Time: 30 minutes
- Category: Dessert
- Method: Baking
- Cuisine: American
Nutrition
- Serving Size: 1 brownie
- Calories: 220
- Sugar: 20g
- Sodium: 120mg
- Fat: 12g
- Saturated Fat: 6g
- Unsaturated Fat: 5g
- Trans Fat: 0g
- Carbohydrates: 28g
- Fiber: 2g
- Protein: 2g
- Cholesterol: 30mg